Color Correction in Adobe Premiere Elements 2018
*Disclaimer: This video was sponsored by Adobe. I am provided with compensation for advertisements on this channel and, possibly, commissions for purchases made through links in this post. All thoughts and opinions are my own and are not influenced by Adobe or its affiliates. My experience is my own, and your experience may differ.
When I’m color correcting in Adobe Premiere Elements 2018, I like to keep things simple by focusing on making my video footage look natural, and as good as possible. Join me for this Premiere Elements 2018 tutorial!
A few months ago, I published a few Premiere Elements 2018 tutorials, and I promised I’d be back with a tutorial on color correction in Adobe Premiere Elements 2018… so this is it! Color correction can sometimes seem confusing, but it’s usually pretty simple if you’re not looking for perfection.
If you haven’t haven’t taken a look at Premiere Elements 2018 yet, you can download it here and give it a try (free) for 30 days!
If you’re totally new to Premiere Elements and video editing in general, I have a cheat sheet for you! Click here to grab the cheat sheet now. For more tutorials and how-to videos, be sure to subscribe to the VidProMom YouTube channel as well.
Color Correction in Adobe Premiere Elements 2018
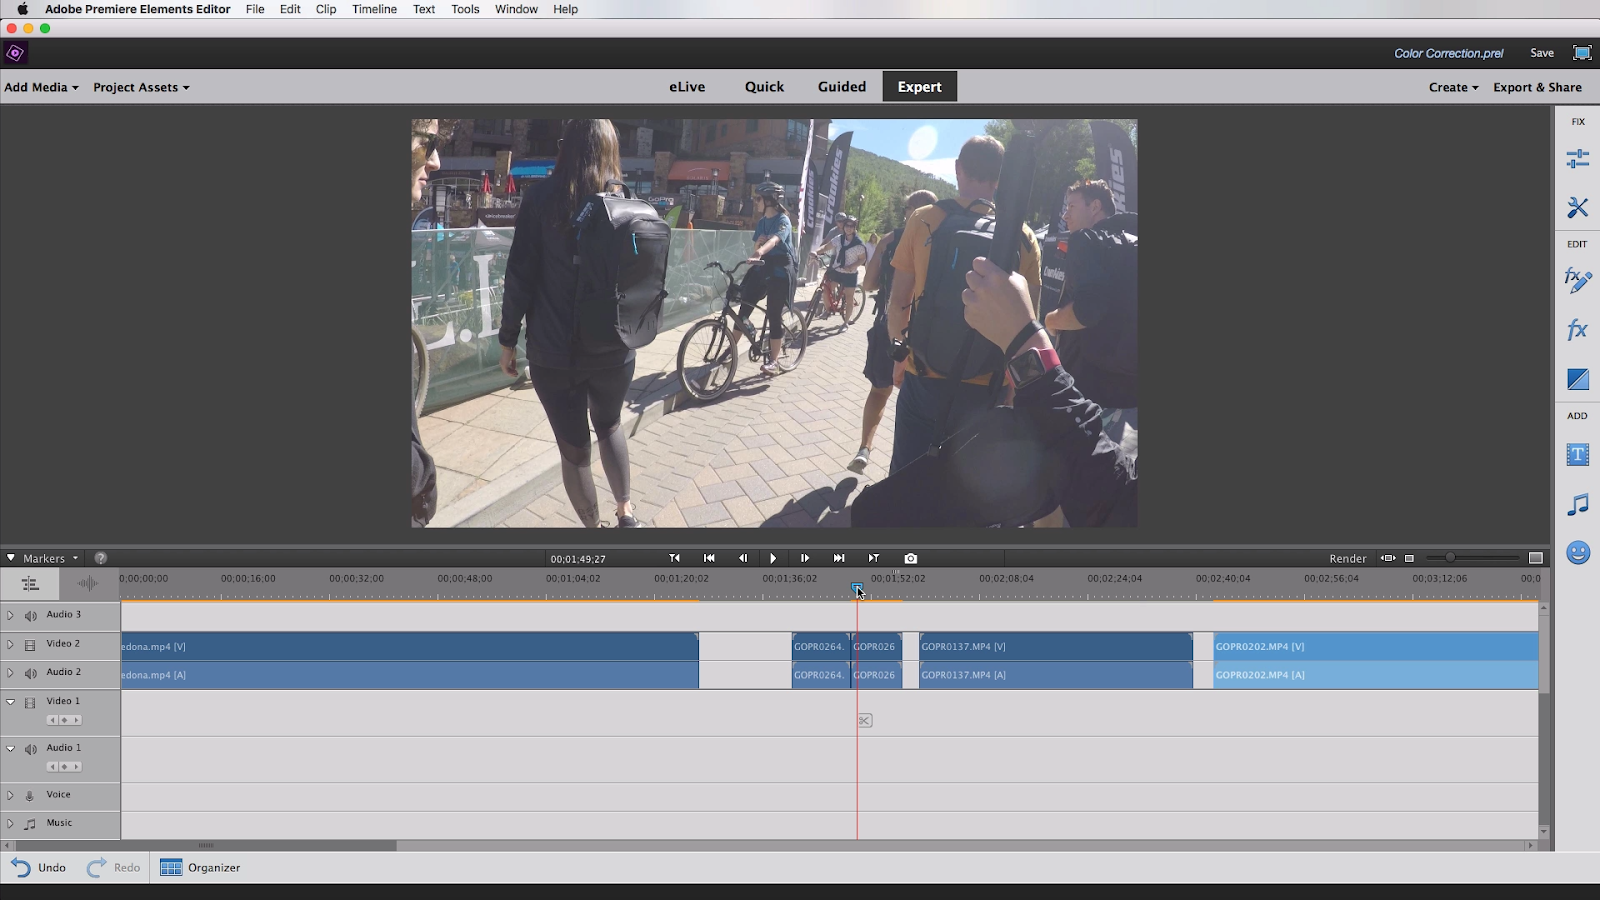
So let’s dive into the mysterious world of color correction! This tutorial applies to clips from your phone, your GoPro, or any digital camera that you’re using.
I do want to point out that you might not need to do any color correction on your clips at all. With family videos, and fun hobby videos, we’re not creating full feature films! Personally, I try not to be too much of a stickler for perfection when it comes to color correction.
But sometimes your video clips just seem off. Maybe they’re too dark, or if the lighting is weird your footage might look too yellow. If you use a GoPro and you have the flat color option on, your color will even look dull and bland.
You can easily correct these kinds of color issues inside of Adobe Premiere Elements 2018, and that’s what this tutorial is all about!
So we’re going to address a couple of different issues with colors, and see how we can make them look as natural as possible. That’s kind of the name of the game…we just want our footage to look natural and to look its best.
There are a few different tools in Premiere Elements that you can use. On the right-hand side, you’ll find a section called “Fix.” Within Fix, you will find a menu for Adjustments. First, let’s look at Auto Smart Tone.
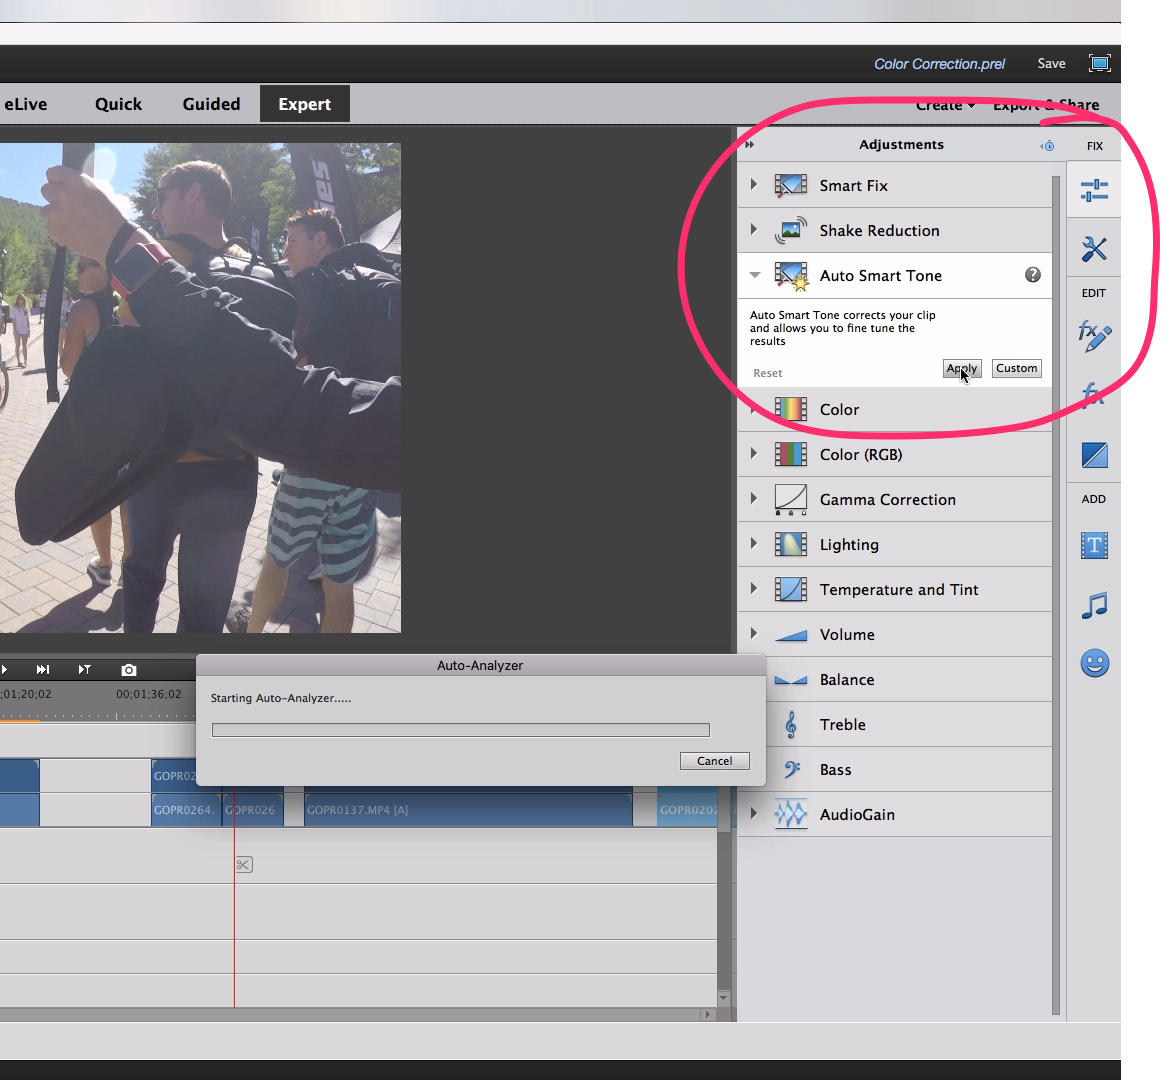
When you select Auto Smart Tone, Premiere Elements will analyze your footage and correct the color tones in different places within the footage. It’s going to really do a lot of the work for you and then you can go in and fine tune it if you want to.
Also, in the Adjustments menu, you have a dropdown option called Color. Hit some of the little colored squares, and have fun with the funky colors they produce. You can always undo if these colors don’t work for you!
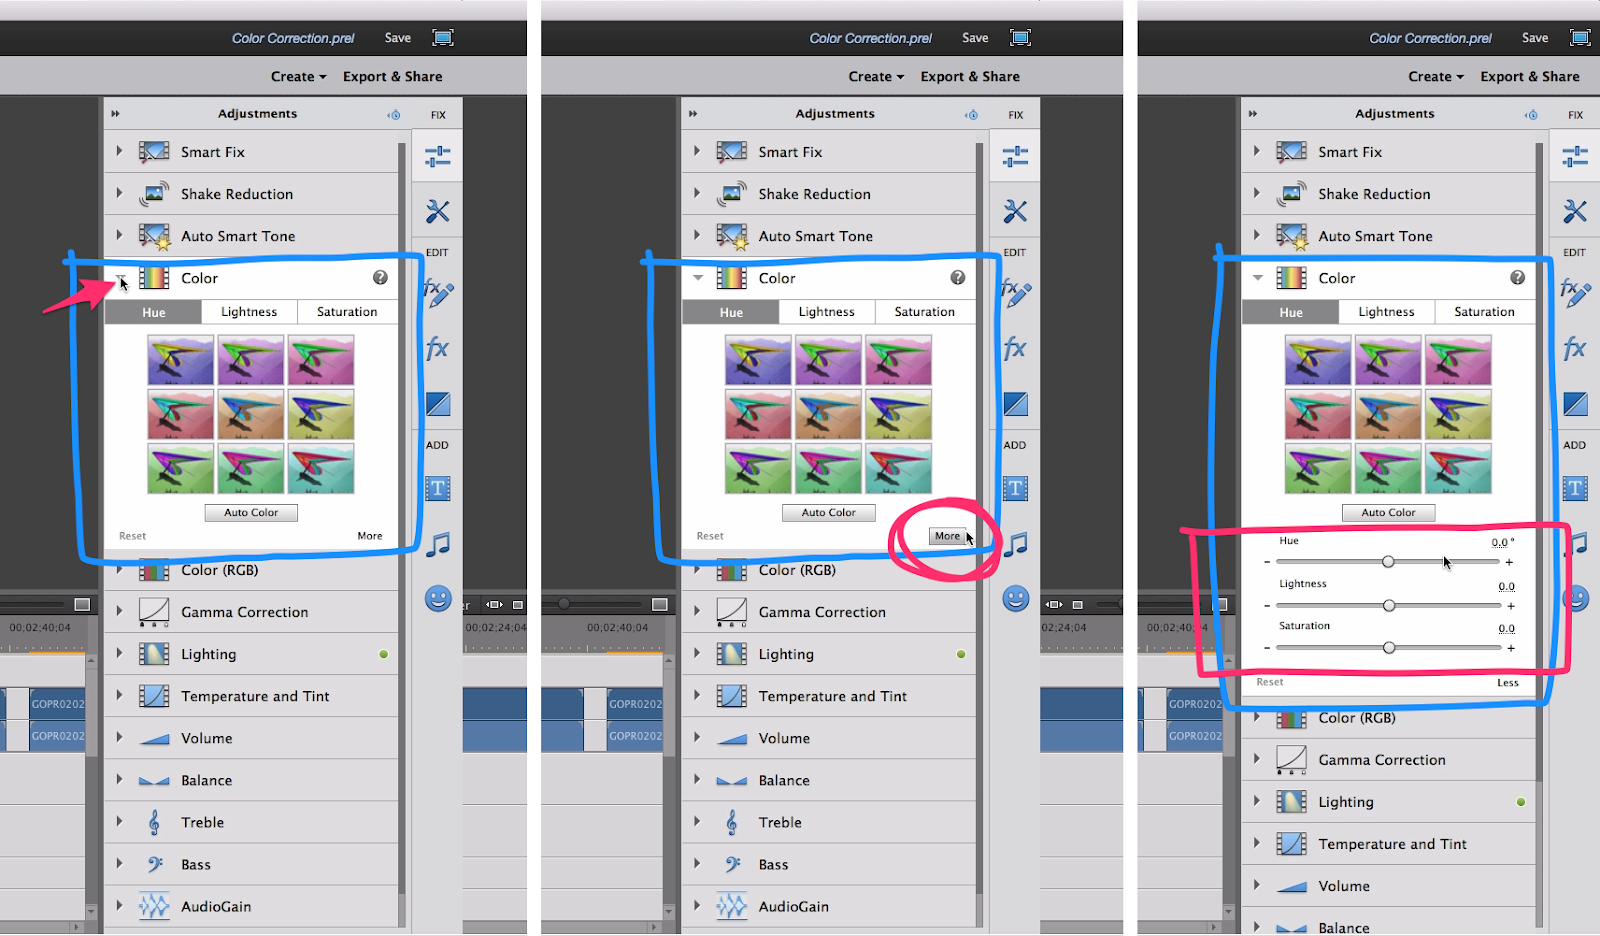
You can also select Auto Color, which will automatically adjust your colors based on what it thinks is best. Tap the “More” button to get access to sliders.
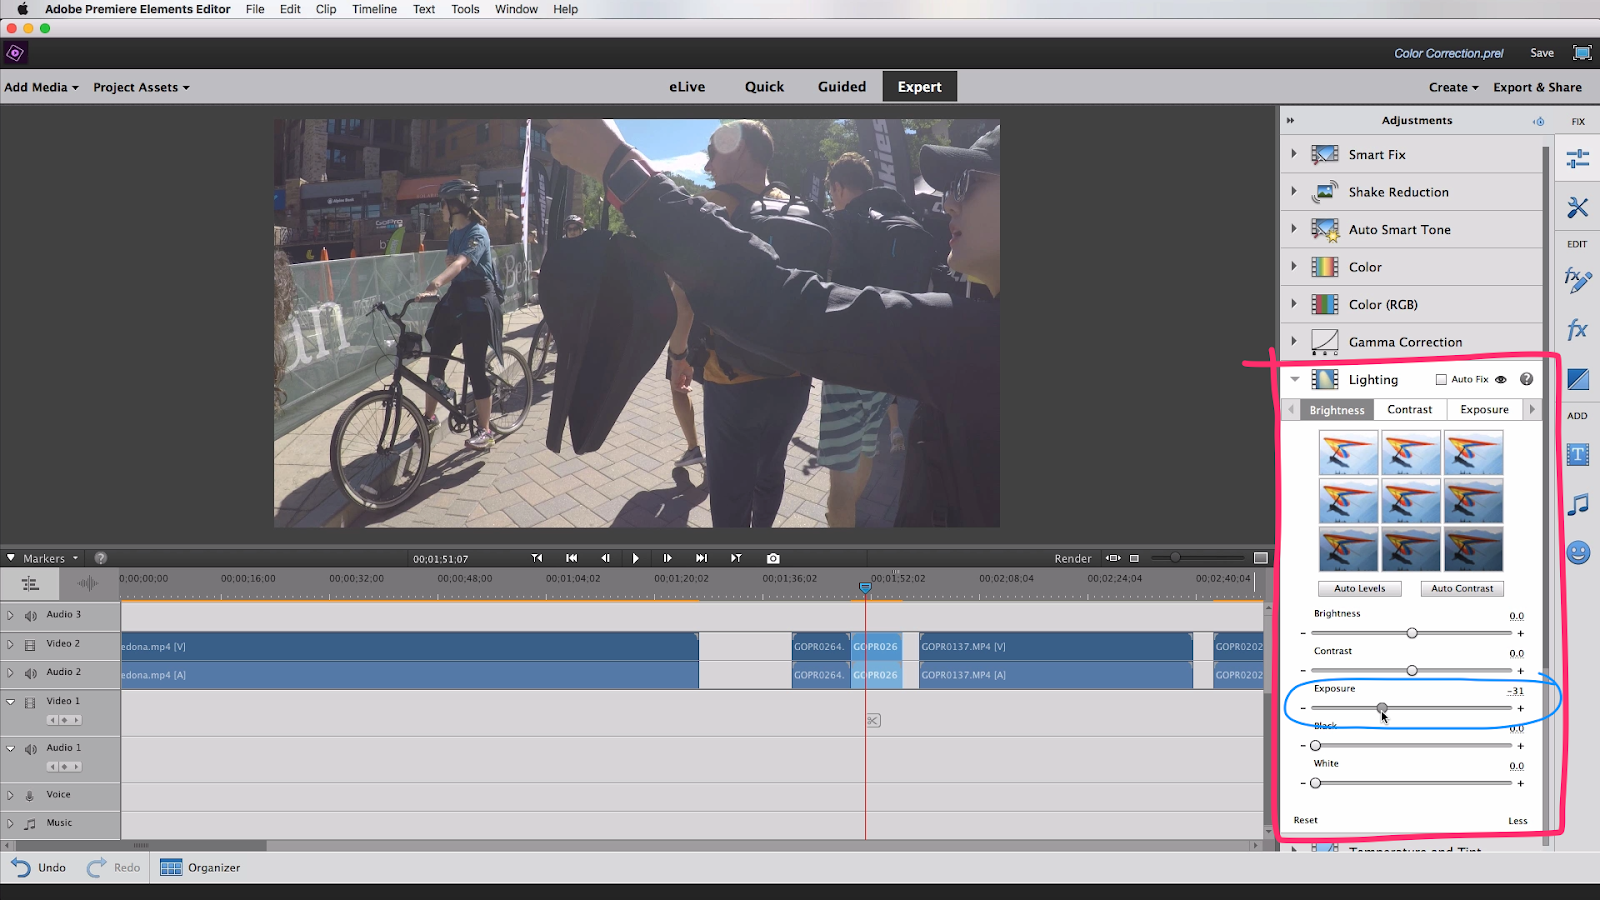
Another dropdown option is Lighting. Hit “More” to find Lighting sliders, including brightness and exposure. I usually find that if I’m having a problem with the colors in my clip, or if they’re too dark or too light, the exposure is usually the first thing I try to correct. If you have a clip that’s very dark, you can bring up the exposure, or if you have a clip that’s washed out, you can bring it down.
So for example, in the clip below, the sun glare is really hitting the lens, which is causing things to look a little bit washed out. So by adjusting the exposure slider to the left, I can bring the exposure down a little bit. Anything thing to try is just hit the “Auto” button and let Premiere Elements do the work for you!
There is also an RGB Color menu which allows you to adjust just the red, green, or blue colors in your video.
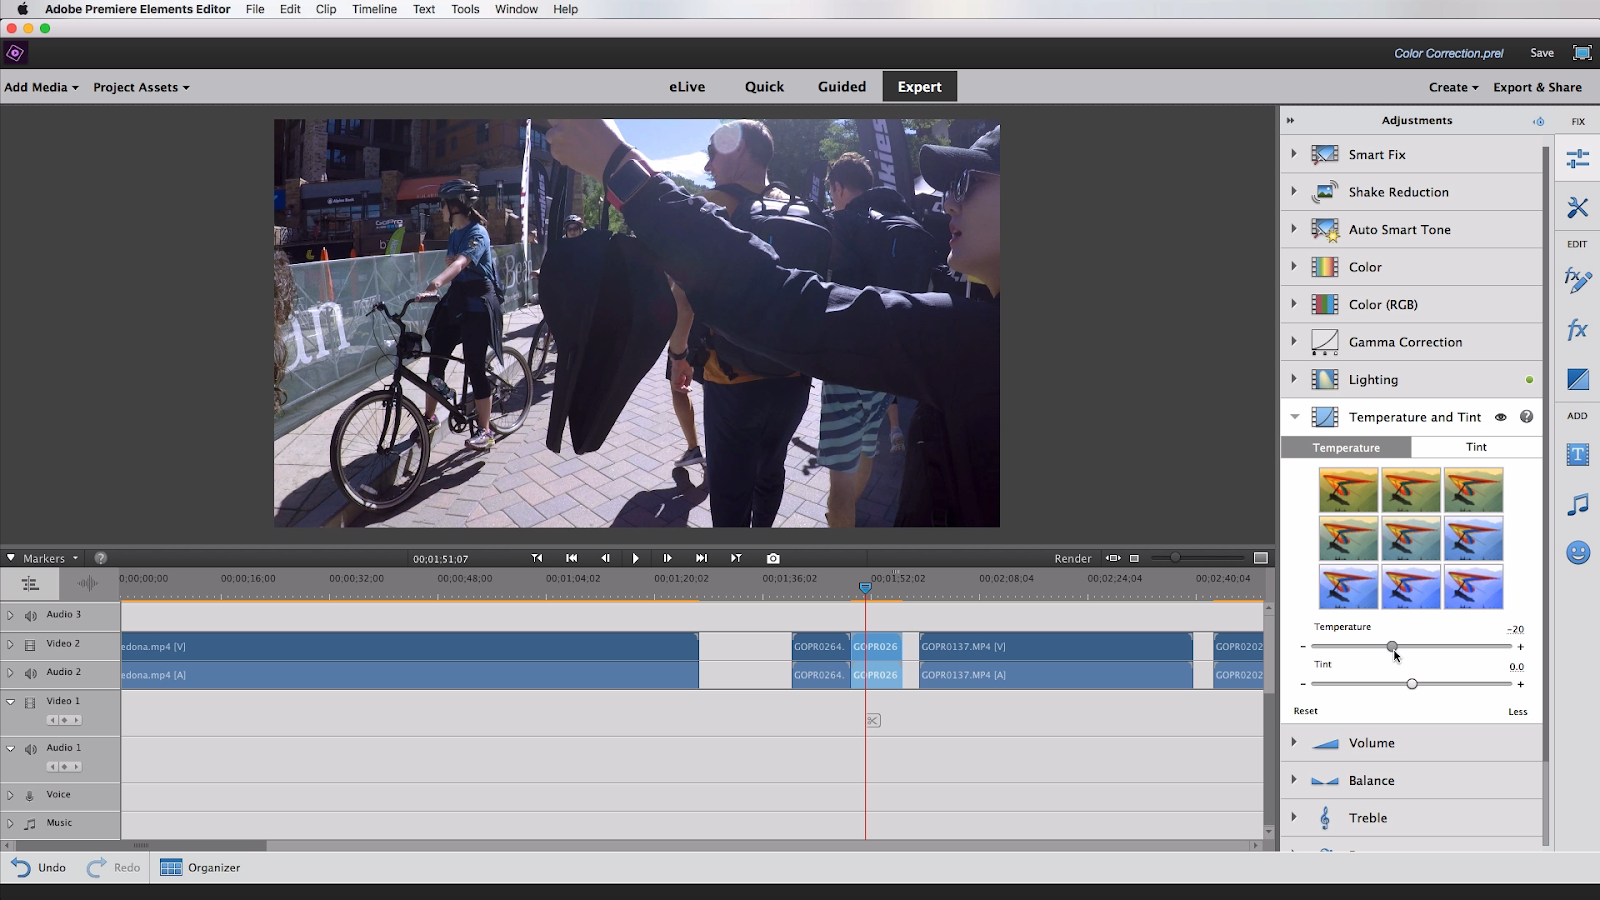
Down the menu further, you’ll find a dropdown menu for Temperature and Tints. Click “More”
to find the sliders and slide up to go warmer and slide down to go cooler. So if you have some indoor footage that looks a little bit yellow from the indoor lighting, you can bring that temperature down a little bit and tone that yellowness down.
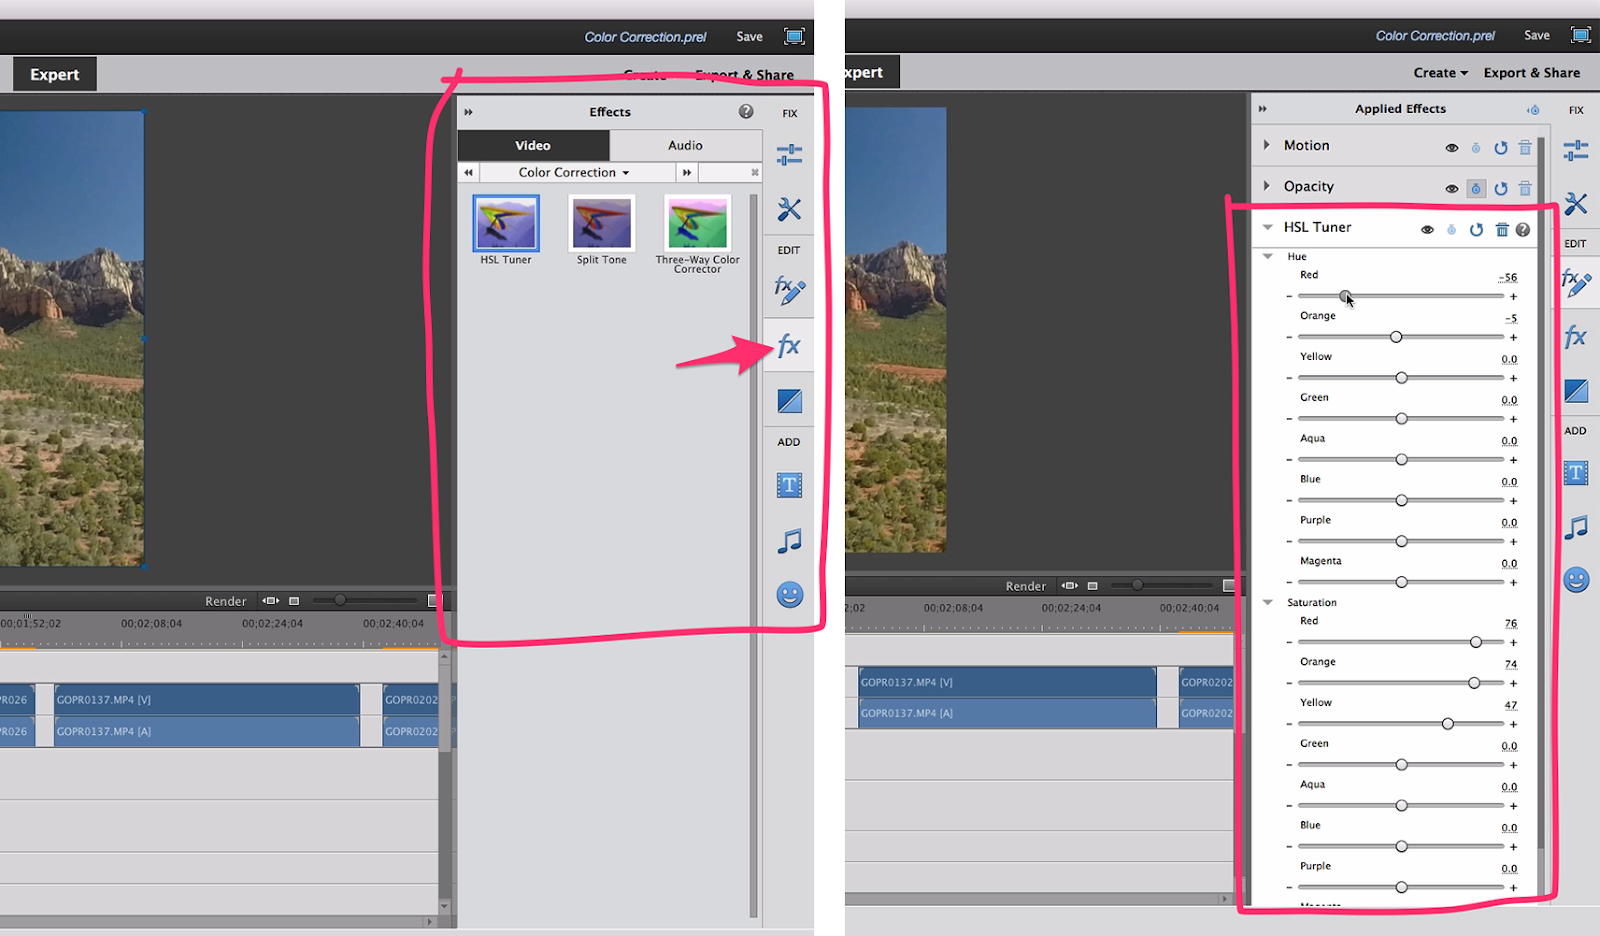
Another menu you might find useful is the HSL tuner, which you can find under Effects (fx). Scroll down
to Color Correction and find HSL Tuner. HSL stands for hue, saturation, and luminance. You will have sliders for all of your colors here. Using the HSL Tuner, you can adjust the saturation of an individual color basis.
Be sure to watch the full tutorial here to see how I color correct my clips in this tutorial.
I have even more exciting color correction tips for you coming up in a Livestream on the Adobe Photoshop Elements Facebook Page! Watch me make underwater video clips pop in Premiere Elements 2018. Sometimes underwater videos can look slightly green… but you want them to look blue! Plus, you want to see the colors of the fish. This Livestream is coming up soon, as well as another color tutorial on a cool feature in Premiere Elements 2018 called Color Pop. This will help you create a really fun, interesting look to your videos! To catch those tutorials, be sure to subscribe to the Adobe Photoshop Elements Facebook page, and turn on your notifications so you will get a notice when I go live there.
Color correction is pretty simple in Premiere Elements 2018. If you haven’t downloaded Premiere Elements yet, or haven’t upgraded to the 2018 version, you can get a 30-day free trial here.
Be sure to subscribe to the VidProMom YouTube channel so you can be notified of future Premiere Elements tutorials. If you haven’t downloaded my Premiere Elements Cheat Sheet yet, you can download that here!