GoPro’s newest camera, the Hero7, comes with a totally redesigned menu, so the Hero 7 Settings are laid out a little different than previous models. In this post, I will walk you through the GoPro Hero 7 Settings for video capture mode, including what each setting means, and what the “best” GoPro settings might be for you.
Some product links in this post are affiliate links, and VidProMom will be compensated when you make a purchase by clicking our links. Read my disclosure policy here.
GoPro Hero7 Settings
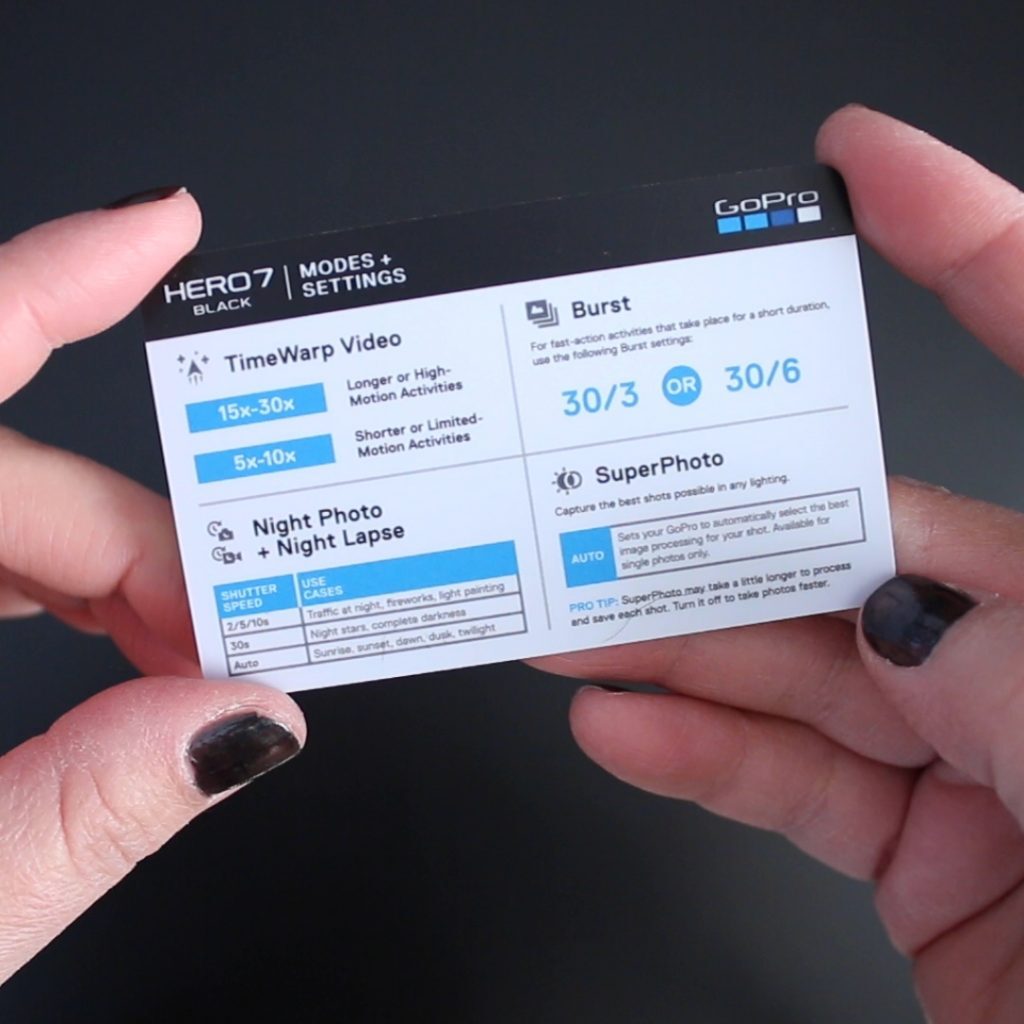
GoPro lists out the recommended settings in the Hero7 user manual, so you can always reference that. When GoPro sent me the Hero7 Black when it was launched, they also included this handy settings card. But for some reason, they didn’t make the Hero7 Settings Card available to the general public.
You might assume that the default settings that the GoPro ships with are the best, but that’s not necessarily true. There is no such thing as “best” GoPro settings because it depends on what you’re shooting! So in my video and this blog, I will walk you through the GoPro Hero 7 Settings, and exactly what they mean so that you will be able to make your own decision.
GoPro Video Settings for Hero 7
We are talking about video mode settings in this post, so first things first: make sure you’re in video mode. Tap the bottom left of the Touch Screen and choose video capture.
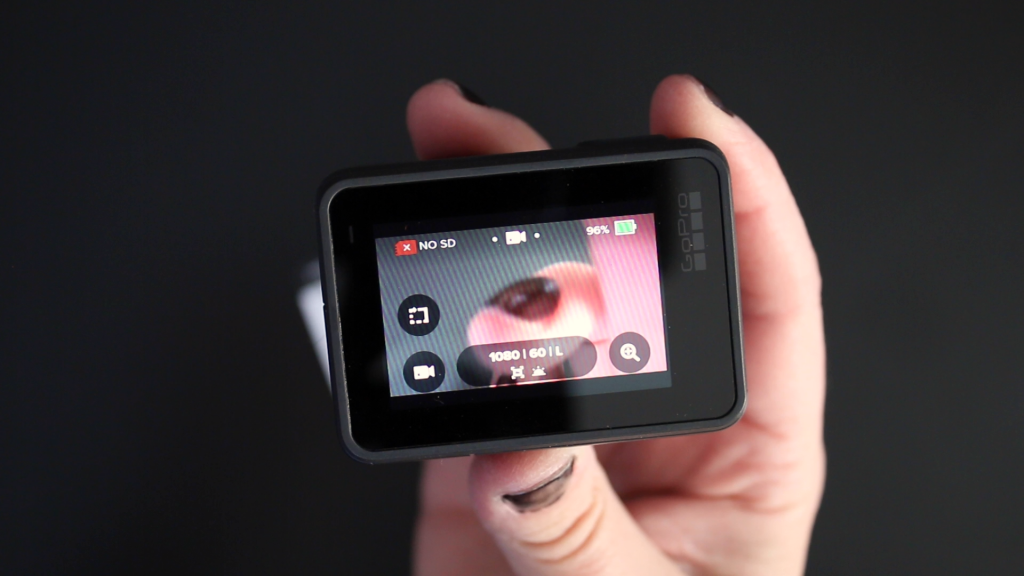
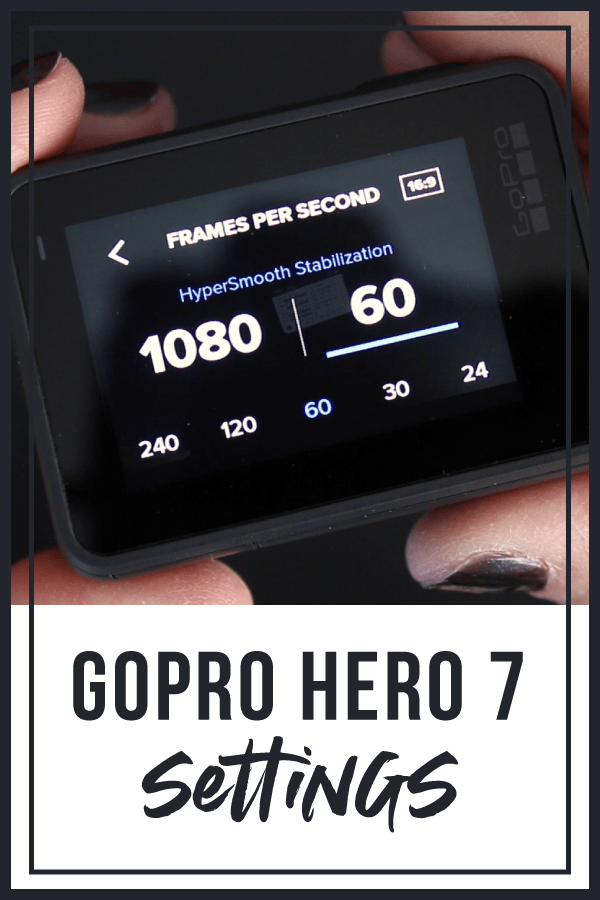
In the lower center of the Touch Screen, where mine says “1080 | 60 | L”, I’m going to tap that area, which opens up the video capture settings. If you haven’t messed with your settings at all yet, the default settings on the Hero7 Black are 1440 resolution and 60 frames per second, along with a 4:3 aspect ratio and wide field of view. Those aren’t even close to the settings I recommend for beginners!
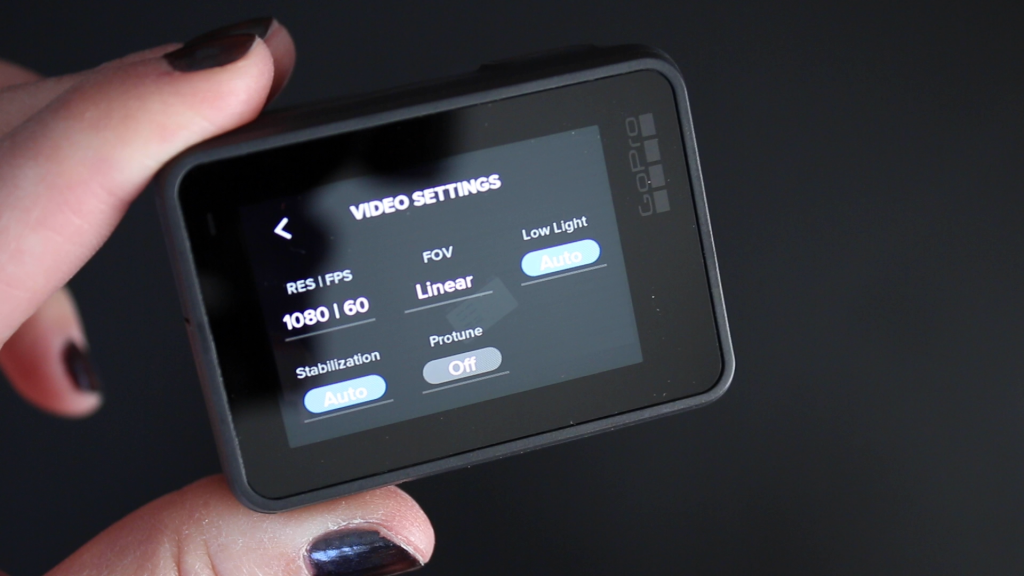
Looking inside the video settings menu, we see RES | FPS, POV, Low Light, Stabilization, and Protune. We will take a look inside each one, starting with the Resolution and FPS.
Related: What You Need to Know About GoPro Hero 7
GoPro Hero 7 Resolution Settings
In the resolution settings menu, there are a couple of things going on here. First, on the top right, you will see the aspect ratio. Mine is set to 16:9 which is a traditional widescreen frame shape. If you tap that, it switches to 4:3. I like to keep my aspect ratio at 16:9.
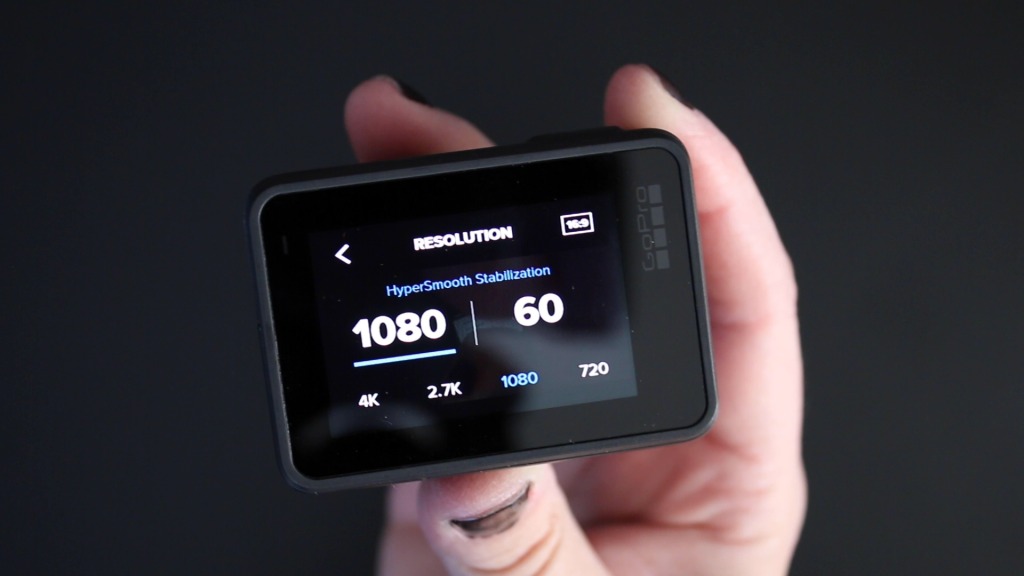
The 1080 number you see in this menu is the resolution. Aside from 1080, the other resolution options are 4K, 2.7K, and 720 (in the 16:9 format). Resolution refers to the number of pixels that ultimately make up each frame, and so the higher the resolution, the more detailed your image (the video image) will be.
1080p is considered HD quality (high definition), and that’s generally the resolution I use because I’m happy with the quality and I’m not left with extremely high file sizes. Personally, my computer doesn’t perform well with 4K footage. So, choosing your GoPro resolution is a personal choice based on your preferences, what you’re trying to achieve with your videos, and what your computer or mobile device will be able to handle for you.
I recommend that if you’re brand new to using a GoPro, start with 1080p. Many times new GoPro owners find that their phone and/or their computer aren’t up to the task of processing 4K footage, and they’re left confused and frustrated with why they can’t watch or edit their GoPro videos. Try out the different resolutions and see what’s going to work for you.
Available Resolutions in 4:3 Aspect Ratio
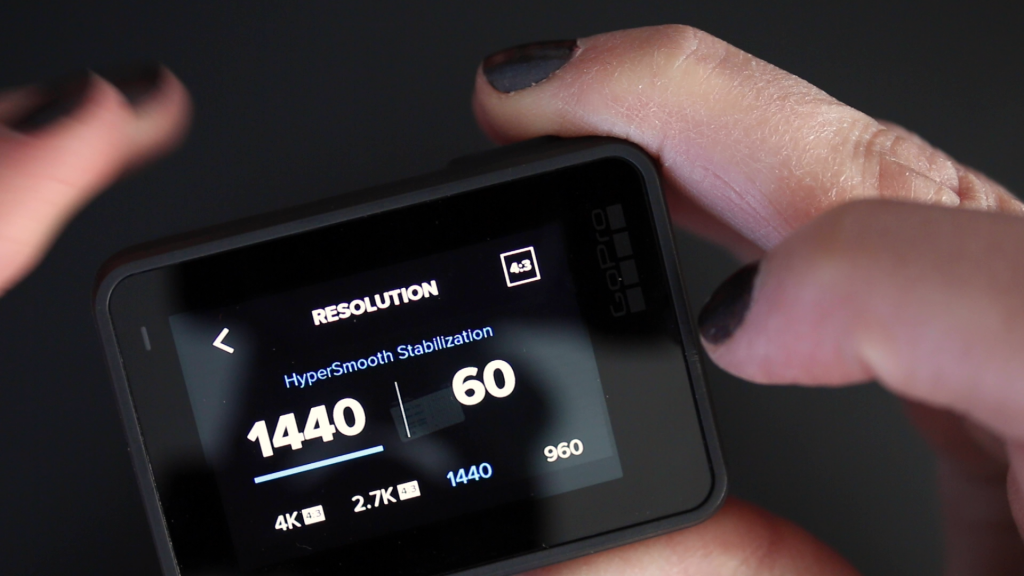
You will notice that when you’re using the 4:3 aspect ratio, your resolution options are a little different. You will see 4K(4:3), 2.7K(4:3), 1440, and 960. Since the shape of the frame differs for the 4:3 aspect ratio and 16:9 aspect ratio, the resolutions are also different. For a wide-screen frame shape, choose 16:9. For a frame that is more of a square shape, choose the 4:3 aspect ratio.
GoPro Hero 7 FPS Settings
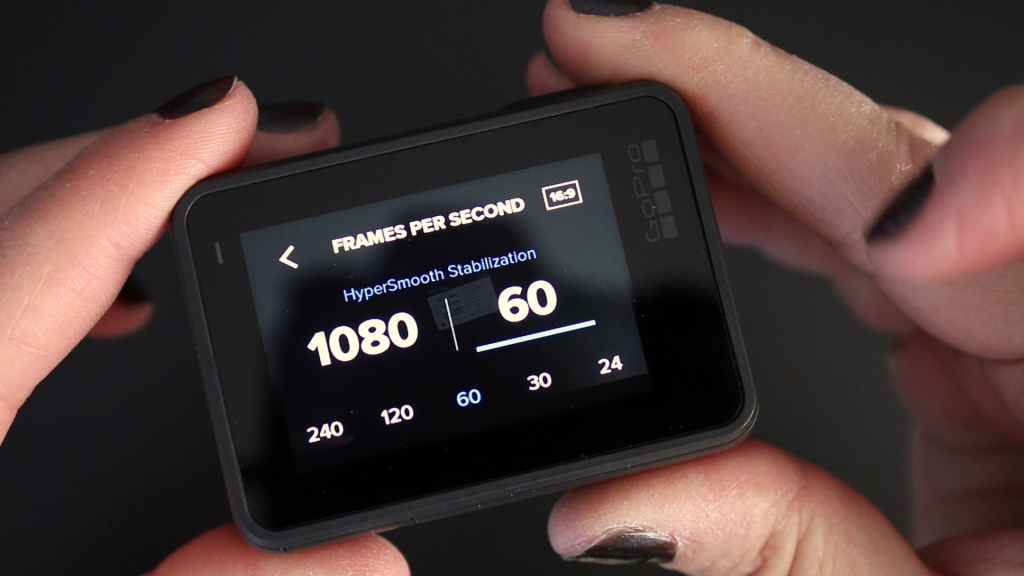
On the right-hand side of the Resolution menu, there is another number, which is the Frames Per Second or FPS. Lately, I have been shooting at 60 FPS. In the past, I have recommended 30 frames per second because that’s a nice manageable frame rate. Again, large file sizes can sometimes cause problems.
One of the reasons I have been using 60 frames per second on the Hero7 is because I like to keep the auto low light function on, which is not available in 30 frames per second. The FPS options available on the Hero7 Black will differ depending on what resolution your camera is in. Since I shoot 1080p most of the time, you will see in the photo above that the options at 1080p resolution are 240, 120, 60, 30, and 24 FPS.
NTSC vs PAL on Hero7 Black
My Hero7 is set in NTSC, and while I don’t fully understand what that means, I do know that whether you use NTSC or PAL depends on what country you’re in. Since I’m in the United States of America, I use NTSC (and so should you, if you’re in the US). If you’re in the UK, you should use the PAL system.
One of the differences between NTSC and
I don’t understand it and I can’t explain it any further than that. However, if you’re seeing 25 or 50 FPS, it might mean that you’re in PAL mode.
Field of View on Hero7 Black (FOV)
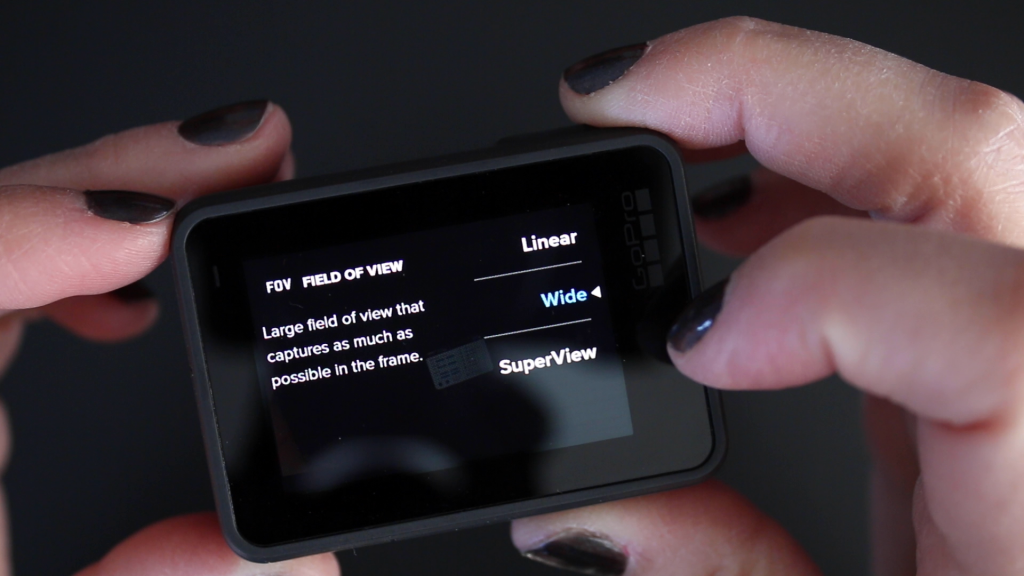
Backing out of the Resolution and Frame Rate settings menu, let’s tap FOV which stands for “Field of View”. The FOV setting will affect how much of a scene your camera captures, and will also affect how distorted your video will be.
The GoPro has a very wide-angle lens which gives it a sort of “fish-eye” effect. If you want to reduce that effect, just simply select linear mode. Linear is a more flat look. It is more like what you’d expect from a video shot on your phone or a basic DSLR camera.
Wide is just as it sounds. It’s the standard wide-angle, and SuperView captures most of your surroundings but gives you an even more fish-eye look. Personally, I like to stick with the linear mode. Some FOV’s will be available in certain resolutions and some aren’t. So, if I’m in a resolution where linear is not available, I will usually choose wide.
Play with this menu, and you’ll be able to see exactly what I mean about the lens distortion or “fish-eye” effect. Ultimately, the best FOV will be your decision.
Low Light Settings on Hero7
The Low L
Hero7 Stabilization Settings (HyperSmooth)
In the Stabilization menu, you can toggle between “auto” and “off”. The new HyperSmooth Stabilization on the Hero7 Black is pretty amazing, and I keep mine set to “auto”. If you like smooth footage, you’ll want to keep it set to “auto” as well. If you’re not sure how HyperSmooth works or what all the hype is about, be sure to check out my Hero7 Black Review where I show off HyperSmooth!
What is Protune on GoPro Hero7?
The last setting in the Hero7 Black video capture setting menu is Protune. I am not going to dive into all of the details of Protune settings on the GoPro, because this post is for GoPro beginners. Protune is more of an advanced function.
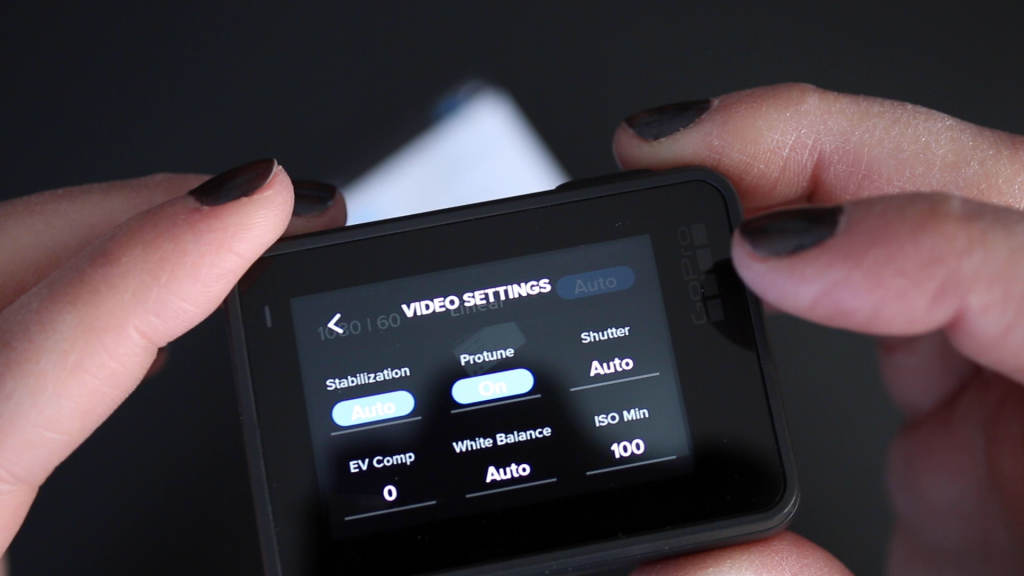
When you turn Protune on, you will see several different menu options available to you. Some of these additional options are shutter speed, EV Comp, White Balance, ISO, Color, and more. I usually keep Protune off
You can think of Protune as “manual” settings for your GoPro. So with Protune set to off, you’re letting the GoPro do a lot of the “automatic” heavy lifting for you (which it’s generally pretty good at).
If you’re very familiar with manual settings on cameras, and you want to explore the Protune settings on the Hero7 Black, then turn Protune on and try it out! But if you’re looking for GoPro’s great automatically great-looking footage, and you’re a total GoPro newbie, then you can surely leave it off for now.
Related: How to Use a GoPro Camera?
VIDEO: GoPro hero7 Settings