CapCut for Desktop – Tutorial for Beginners
Finally, Capcut for Desktop! Now that the FREE video editing app CapCut is available for Mac and PC, I put together a beginning-to-end tutorial for video editing for beginners using CapCut. This is my process for editing YouTube videos that I teach my clients and students!
Some product links in this post are affiliate links, and I will be compensated when you purchase by clicking our links. Read my disclosure policy here.
CapCut for Desktop
The first thing you're going to do is to take a look at the details on the right-hand side. There's a button at the bottom called “modify” that you can click. It's a good idea to name your project so it's easy to find later and keep all of your projects organized. Speaking of organization, I keep all my media in its original place. Now I have all of my YouTube content organized on my external hard drive.
Modifying Settings
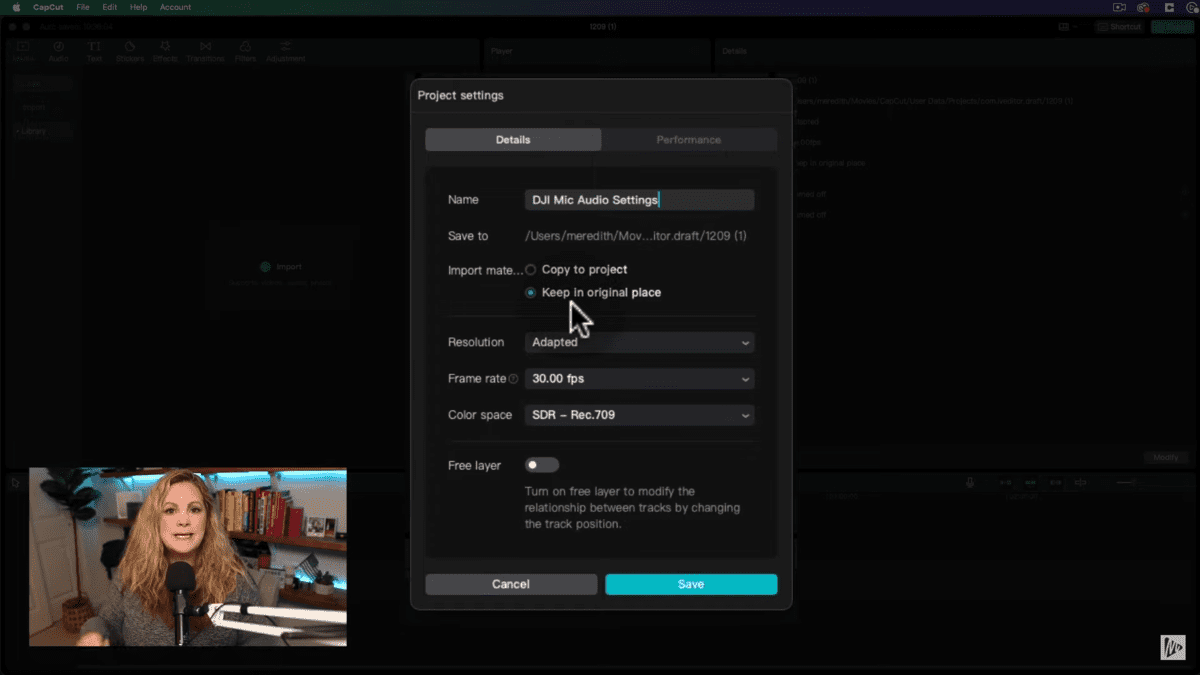
Under the resolution, we will choose “Customize” here because CapCut is excellent for editing your YouTube videos. And I want to make sure this video is set up for YouTube. So it's 1920×1080. That way, the project will be a 1920×1080 YouTube video.
The frame rate will be 30 frames per second, the color space will stay at SDR, and the free layer will be a fascinating setting. I love that they included this because if you have it turned on, then CapCut for desktop acts a little bit more like an actual desktop editor, where you can move your clips around on your timeline from one track to another really quickly. Once you have your project settings set up, just hit save at the bottom.
Importing Media To CapCut Project
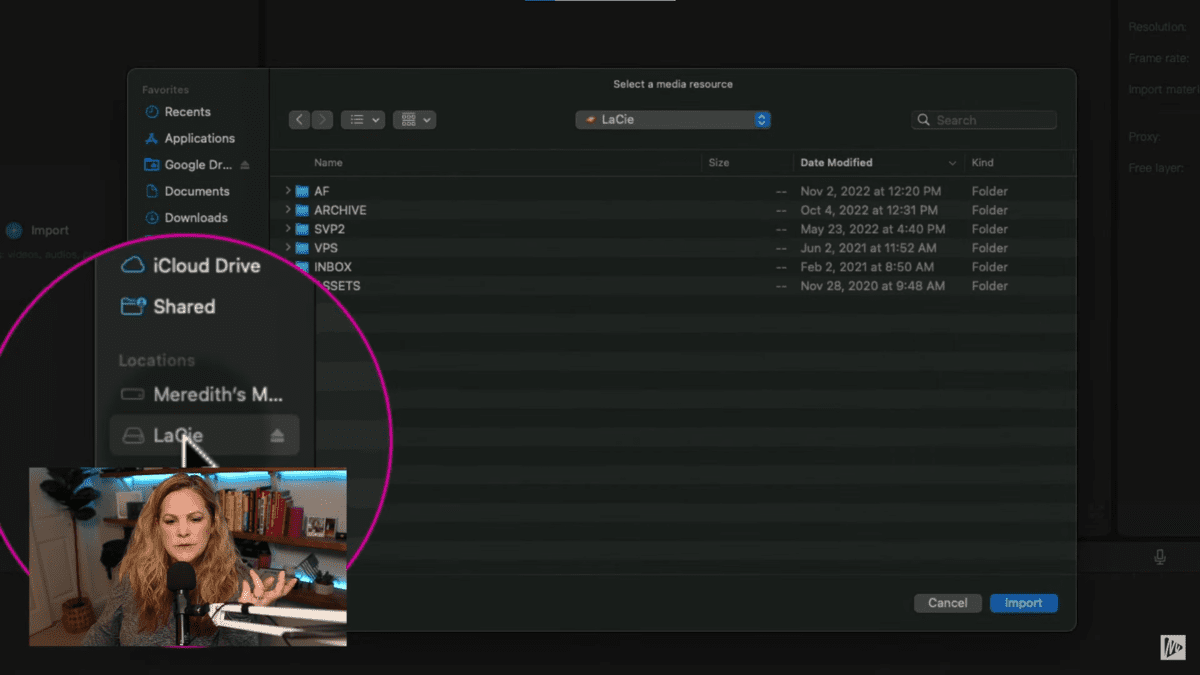
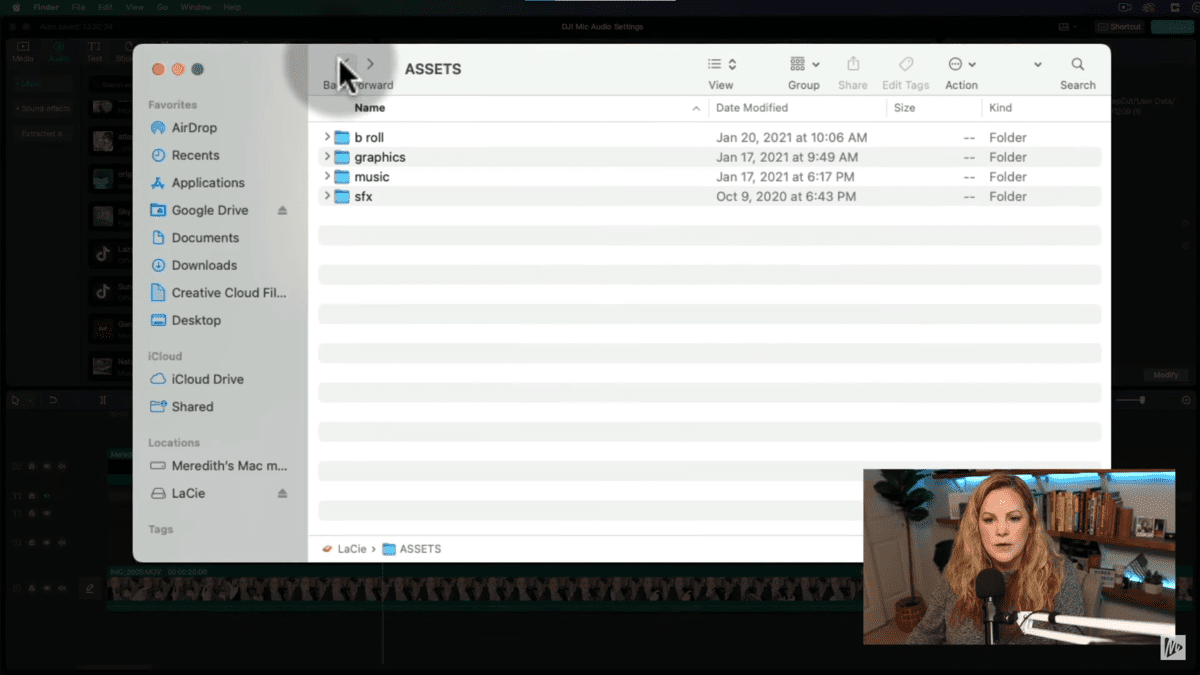
You obviously need to import your media, so click the blue plus button, import, and this is going to open up the folders. I'm going to go to my external hard drive, my inbox, and the video that I'm editing, which is DJI mic settings. I have two screencasts and two regular videos that I shot on my phone. So we're going to have A roll and a little bit of maybe B roll plus a screencast. I selected the files and the actual video files that I'm going to import, and I'm going to choose import.
Now, I will teach you exactly what I teach my students inside of Social Video Pro in my 30 days to a thriving YouTube channel course. This is the video editing method that I use and teach others, and I call it the BFF editing method. So we're going to start with the letter B for basic. The link to the BFF method cheat sheet will be right here.
Add Media To Timeline
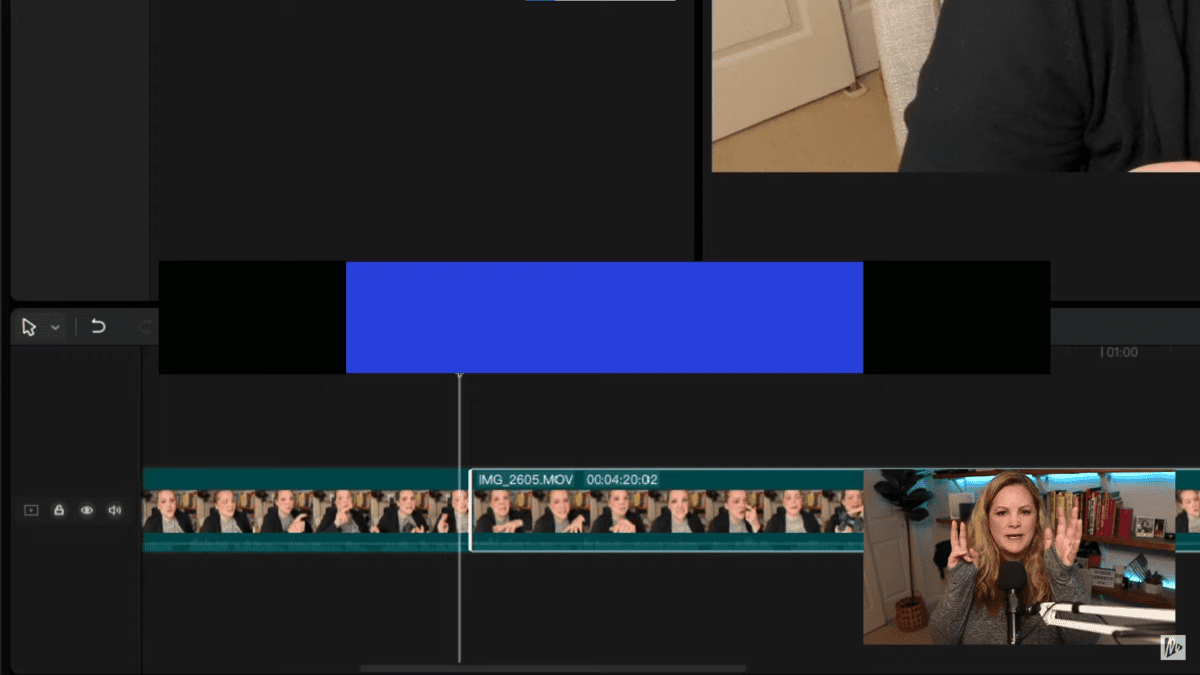
To make your basic edits, we need to get that footage down onto the timeline. So I'm going to start with the first clip that I recorded. I'm just going to select it and drag it down to the timeline. This is going to add the entire clip to my timeline.
If I wanted to just add one piece or one section of this to my timeline, I could just drag those bars on the left and right to shorten that clip a little bit and then bring it down to the timeline. And it will just be that one little snippet. And then if we zoom in on the timeline, we have the clip down below. We will see it in our player window as well as the waveforms down there.
Split Clips
So you can see when I wasn't talking and then when I was talking. I'm going to use a little bit of it as B roll. But we'll get to that in just a moment. This is will be the beginning of the video. So I have this spot where I stopped talking, and I need to cut this because right in between here, I kind of messed up my words or I started over again.
So, I'm going to split this clip because we need to chop up this whole entire clip to keep the parts where I actually said what I meant to say and get rid of anything where I made a mistake or I restarted. This is the basic edit. We're creating a rough cut.
Trim Clips
And as I'm going along, I'm just finding where I want to split the clip using Command B or just hitting that split button over here and then selecting what I want to delete and hitting this little trashcan, and then my two clips come back together again. And I don't have a weird space where I deleted something. An alternative way to clean up your cuts like this might be to just drag the tail end over to where you want the clip to actually start.
So you're either taking it like a piece of tape and cutting it up with scissors and getting rid of the parts you don't want. Or you're just trimming the ends of that piece of tape if all you need is a little bit of an edit at the beginning and at the end. It really depends on how you shoot your video and how many mistakes you make when you're shooting your videos.
Rearranging Clips on Timeline

Then, I want to move my next clip to my timeline, and we'll do the same exact thing to that one. So I'm just going to drag it down. And I'm going to place it right between my intro and my outro. We can mix things up later, but just to make it easier on myself I'm going to put it right where I want it in this particular edit. So, I have a few clips at the end, a few clips at the beginning, and there's a long clip that I'm going to chop up next.
Now, I have a rough cut of my intro and my outro and the first part of my A-roll. I want to point out that everything you're doing with your clips on CapCut on the timeline is undo-able. So if you make a mistake, if you miss this here and you're like, “Oops, that's too far,” all you have to do is hit Command+Z and it will go back. If you want to re-edit the whole thing, that's fine too.
All of your clips that are up here in your media area, you're not doing anything permanent to them. You're just pulling them into the timeline, cutting them up like a piece of tape, and then rearranging them. So, you could grab these clips, pull them up, and drop them in wherever you want them to go. And then if you can't remember where it went, just hit undo command Z. And will go back to where it was before.
Lock, Hide, and Mute Track
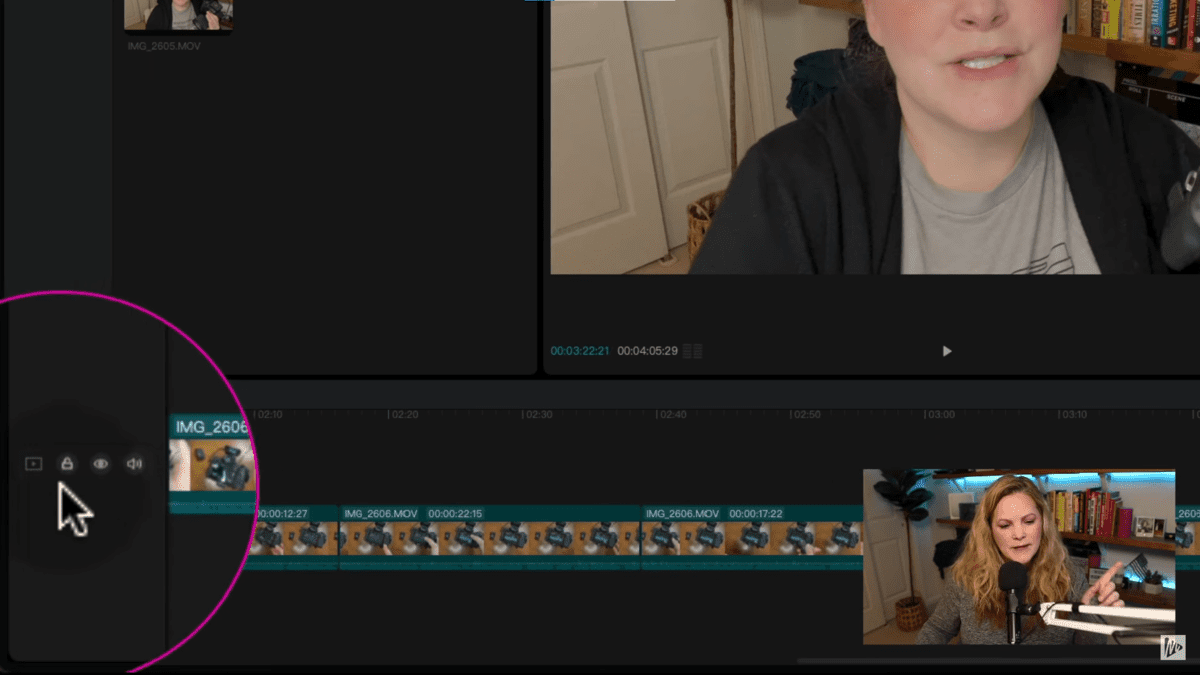
You can also use the functions way over on the left to lock your track. If you're adding your B-roll, or you're playing with your background music, you can always lock a track so that you don't accidentally do something. You can also make your track invisible so that it isn't viewable in the preview window and mute an entire track.
Import Screencast to Timeline

Next, I'll need to pull in my screencast. My screencast is already edited because I like to edit my screencast in ScreenFlow. So I just need to import that. I'm going to grab my screencast and pull it down, I want it to go right in between my clips. And then I have another little snippet to put right after that. So I'm going to drag that down too. So now I have a complete rough cut.
Depending on your needs or your desires for this video, you could be done with it, you could export it to YouTube. But what about text and effects and background music? You may want to fine-tune this a little bit and make it look a little bit more polished and a little bit more professional. So we'll talk about fine-tuning in just a minute. If you are done and want to export your video, we'll talk about that at the very end.
Editing Text in CapCut for Desktop
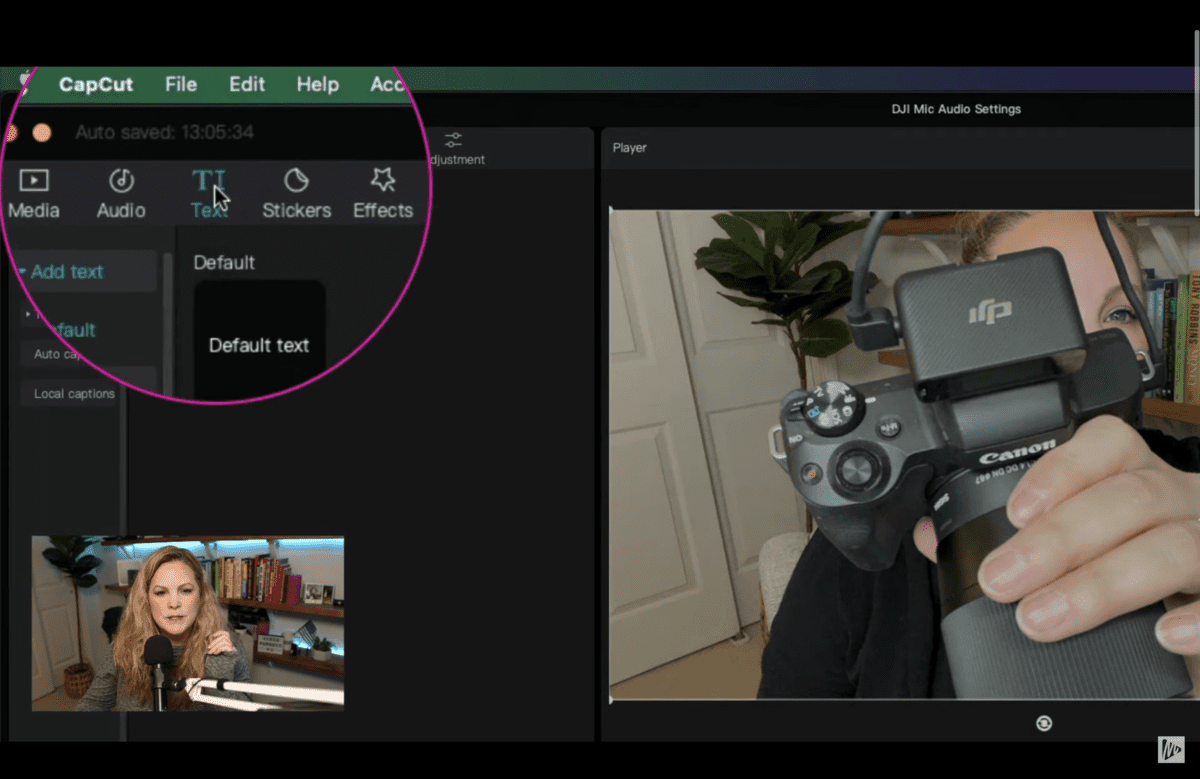
So let's talk about text. Up here at the very top, choose text. And we'll have a default text, we can add this to our project by just hitting the plus button. That will add a little text box and you can see it on the player. You can see it down here on our timeline. And we can treat this just like it was a regular clip. We can move it around, we can put it wherever we want it to go, and we can also change the length just using the trim handles on either side. I'm just going to double-click on the text I have selected in the timeline.
So I could just grab it and move it someplace, but I want to put it right back in the middle. I will be using my guides. If I double-click, then I can just fill in the text box and start typing. and I can edit the text box on the right-hand side and I can choose what font I want. I can use the slider to change my font size, and
I could also just type in the number or use the arrows here and we have the “Style” button.
Text Designs
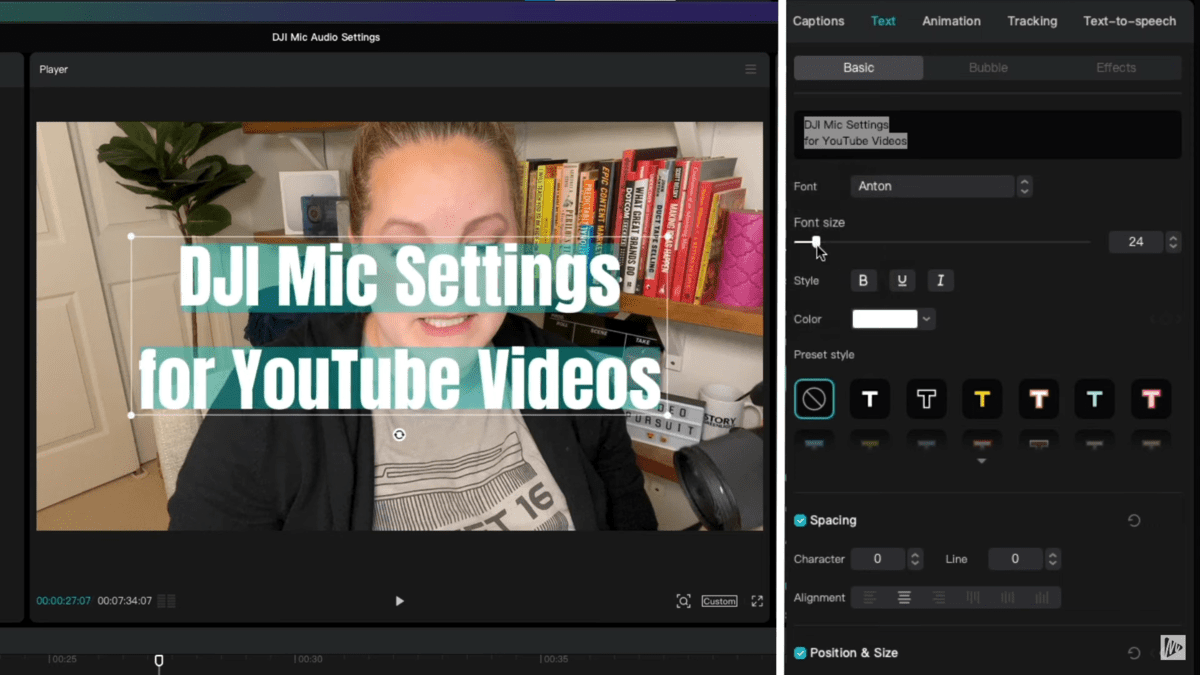
So we could make it bold, we could make it underlined, or italicized. We can change the color. There are some preset styles. So if you use the CapCut for deesktop, you know these styles come in handy. So you can make it with an outline, or you can reverse it.
We have character spacing, which is going to spread your characters out. We have line spacing, which is something that you might want to do. This is going to kind of depend on the font that you choose. We have position and size. You can add a custom stroke or outline, and also text color and text shadow. You have all of these text settings which are really great, as well other options, and then just use some of the default ones there.
And then you also have premade text effects. Those are like basic title screens and text that you can do in pretty much any editor, but CapCut has a couple of other features like animation where you can have it fade in/out. If you're familiar with text-to-speech options on TikTok, for example, you also have those inside of CapCut.
Captions In CapCut for Desktop
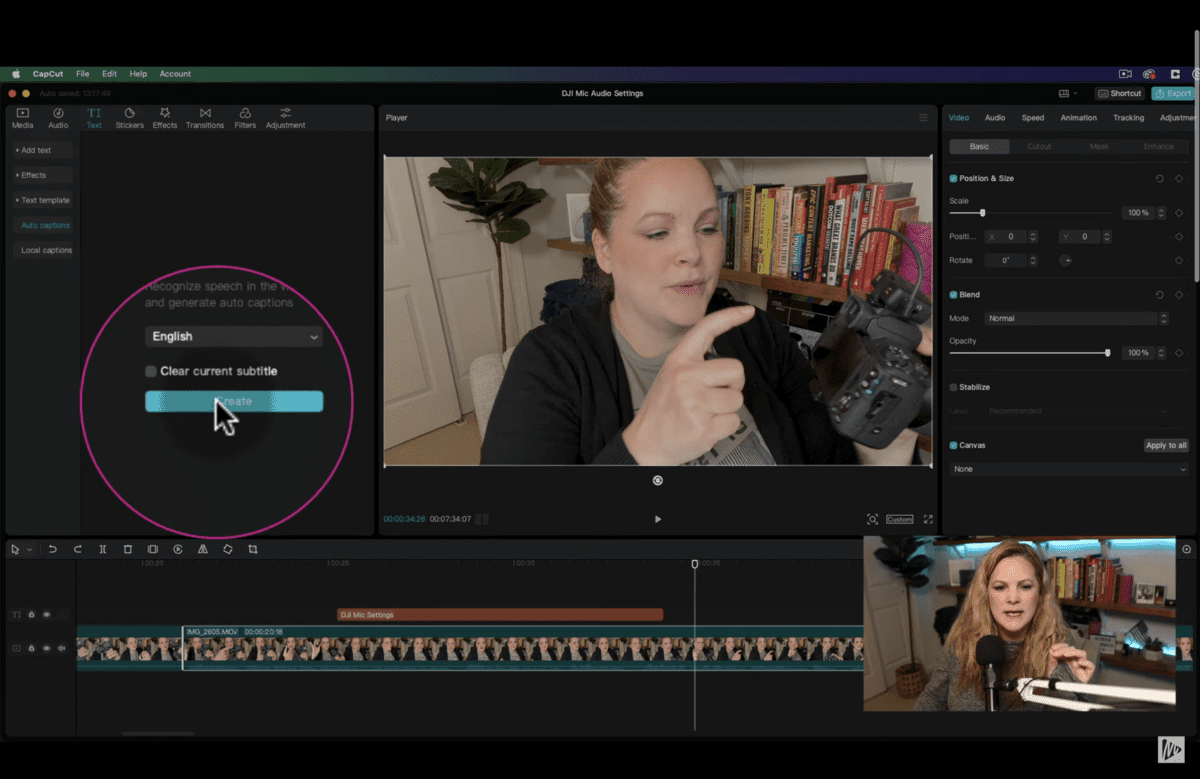
The other text option I wanted to show you is the captions. Come down over on the left to auto-captions, and hit create. You should now see another row in my timeline, and those are the captions. Now I can go through and just check them. You could click on one, double click and edit it up there if it transcribed the word wrong or if you want to capitalize something when you edit your styling. This is where I really like the preset styles from CapCut. Then all you have to do is just choose a style or give it your own custom style. Then, it will apply to all of the captions in your video. It's so easy.
Add B-Roll to Timeline
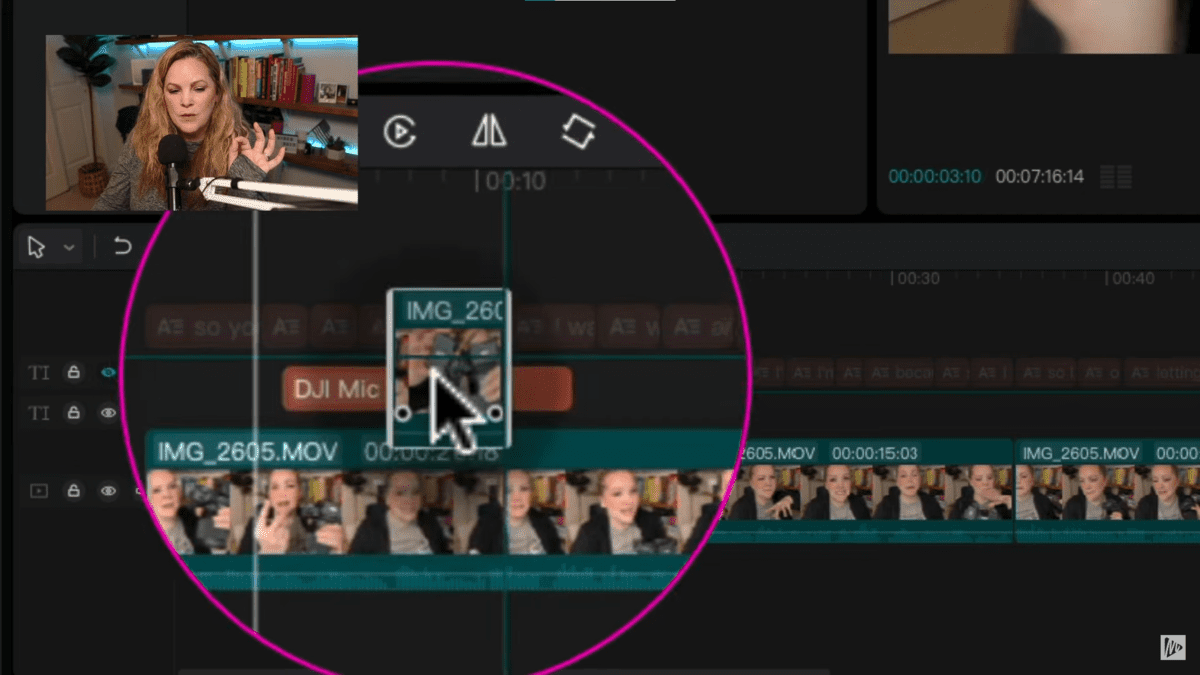
Another common function when you're editing videos, especially for YouTube, is the addition of a B-roll. That's where you have some extra footage that goes over the top of your main footage, your A-roll footage. In this case, I have a little bit of footage here at the beginning of my video that I want to use as B-roll.
Now, I have a little clip of B-roll that I want to have over the top of where I am speaking. So I'm just going to grab the clip, I'm just going to keep my mouse button down, I'm going to hold this down, and if I just keep dragging it places, it's going to give me these guides and ask me where I want to put this thing.
It just created a whole new track, so I'm going to bring my title up a track. These tracks are kind of swapping places. So I have my title over the top of my B roll. I don't really have much other B roll to add in. But all you have to do is add your media, decide what you want to add, and then just drag it down. If I wanted this piece to be B roll, I just drag it down and leave it on the track that I want the B roll to be on. It's so easy. In this fine-tuning phase, I'm kind of putting everything together to finalize everything.
I want to make sure that all the little cuts in between my clips are nice, clean, and smooth. That usually means zooming way in. So I'm just trimming the ends just a little bit. At this point, you've done your basic edits, your fine-tuned edits, and the final F in the BFF method is getting a little bit fancy.
Lower Thirds and Background Music
What I'd like to talk about here is adding lower thirds to your videos and adding background music. And this is pretty easy with the text function. You can easily add lower thirds by choosing a text template, or even just coming in and using regular text.
So you have your text, animation, and lower third. There is background music inside of CapCut that you can use. All you have to do is find the sound you want to use. Add it with the plus button and it will add to the track and now you have a background audio track.
I don't use any software installed background music because I don't know what the rights are to that music. And I always want to ensure I'm using royalty-free background music. I use Epidemic Sound for this. That way, I know that the background music that I'm using on YouTube, Tiktok, Instagram, Facebook, or wherever it gets uploaded, is not going to have any copyright claims or copyright strikes.
I know I'm protected that way when using Epidemic Sound for my background music. So let me just pull something in from my Epidemic Sound library, so it's dropping right in on my timeline. Then what usually happens is that the music is way too loud, right? What we need to do is bring the volume down a little, and you can either grab the little volume line and you can see the little arrows that pop up.
You can grab it and just drag the whole thing down, or you can use the audio editing pane and drag the volume sliders up and down. So when you're ready, up in the top right, you can now choose to Export.
Export CapCut Project for Desktop
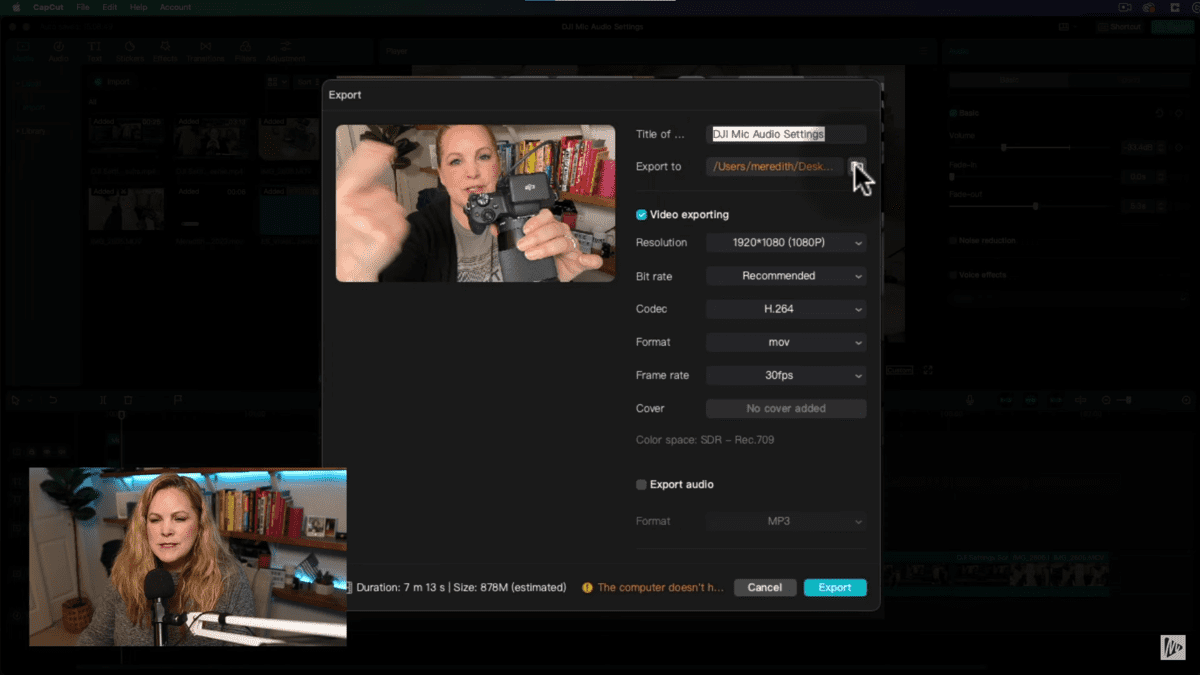
CapCut wants to know where we should export this video to. So that's where the video's final version will go. For me, I'm going to put mine right on my external hard drive. So my project is at 1920×1080. The resolution doesn't need to change. That's how I wanted the project set up and that's how I want the exported file to be as well.
This is a 1080P video. For the bit rate, I'm going to go for the recommended codec, which is H.264. I want my format to be an MP4 file, my frame rate is going to be 30 frames per second, and I'm not going to do anything with a cover image or anything like that. It'll tell me right down here at the bottom that this video is 7 minutes 13 seconds, 878 MB in size, and hit Export. That'll take a few minutes, just like any video editing software will take to export, and then you can upload it to YouTube.
So now you know how to use the BFF method that I am teaching inside of Social Video Pro, my 30 Days to a Thriving YouTube Channel Program, and you know how to use it with CapCut for Desktop so you can create professional looking, polished YouTube videos. Don't forget you can download the BFF method cheat sheet here.
VIDEO: CapCut for Desktop – Tutorial for Beginners
Click here to subscribe to Meredith Marsh on YouTube.