Premiere Pro to Instagram Stories – How To Export
I am in love with Instagram’s Stories feature, but it is a challenge to figure out how to upload pre-recorded, edited content. Have you ever noticed that high-profile Instagram accounts like @garyvee and @gopro upload a mix of “on the fly” and pre-produced, edited clips to Instagram Stories?
Some product links in this post are affiliate links, and I will be compensated when you purchase by clicking our links. Read my disclosure policy here.
I’ve been exporting teaser videos from Premiere Pro to Instagram Stories every week when I publish my YouTube videos, and this is something people have been asking me about. Here is a tutorial for how to export videos from Premiere Pro to Instagram stories.
Premiere Pro to Instagram Stories
In order to upload a video to Instagram stories, the video must be:
- 15 seconds long or less
- taken on your phone in the last 24 hours
- the same dimensions as your phone
But what if you have an awesome video you just uploaded to YouTube, that was shot on your DSLR and editing in Premiere Pro? That’s the problem I was trying to solve a few months ago when I discovered this trick. Here is the solution (if you are totally brand new to using Premiere Pro, I recommend you watch the complete tutorial):
- Create a new sequence with the dimensions of your phone (iPhone 6S is 750×1334)
- Set a background color (or keep it black)
- Place your video clips on the timeline
- Arrange, rotate, scale, and design your layout
- Repeat for all clips
- Export segments of your timeline in increments that are 15 seconds or less
- Save them to your phone (I use dropbox for this) and upload to Instagram Stories
It sounds tedious, but keep in mind the idea for me was to create a few teaser clips to get my audience’s attention and hopefully inspire them to go watch the full video on my YouTube channel. So while you could do this process with an entire edited video, you don’t have to.
As I explain in the video tutorial, the first thing I do is create a new sequence that is the same dimensions as my phone. I have an iPhone 6S, so that’s 750 wide by 1334 high.
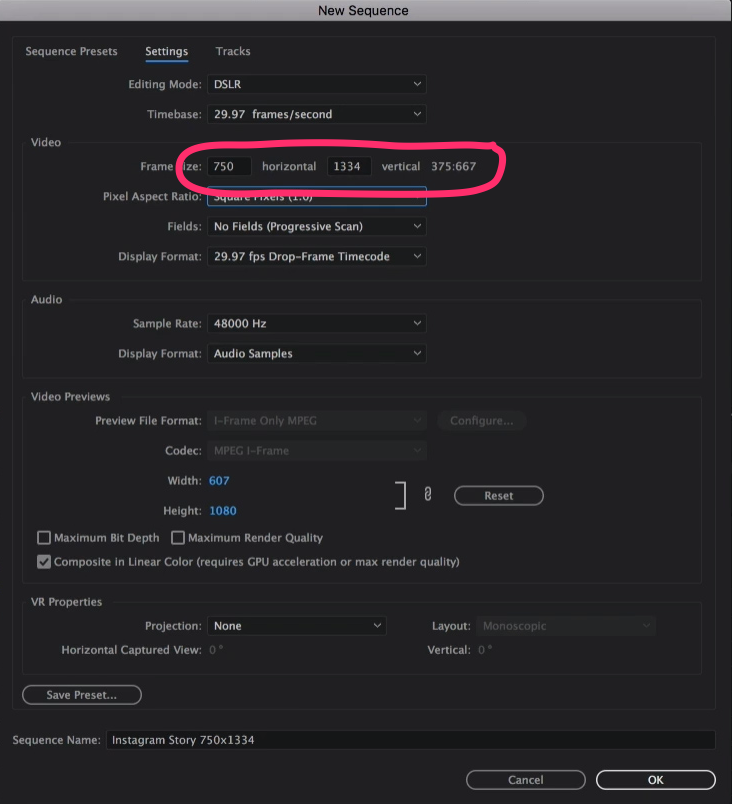
That will give us a sequence that is rectangle shaped, but vertical instead of the standard 16:9 horizontal orientation. Now you basically have a canvas to work with here. The first thing I do on my new sequence here is add a Title to the bottom track, so that my background isn’t black. I make a rectangle shape that covers the whole frame, and make it any color I want. I choose a light gray so that it’s almost white, but not as “bright” as white.
Next, I lock that title track and copy my clips from my full, edited video timeline and paste them onto the timeline of my new 750×1334 sequence.
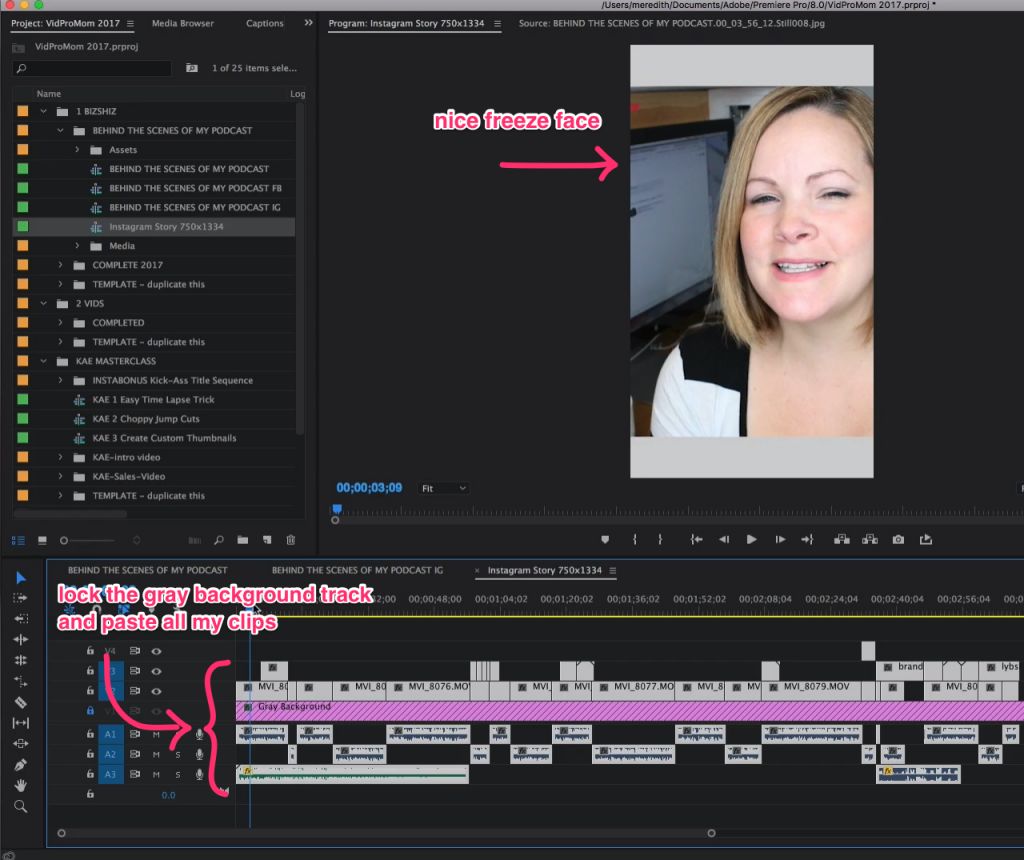
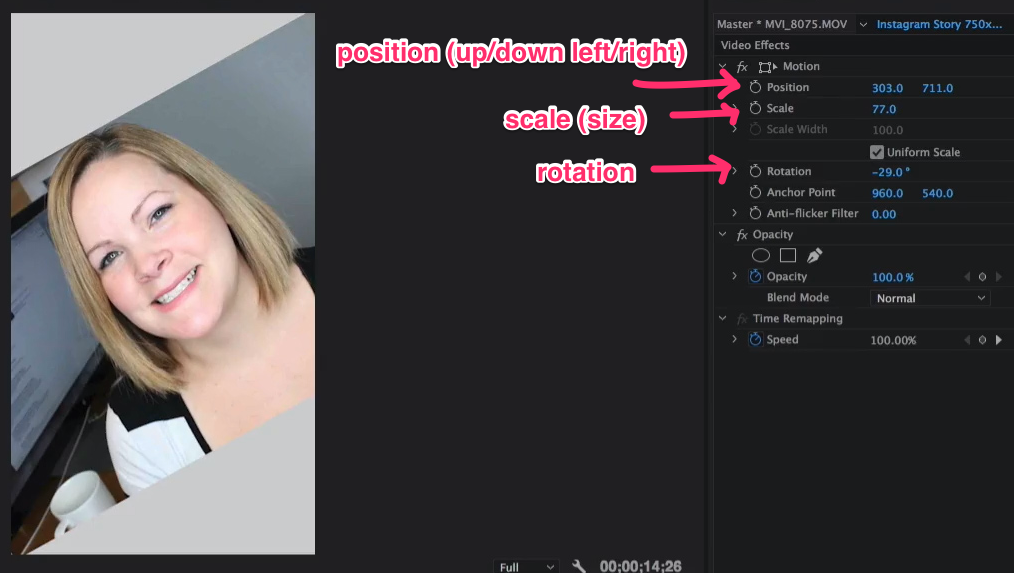
Once all the clips are in, you can have some fun with how you arrange your video in your frame. I like to rotate a little bit, then resize and move so that my body is near the middle of the frame and the corners of my video run diagonally across the frame. This is just a personal preference! You could arrange your frame however you want here. Whatever suits your style.
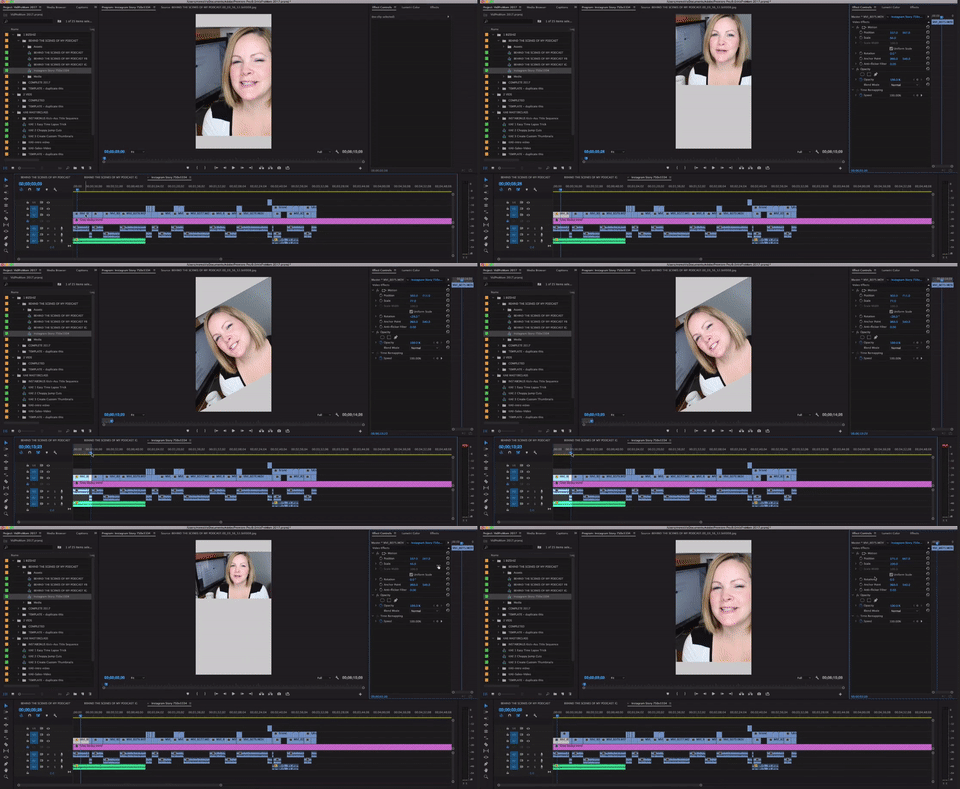
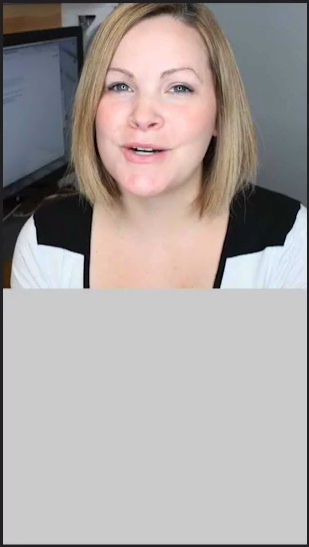
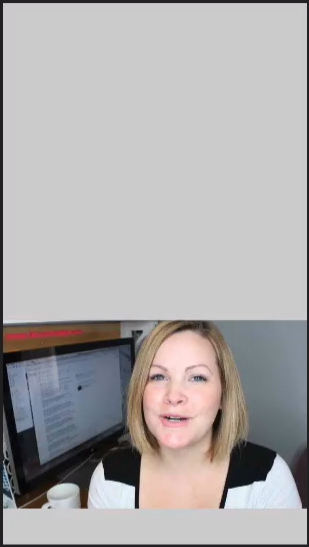
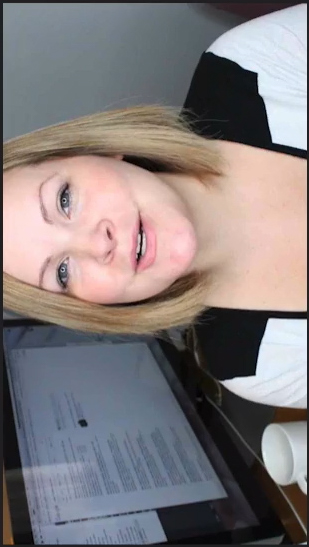
Here are some examples of ways I could position my video within my frame:
Like I said, I like to rotate, resize, and reposition my video. Here’s a look at the tools I use in the Effects Control panel to achieve the diagonal look:
You don’t have to do this with every one of your clips. You can select the word “Motion” above the Position setting, copy and then when you select your next clip, just hit paste and all the settings that fall under Motion will be copied over to the next clip you have selected.
Once all your clips are arranged in your frame the way you like, now you can export your 15 second (or less) clips! How I do this is I find the first starting point where I want my Instagram story to start, and I hit “i” on the keyboard. This sets an “in point”. Then I find where I think I want my first exported clip to end and hit the “o” on my keyboard. This sets and “out point”. In the bottom right-hand corner of your preview window, it will tell you exactly how long your selection is. Make sure it isn’t one millisecond longer than 15 seconds!
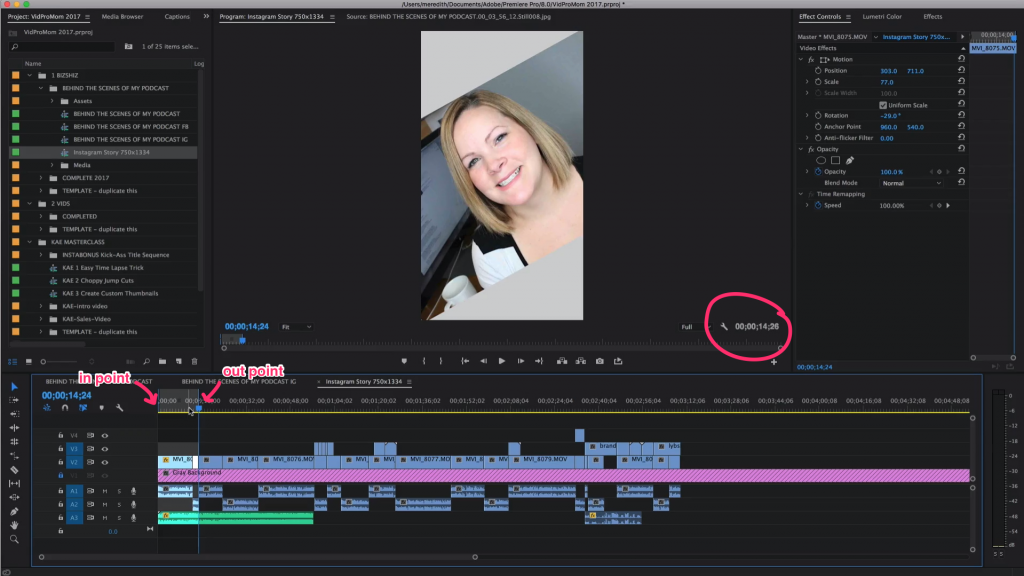
Exporting for Instagram Stories
Next I hit command (or ctrl) M on my keyboard to bring up the export settings. Since I made a selection of my timeline using the in and out points, Premiere Pro knows that’s the selection I want to export (not the whole video).
I save my exported clips to Dropbox, so that I can grab them easily from my iPhone. You could use Google Drive for this also. But somehow, you’re going to need to get your exported clips to your phone in order to get them to Instagram stories.
From here, you could hit Export and you’d be all set with that one clip. Since I usually upload a handful of clips to Instagram stories, I actually hit queue, which opens up the Media Encoder. Media Encoder will save my selected export until I’m ready to batch-export a bunch of clips at once. This is a HUGE TIMESAVER.
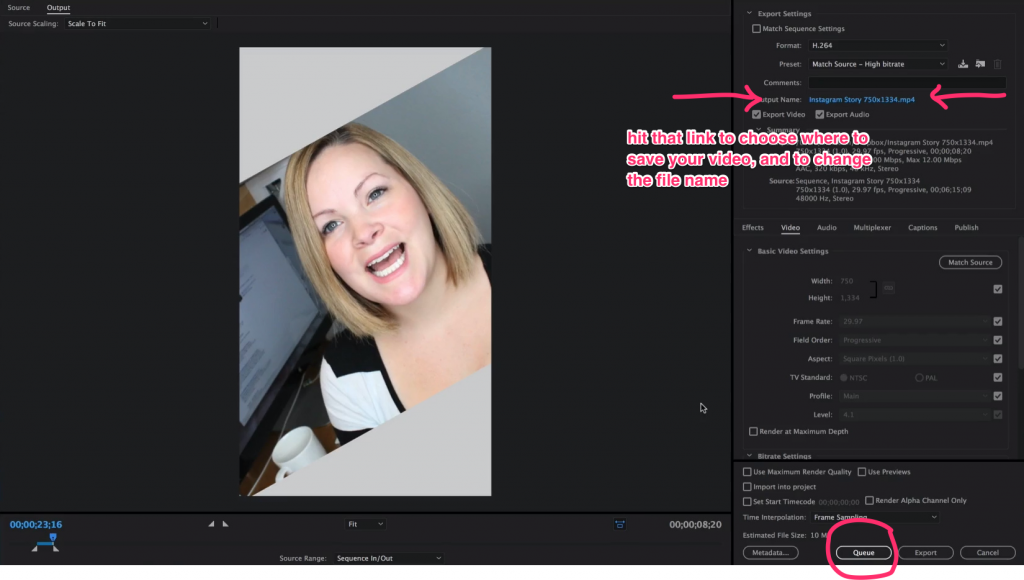
Once you’re all set with all your clips, and everything is in the Media Coder, just export them all. If you’ve saved them directly to Dropbox, then find them on your phone, open each video clip in dropbox and export it to your phone’s camera roll.
The Magic
The magic trick here is that since you just saved this video to your camera roll, Instagram thinks you just shot this video on your phone. So as long as it’s the same dimensions as your phone and it’s less than 15 seconds, it’s going to let you upload your clip! Ta da!
From here, you can treat your clip just like you would any Story clip. Add text, doodles, and emojis, then add to your story. Just make sure you upload them in order, otherwise, your story might feel a bit disjointed.
More Premiere Pro Tutorials
On my podcast, the VidPro Studio Show, I had the opportunity to interview my friend Kelsey from the Premiere Gal YouTube channel. Kesley has tons of Premiere Pro tutorials, so if you’re looking for more tutorials on using Premiere Pro, Kelsey is your gal!’
