6 Screen Recording Tips – Make Professional Screen Recording Videos Faster
Screen recording tips are my JAM! If you’ve been around my YouTube channel for a while, you know that a lot of my videos are screen recordings (A.K.A. screencast videos), and I usually use ScreenFlow to record and edit my screen recordings.
Now, I want to share 6 screen recording tips that you can use no matter what software you use, and whether you’re using a Mac, PC, iPad, or phone.
Some product links in this post are affiliate links, and I will be compensated when you purchase by clicking our links. Read my disclosure policy here.
Thanks to Envato Elements for sponsoring this blog! I’ve been a long-time Envato customer. Save 50% on the annual subscription here: https://vidpromom.com/envatoelements
I participate in various affiliate programs, including Amazon, and I sometimes get a commission through purchases made through my links here.
Screen Recording Tips
In one of my videos, I mentioned that one of the quickest and easiest YouTube videos for me to create is called a “Tutorial Sandwich.” It is a screen recording sandwiched between a talking-head, “direct to camera” intro and outro.
It’s quick and easy because I can record the intro and outro for multiple videos at one time with my hair and make-up done. Then, it doesn’t matter how I look for the screencast part because my face isn’t on screen.
That isn’t one of my six shortcuts. However, I wanted to mention it because my first shortcut is to use screencasts as a B-roll. Now, B-roll is extra footage that you use on top of your A-roll (the talking-head part of your video). It really helps make a more “professional” video because you’re showing other footage, and not just talking in your videos.
Sometimes, it makes sense to record your screen to use as a B-roll. But if you have a lot of things to show on-screen for your video, it might cost you a lot of time to edit the long screencast video to use as your B-roll.
VIDEO: 6 Screen Recording Tips – Make Professional Screen Recording Videos Faster
Click here to subscribe to Meredith Marsh on YouTube.
Record Screencasts as B-Roll

The first shortcut that I want to share is to record JUST WHAT YOU NEED. Yes, even if it means several short clips. This will make editing so much faster especially if you label each piece of B-roll accordingly. This will save you some time scrubbing through your screencast footage to find the right B-roll for your video.
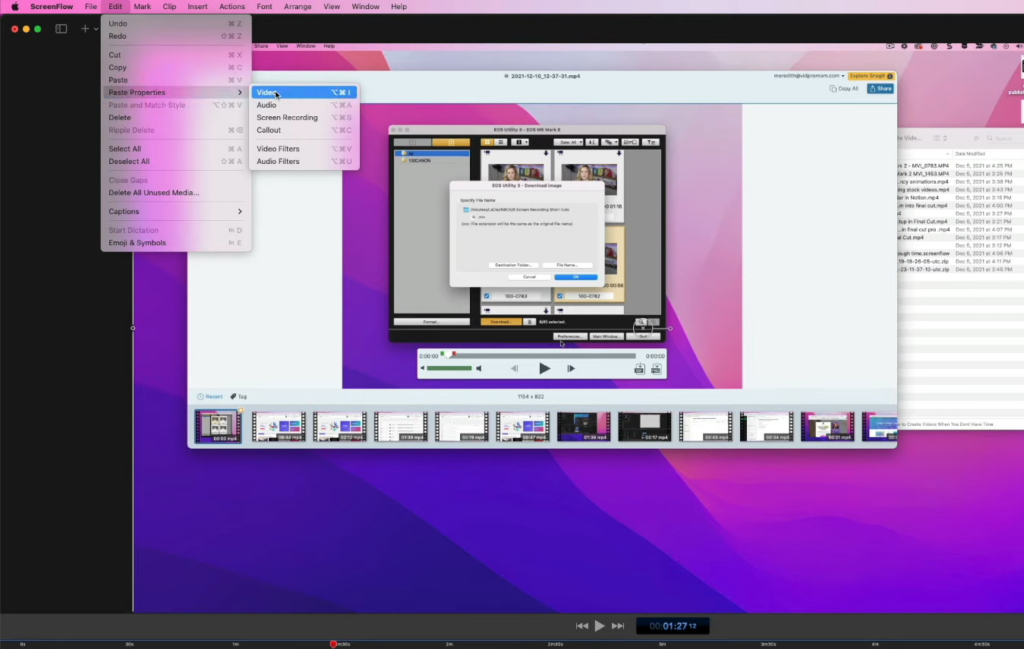
Copy and Paste Attributes and Properties

Now, I just recently discovered that this is possible in ScreenFlow. I want to point this out because I also do this in Final Cut Pro and I also think Premiere Pro has this feature too. Trust me, it’s a huge time saver.
Let’s say I’m editing a screencast and I had to zoom in and reframe the recording. To apply the same size and position of all the other clips, I used to copy the frame size and paste it into all the clips, then go back, and do the same with all the sizes.
But now that’s not needed anymore! I can right-click on the clip with the settings I want to copy, choose copy, and then paste attributes. That is a HUGE time saver.
Presets in Screenflow

Now, this shortcut is only for ScreenFlow specifically, as far as I know. But I have to mention it because you might also be able to do this with other screen recording editors.
When I edit a screen recording using ScreenFlow, I always try to remember to enhance a couple of details. Sometimes I forget and people complain in the comments, but I try to remember to make the mouse BIGGER on the screen. So it’s easier to see and follow. I can also set a highlight feature on mouse clicks and add a mouse click sound effect automatically any time I click something.
I think these effects make the screencast footage easier for the viewers to follow. However, it can be a real pain in the butt to add those effects to each and every single clip. Especially after you’ve done a lot of cuts and trims.
The shortcut for that is to create a preset and it’s really easy. In that way, all I have to do is make sure to apply the mouse preset and the click presets.
Mockups as Screen Recording Background

I’ve done videos before where I’m recording my iPhone or iPad screen, so the dimensions of the recording aren’t the same as they are for a YouTube video, which is 1920×1080, right? So you could get fancy with background colors or branding but, I have a shortcut for this that will make it look even better and quicker.
This is where Envato Elements comes in because you can download a mockup image. It could be a still image of a phone or iPad. Then, you put your recording over the top of that to make the recording look like it’s on the device itself. It’s a professional photo, so you can change the size however you need and adjust your screen recording to fit in the mockup space.
There are a ton of still images you could use as a background or flat lay for this. Some of them are already mockups, or you could download a flat lay, then a phone mockup, and put them together to make sense.
One really cool thing about Envato Elements is if you pay monthly for unlimited use of any of their images, music, stock video footage, graphics, fonts, and so much more. It’s really amazing! And you save half the price when you choose the annual option too. Make sure to use my link here to snag that offer.
Animated Arrows and Circles

While we’re still talking about Envato Elements, another thing that you can also download there is animations. Like arrows or circles. These are video files you can download and use in your screencasts to point things out on screen.
Now, as much as I love ScreenFlow, it can be difficult to create arrows or circles, and then to animate them is much more. So with stock animations like this from Envato Elements, you can simply import and position them however you want. You don’t have to use Screenflow for this, you can use any video editor.
Create Desktop Background with Screencast Dimensions

Okay, I haven’t had this in a while but I recently set this up again because it’s so helpful and I’m dying to share this tip.
So you know how when you go to record a screencast, you can record your whole screen, or a section of your screen, right? Well if you do your whole screen, that’s way bigger and may not be the same dimensions as your YouTube video. That means you will have to zoom in or reframe the screencast. And if you scale it down and say, just record 1920×1080. For mac users, your menu stuff at the top of the screen isn’t in the recording, right?
Now, what I did is I took an image in Envato to use as my desktop background. I uploaded it to Canva with the same dimensions as my screen. Then, I created an almost invisible box on the upper left-hand side of the screen. This will let me know exactly where to place the window that I’m recording. I know where to keep other windows and desktop items that should not be in the recording. As an extra, I can also throw my branding right inside of that screen portion, if I want to.
Once you export the background, just throw it onto your desktop in the settings, and ta-da! Now, your top menu is visible when you’re screen recording. And you still have the background image you want on your desktop, with just a small mark to let you know where your recording space is.
More Screen Recording Tips
Lastly, if you’re looking for some cool background images, you can find those at Envato Elements too. Be sure to use the link here so you can save 50% on your annual subscription. And if you like shortcuts, you can check out my video on how to create videos when you don’t have time to create videos, and don’t forget to subscribe!
