Simple Video Settings for YouTube Videos
If you have a mirrorless or DSLR camera and you're wondering what video settings for YouTube videos are best, you're in the right place. Have you been asking yourself questions like, “What are the right video settings?” “How can I make sure I look like a pro in my videos, even if I'm not a pro?”
Well, I've got you covered! I'll show you my basic YouTube setup for talking head video using a Canon R10 mirrorless camera. These settings work for any camera. They're pretty universal, so let's dive in!
Watch the Video: Simple Video Settings for YouTube Videos (Any Camera)
Basic Camera Setup for YouTube Videos
I won't scare you with camera jargon. We'll begin in automatic mode, then share manual mode tricks. The basic setup is the same whether you're shooting in auto or manual.
This is for YouTube beginners starting with camera videos. I'm showing only the basics, not every menu item. It's universal for any camera brand.
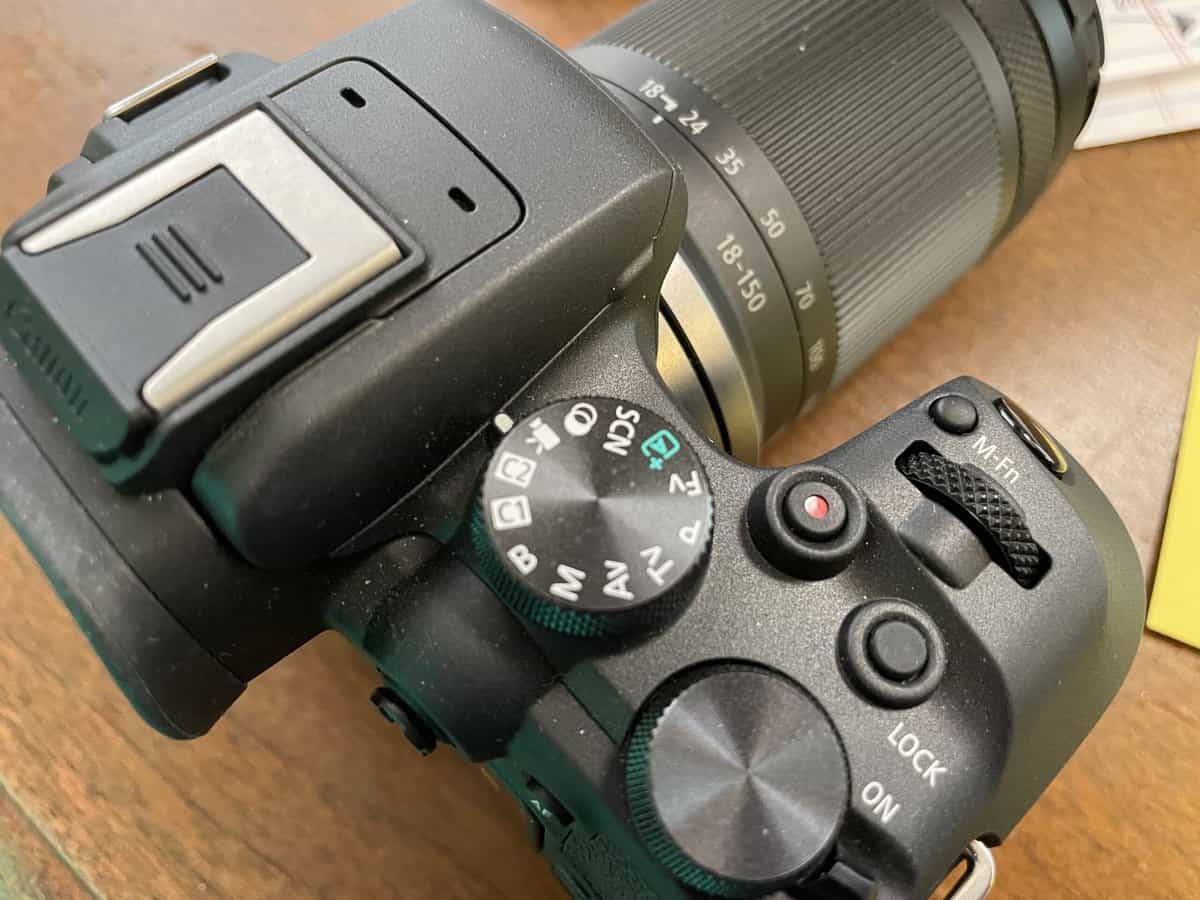
First, make sure your camera is in video mode, not photo mode. On my Canon, I have it set to that little video camera on the mode dial at the top. This might seem obvious! If you use your camera often for photos and videos, or it's new, it may not be in video mode. You'll know when you can't find the settings.
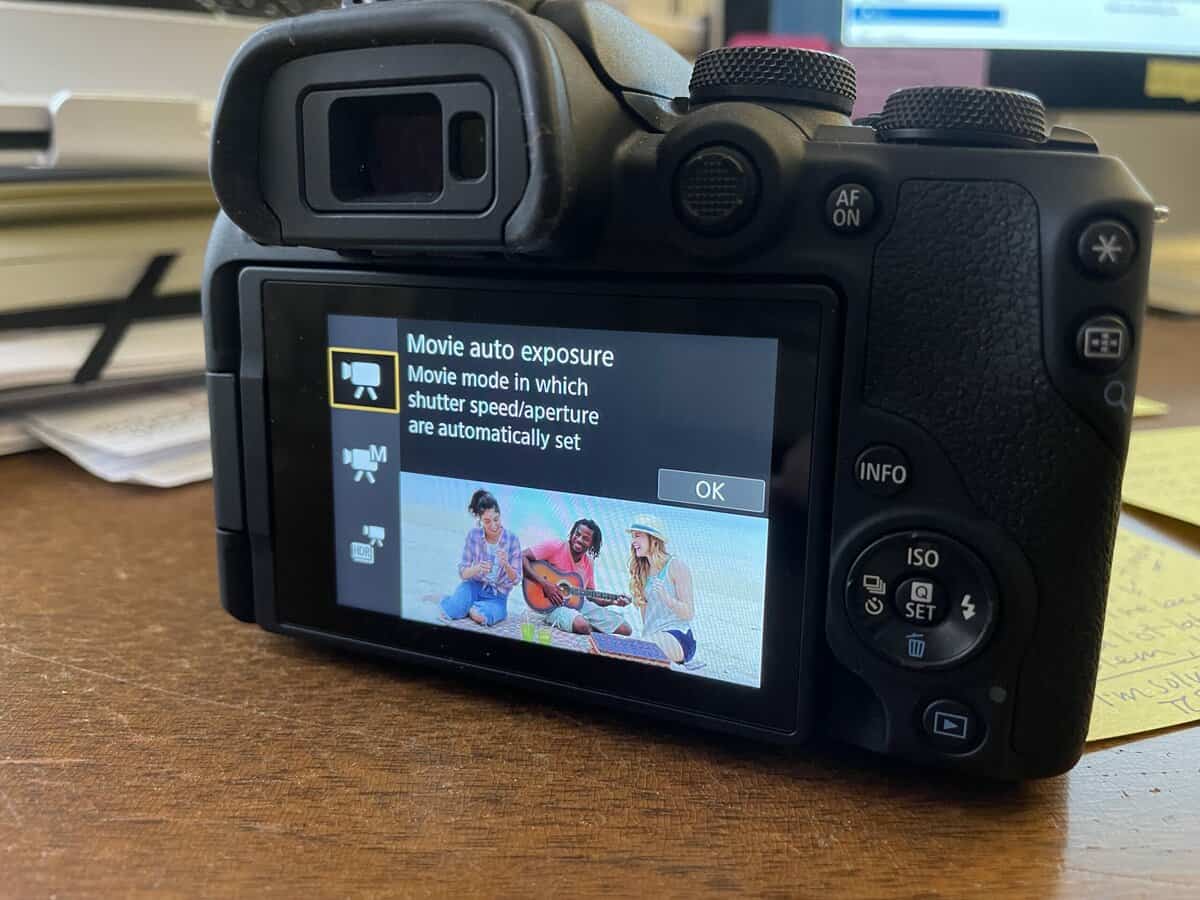
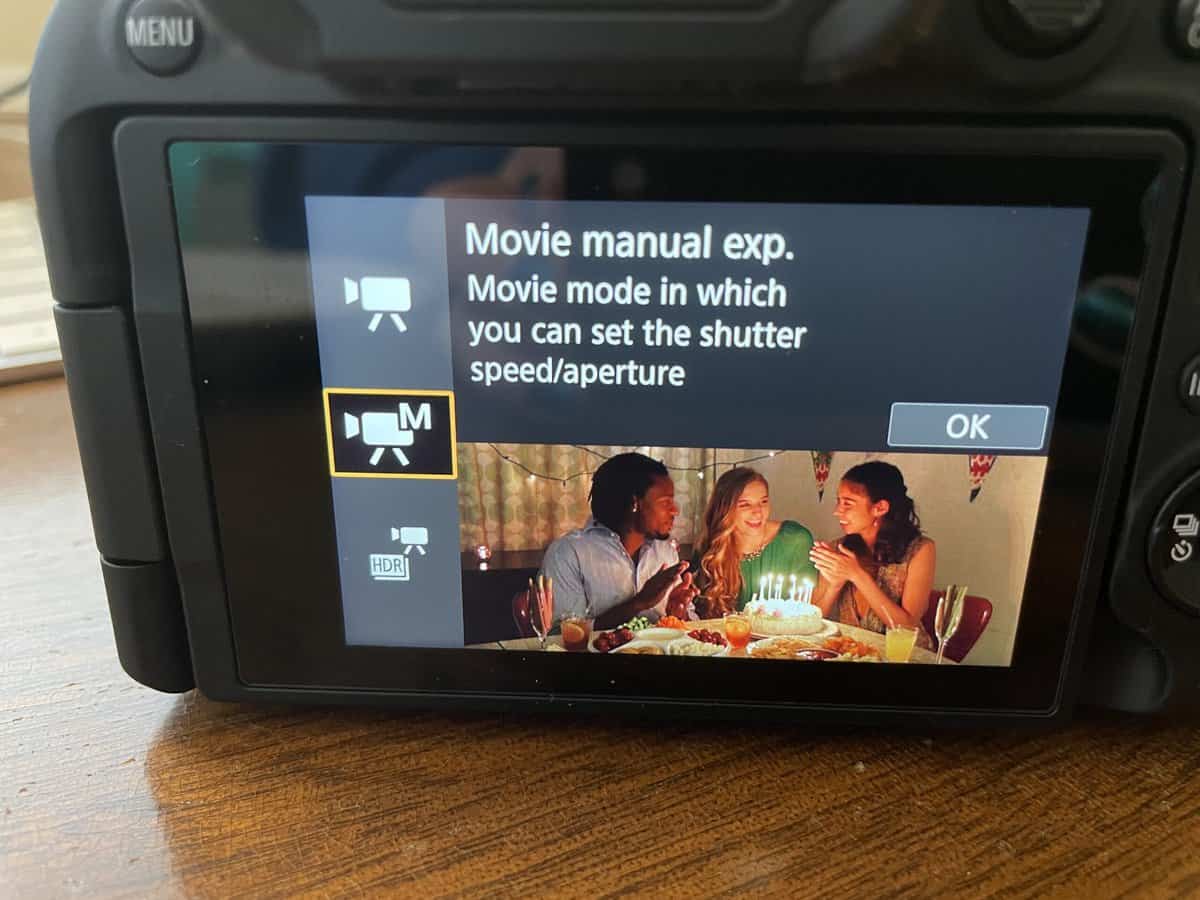
If you're using a Canon and your menu setup is similar to mine, you'll see the shooting mode option. Make sure it's set to movie auto exposure, not the one with the “M” which would be manual. That way, all of our automatic settings are set up.
Important: If you're not sure where to find these settings, it's best to watch the complete video at the top of this post or click here to watch on YouTube.
Set Resolution and Frame Rate
To set the resolution and frame rate, tap on the “movie record size” option. The options available here are important for video quality and your own personal preferences. For a basic YouTube video, such as a talking head video, I stick with 1080p resolution and 30 frames per second.
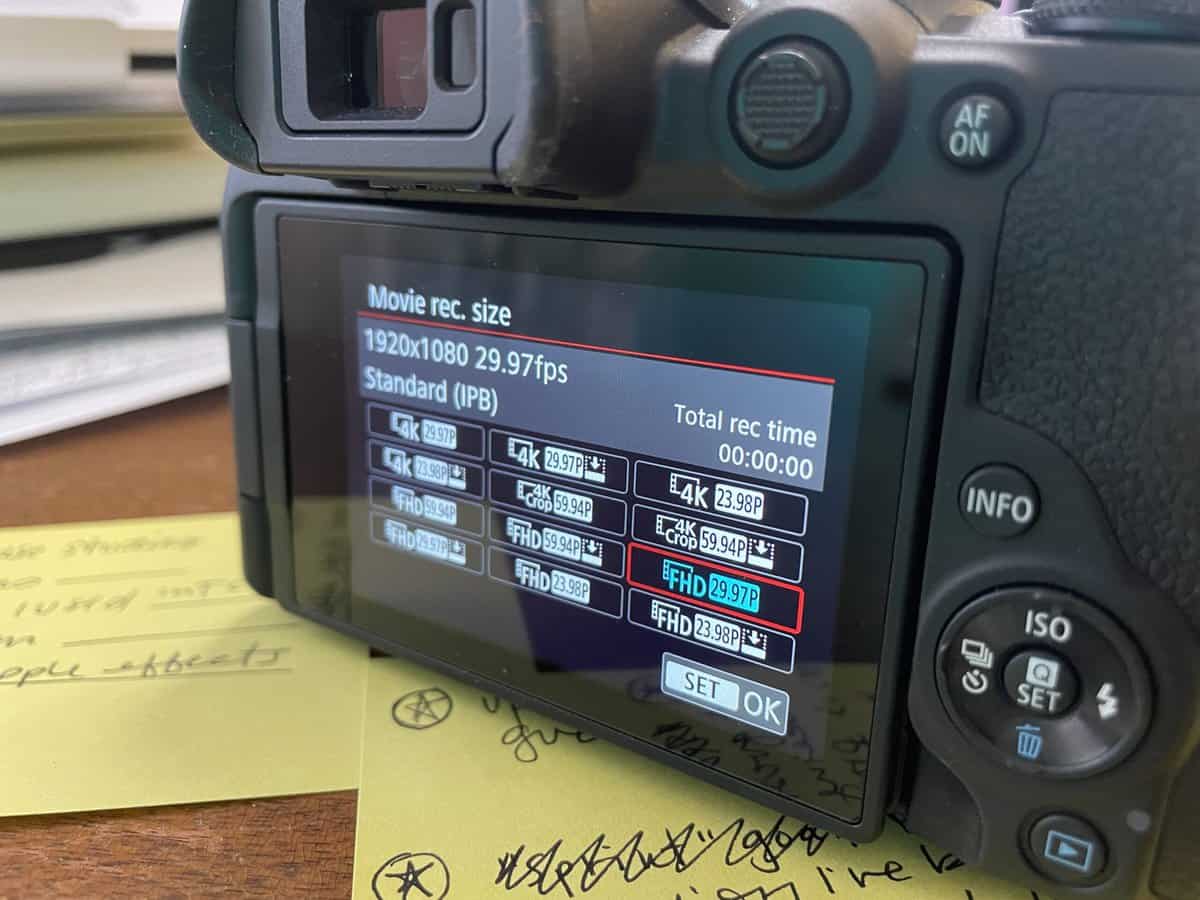
On my camera, you can see that I have selected FHD 29.97, which shoots at 1920 by 1080 pixels and 29.97 frames per second, which is 30 FPS. If your camera can shoot in 4k, you can choose to shoot in 4k, but the file sizes will be larger, and it might take longer to edit. Therefore, it's best to stick with 1080p, especially if you're just starting out.
Sound Recording Settings
When filming a video, it's essential to consider the sound quality. If you're using the onboard mic of your camera, be aware that it will pick up all the sounds in the room, including unwanted noises like wind, HVAC, or even barking dogs down the road!
If you're far away from the camera, it will struggle to pick up your voice, which could result in poor sound quality.
While it's best to use an external mic like the DJI wireless mic, especially if you plan to vlog or record from a distance. When using an external mic, it's crucial to set the recording to manual and adjust the settings. Recording good audio during filming is much easier than trying to fix it later.
Related: DJI Mic Settings for YouTube Videos
White Balance Settings
Next, let's discuss the white balance setting. The white balance setting is crucial because it determines the color temperature of your video. By leaving it on auto, the camera will adjust the color temperature based on the lighting in the room, giving you a more natural look. However, if you prefer to play around with the white balance, you can do so, but it's important to keep in mind that different lighting conditions may require different white balance settings.
Personally, I keep my white balance on AWB (Auto White Balance) because I like the look that it gives me in my space and I don't have to fiddle with the settings for every video.
Auto-Focus is Best for “Talking Head” Style Videos
Auto-focus is particularly essential for talking head-style videos. With auto-focus, you can set your camera to track your face and keep it in focus, even if you move back or forth. This is especially useful when creating a talking head video because it ensures that your face remains in focus. Some cameras have advanced features like eye detection, which will track your eyes and ensure they remain in focus throughout the video.
Remember: If you're not sure where to find these settings, watch the video at the top of this post or click here to watch on YouTube.
Video System: NTSC vs PAL
It is crucial to select the right video system setting to ensure your video is not only perfectly exposed but also matches your country's frame rate. If you are in the United States, set your camera to NTSC, and if you are in the UK, set it to PAL. You may not know which one to use, and that's fine… a quick Google search will do the trick. If you select the wrong video system, you will not have the same frame rate options.
Shooting Videos in Auto Mode
If you're new to shooting videos, start with the basics by keeping your camera in auto mode. It is that simple! You can set up your shot, turn on your lights, and just start recording. It may take some practice before you feel comfortable with the look of your video.
When your camera is in Auto Shooting mode, your camera will automatically adjust your ISO, shutter speed, and aperture (f-stop), ensuring your video is perfectly exposed.
Recording YouTube Videos in Manual Mode
If you want to take your video to the next level, you can switch to manual mode. While many find manual mode daunting, it's not as complicated as it sounds. In fact, if you ever learned about the “exposure triangle” for photography, the concept is the same but nowhere near as complicated! That's because you don't usually have to constantly change settings as you record.
In manual mode, you can adjust shooting settings such as shutter speed, aperture, and ISO. You can also see if you're correctly exposed with the meter on the camera screen.
Shooting Settings for Talking Head YouTube Videos
Now let's talk about the shooting settings for your talking head YouTube video. I regularly use my Canon M50 Mark 2 with a Sigma 16-millimeter lens, as it is amazing for talking head videos (and super affordable, as far as cameras and lenses are concerned).

In this YouTube video, I show that my video is exposed well and share my manual video settings. But how do you achieve a professional look without being a professional? Well, it all starts with understanding the exposure triangle, which is made up of shutter speed, f-stop (aperture), and ISO.
Shutter Speed for YouTube Video
This is a pretty easy one! You can think of the shutter speed by doubling your frame rate. If you are shooting at 30 frames per second, your shutter speed should be 1/60th of a second. You don't have to adjust that or change it at all (ever!) unless you change your frame rate. Just set it and forget it!
F-Stop (aka Aperture)
Once your shutter speed is set, move on to your f-stop. Your lens determines the aperture, which affects the amount of light and focus in your frame. Lower f-stop numbers (like f/1.4) allow more light into the camera, making lenses with a lower f-stop great for an at-home studio situation where you may not have a ton of studio lights.
Lower f-stops also create a shallow depth of field, which blurs the background, adding depth to your video. I LOVE a blurry background, but my office is tiny! So in order to create depth (and blur), I use a lower F-stop. I usually have my F-stop set to about 2.0.
Now the lens on your camera may not go that low. Generally, you want your f-stop to be between 1.8 and 3 for a talking head video, but it really does depend on your space, your setup, and your preferences.
ISO
The last setting to set for shooting videos is ISO. ISO affects your camera's sensitivity to light, and for the best quality, you want to keep your ISO as low as possible. This is why it's the LAST setting in the exposure triangle… because you can't change your shutter speed (as it's dependent on your frame rate), and you use your f-stop to get the look you want. The ISO will get your exposure right… but remember your camera needs light in order to do its thing! So if your ISO has to be above 400 or 600, you might want to look into investing in some studio lights.
In conclusion, setting up your camera for creating YouTube videos is not as difficult as it seems. These basic settings are universal, no matter what brand of camera you're using. If you're a beginner, stick to these settings for now, and as you become more comfortable creating videos, you can experiment with more advanced settings.