How to add Text and Titles in iMovie
Add text in iMovie! In this blog, you'll discover how to add text and titles to videos in iMovie, plus create custom titles, transparent backgrounds, and animated text in iMovie.
Some product links in this post are affiliate links, and I will be compensated when you purchase by clicking our links. Read my disclosure policy here.
Add Text in iMovie
Adding Text and Title to Your Videos
In this blog, you're going to learn how to add text in iMovie, including how to add titles, animated titles, credits, callouts, and so much more. If you have been following along in this “iMovie for Beginners” series, then you have probably read my blog post on how to get started, how to get set up, and how to start editing on iMovie. All of the simple steps that you needed to take to start your project in iMovie.
Of course, you probably want your video to look great. Maybe you want it to be professional. Maybe you want it to be a little bit polished. Well, fortunately, all of these capabilities are baked right into iMovie, which is awesome. But there are also other ways to customize your titles and tags, so we'll cover both ways here.
Related: How to Create Custom Thumbnails
4 Ways to Add Text and Titles in iMovie
As you probably already know, iMovie is an app for your iPhone and your iPad. However, for this video, we're going to be talking about iMovie on your Mac. Actually, I'm gonna show you four different ways to create and add titles within iMovie using iMovie's tools, and using one of my favorite tools to bring some custom titles into iMovie as well.
If you've been following along in my iMovie for Beginners series, we started off in the last blog by editing my “How to Make Slime” video inside of iMovie. I covered how to get started in iMovie as a complete beginner. If you missed that, check it out here. At this point, you may be wondering how to make your videos look really cool with some title screens? How do you put words on your screen?
#1: Add Text Overlay Title
The first way that I want to show you would be a text overlay title, so the text is overlaid over the top of your video clips. That's a really cool way to start with your titles.
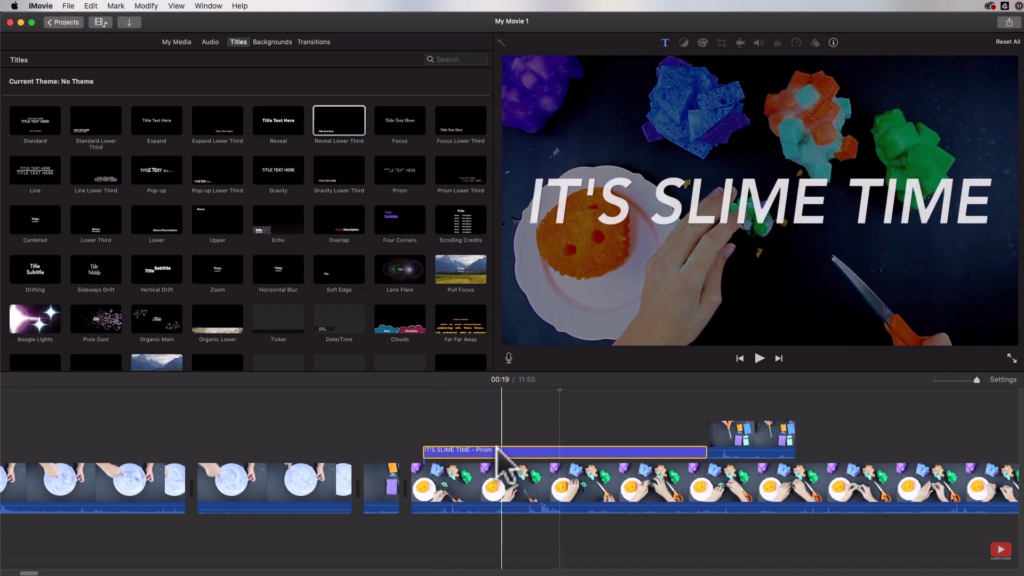
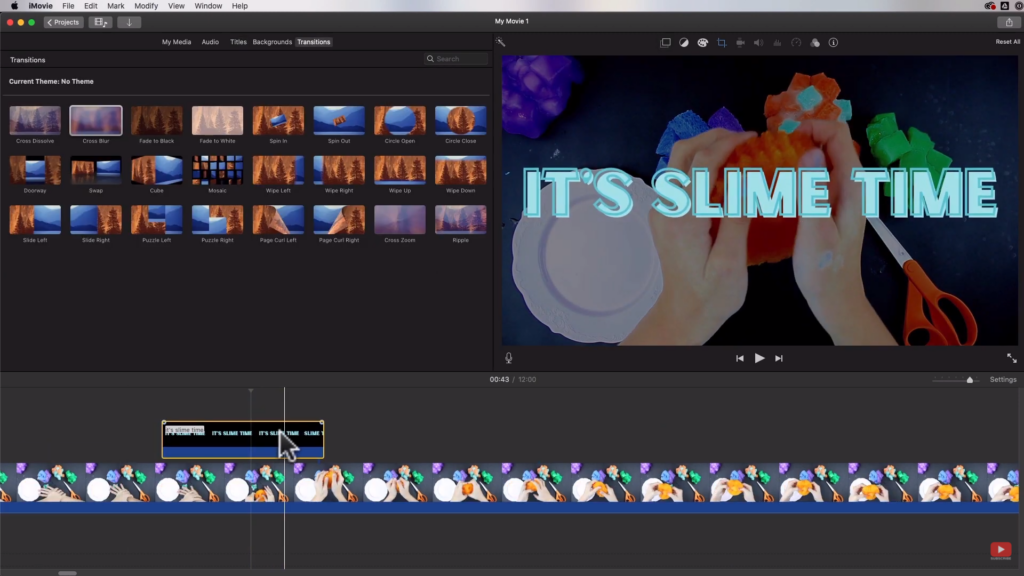
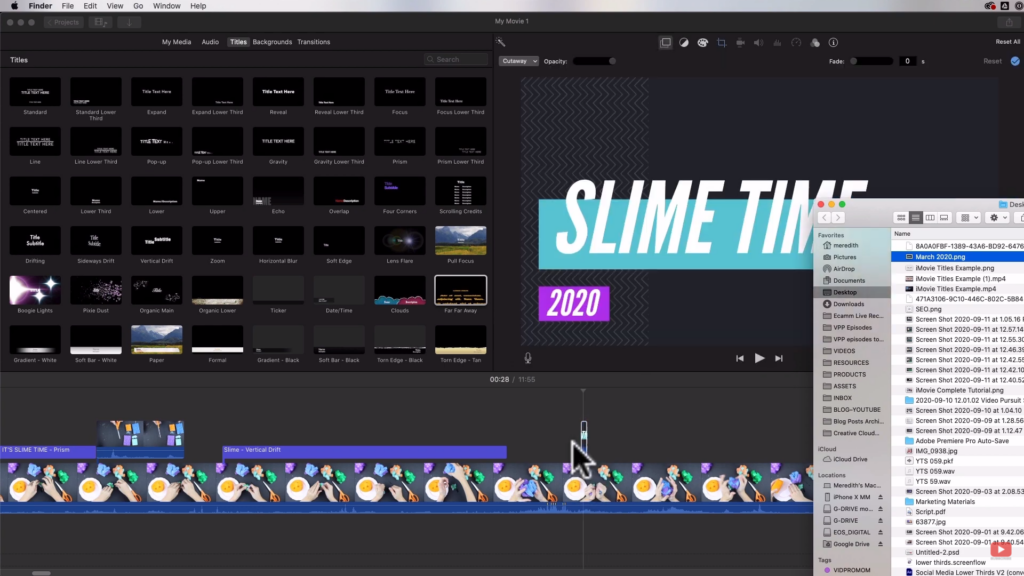
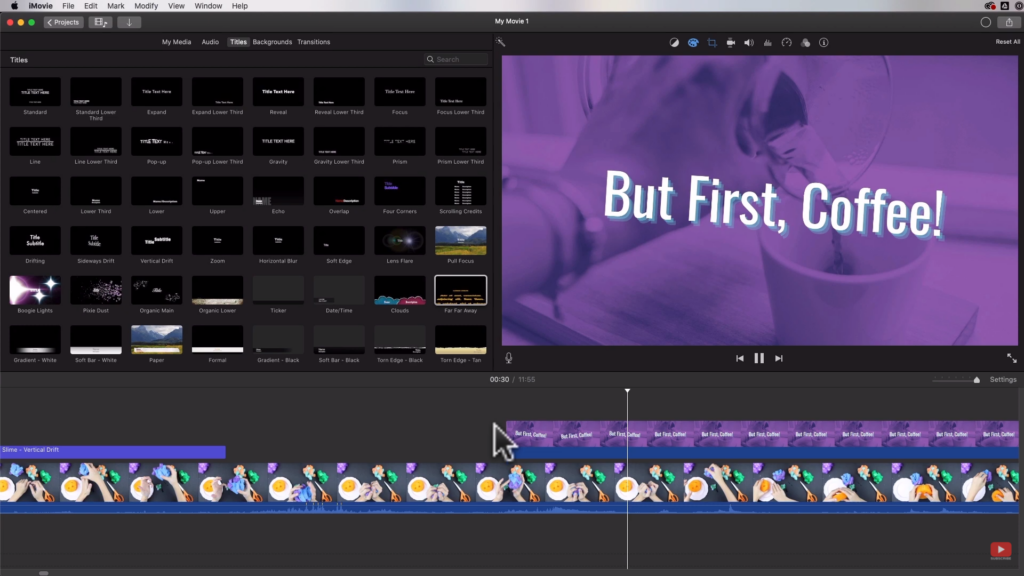
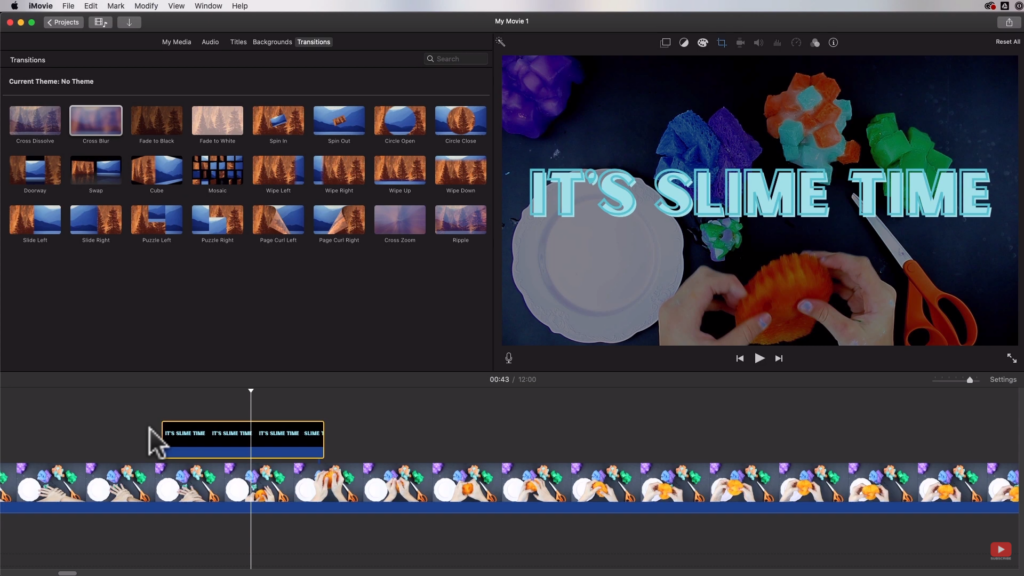
I created a title here called, “It's Slime Time” and it has a little animation. On the left-hand side of your iMovie, you have your “media” bin where all of your project files are. There's an “Audio” area, and there's the “Titles” section.
That is where you can find all of the predesigned pre-animated titles that iMovie already has for you. There's a ton to choose from, and all you have to do is just roll your cursor over those effects. You'll see in the preview window exactly what they will look like when they are animated.
Adding Text Effects in iMovie
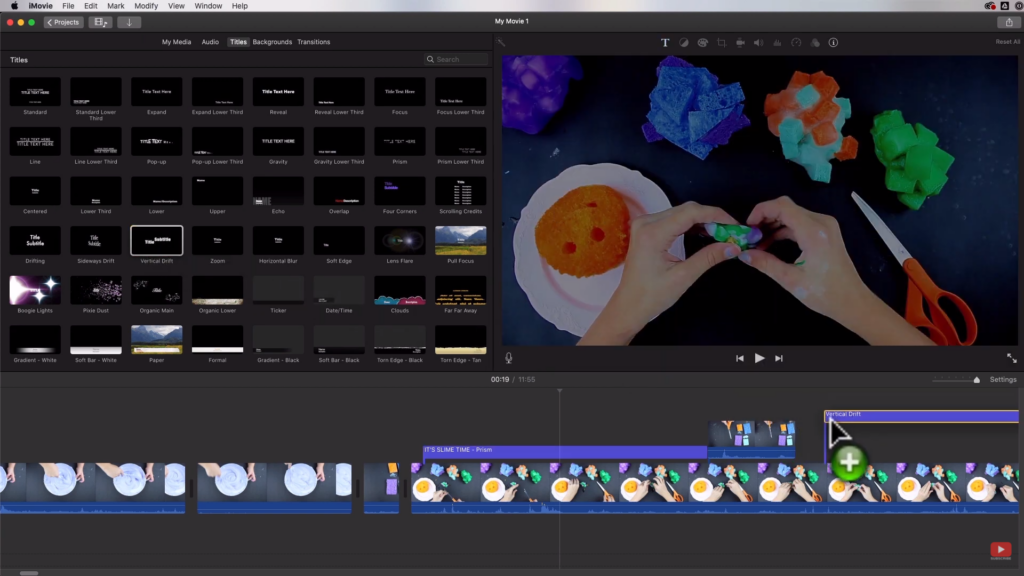
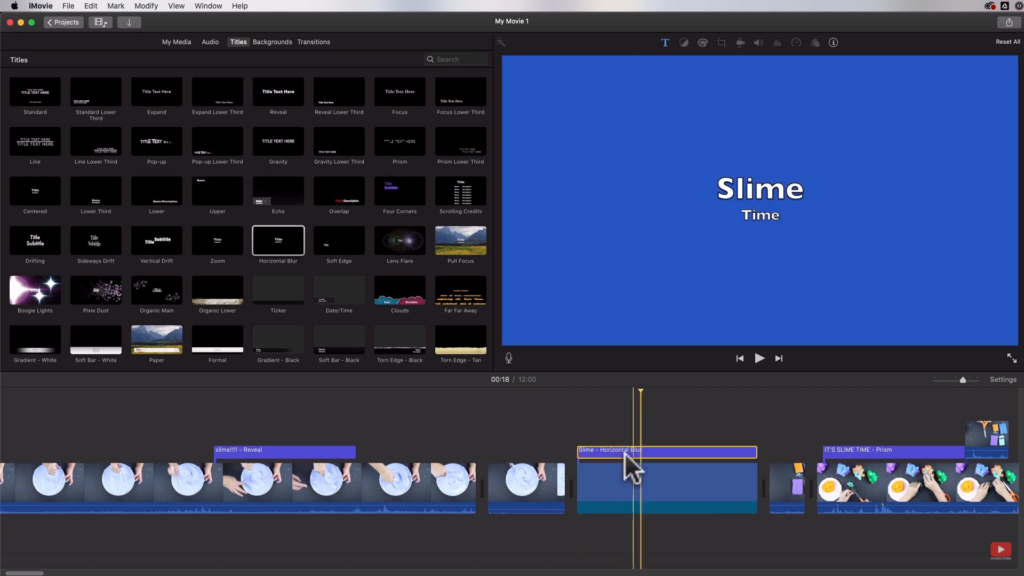
You can see how those are going to actually look. There's a pixie dust effect, boogie lights, and many more. So those are kind of cool too. You can explore those effects on your own and see what might work for you. Once you've decided, you're just going to click the effect and drag it down to your timeline. You will see that the title is over top of the actual video that is on your track right there.
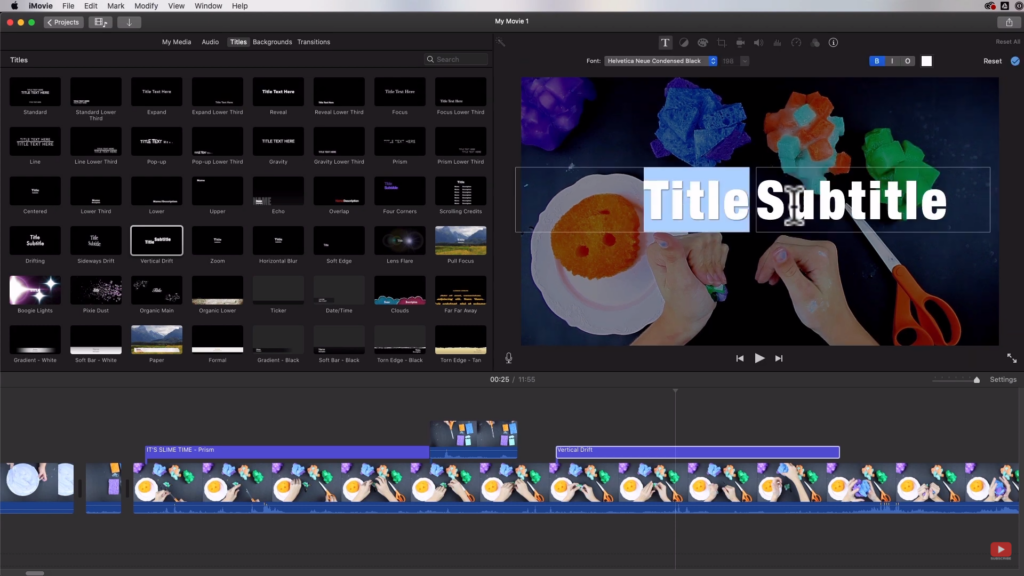
That's the way that we want it to be for this example. If you scrub through it, you can see the video behind there playing. Then the title is just simply laid over the top of that and it's automatically animated. As you can see, I have two text boxes. All I have to do is double-click on those and then I'm able to edit them.
Customizing Title Screen Font and Styles
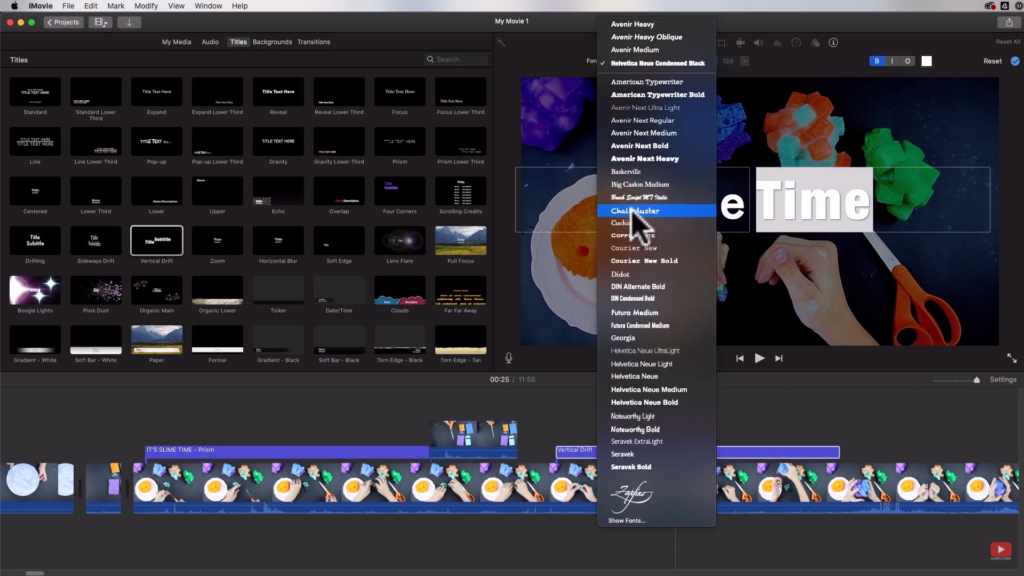
We can also change our typeface to anything we really want. You could mix those fonts up a little bit if you really wanted to. Usually, I like to keep things pretty much the same and you can even have it selected. You can choose bold, italic or you can have it outlined.
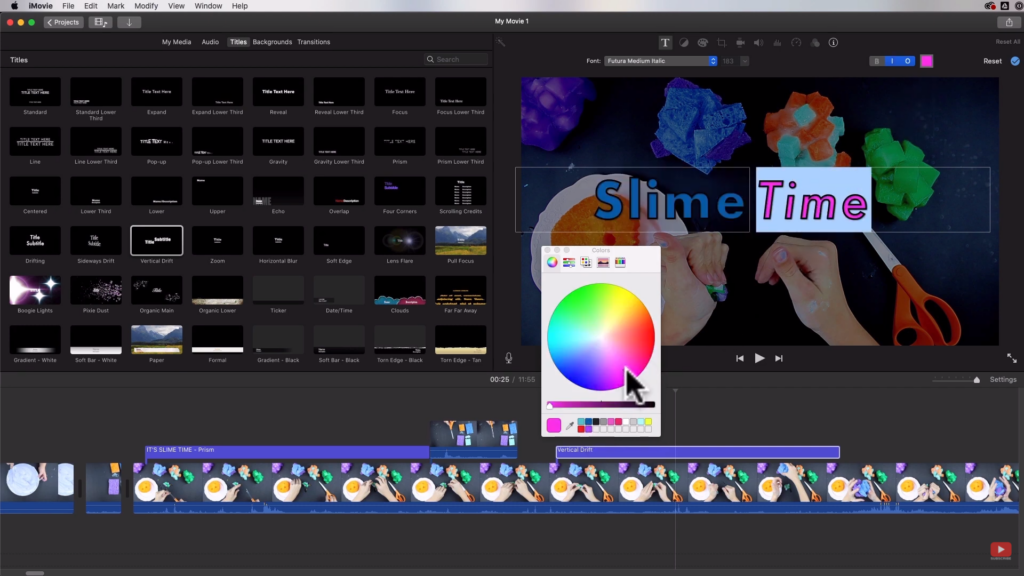
If you click on the little white box on the upper side of the preview window, you're going to get the color wheel so you can actually select what colors you want the text to be.
We're going to hit the little blue checkmark here once we're done and you can see what it looks like. There are a lot of great effects like prism, credit roll, vertical drift, and so on. There are a whole bunch of effects to choose from.
#2: Add Text With Solid Color Background
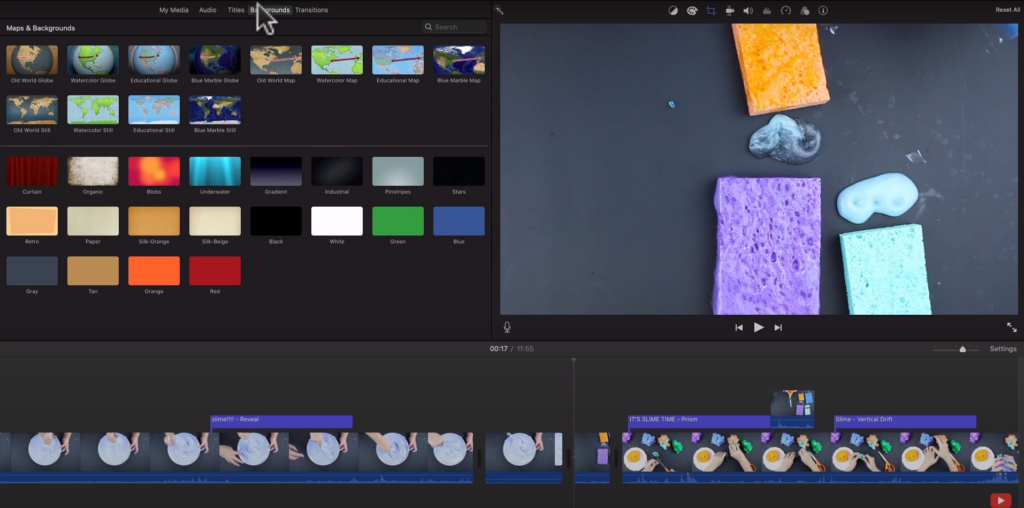
If you wanted to add a title screen with a solid color background, for example, you can follow these next steps. Under the “Backgrounds” tab on the left-hand side, right next to Titles, there are some animated backgrounds there that you could use if you wanted to.
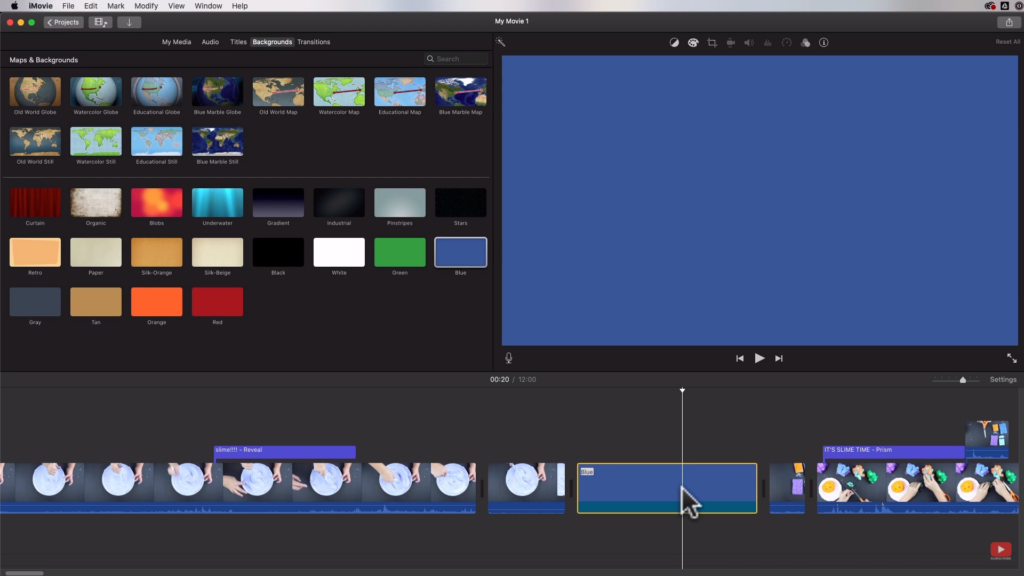
If you just want to have a solid color, you can choose one of those colors. Then, you can drag it down to the timeline right to where you want to place that title screen. It acts as a video clip or a still image where you can adjust the duration of that clip. By doing that, you can have a background for your title that is not over the top of the actual video clips, but has its own background.
Adjusting Color Tones and Saturation.

If you wanted to adjust the color of the background, you can come into the color palette and you could change the saturation of the color. You could also mess with the color temperature and other features like that. If you want, you could also switch to one of the other colors over at the Backgrounds tab.
Once you're happy with it, you can come back over to the Titles tab, choose one of those text effects, and drag it to your timeline. It is the same thing we did for the first one, but this time it is overlaid on a solid background color. So that is what it's going to look like.
Adding Transitions
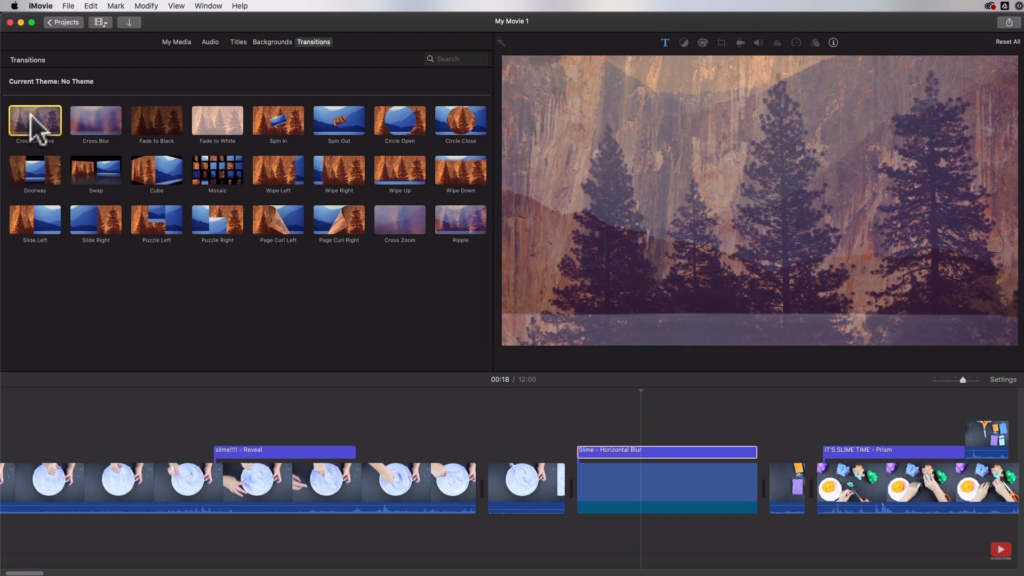
One thing you could do to get a little fancier and more customized with it is add some transitions. Just simply head over to the Transitions tab, then drag the transition that you would like for both ends of your title screen.
#3: Adding Your Own Branding Elements
The third way to add text inside of iMovie, if you want to get a little bit fancier and a little bit more custom, add in your own branding elements, your own typefaces, or anything like that. What I'm going to suggest that you do is to come over to Canva. I've created a couple of templates there that I'm going to share with you.
Now, I have a paid Canva account, which allows me to do a couple of other fancy things, but you can still make some really cool iMovie titles in Canva with the free account.
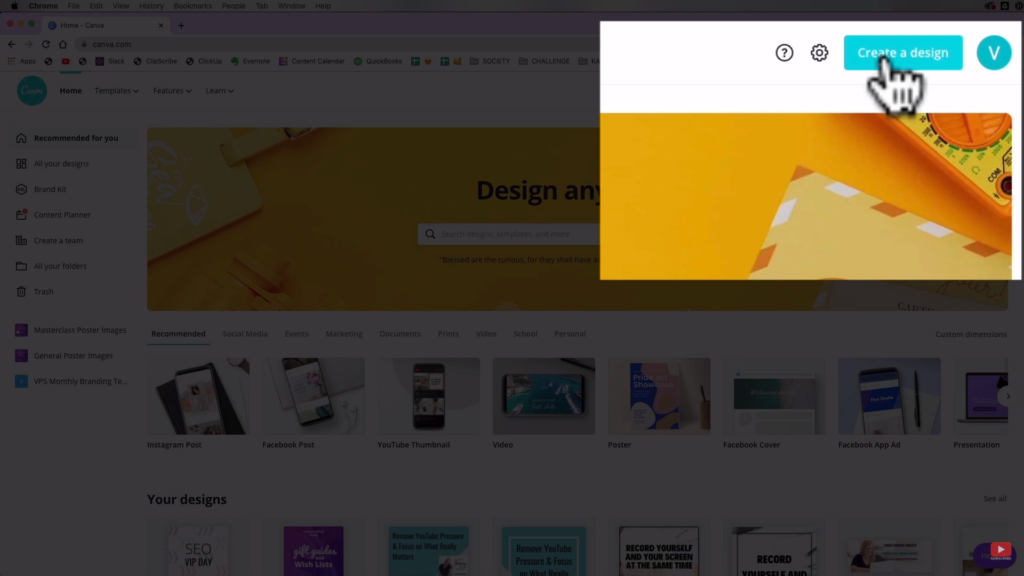
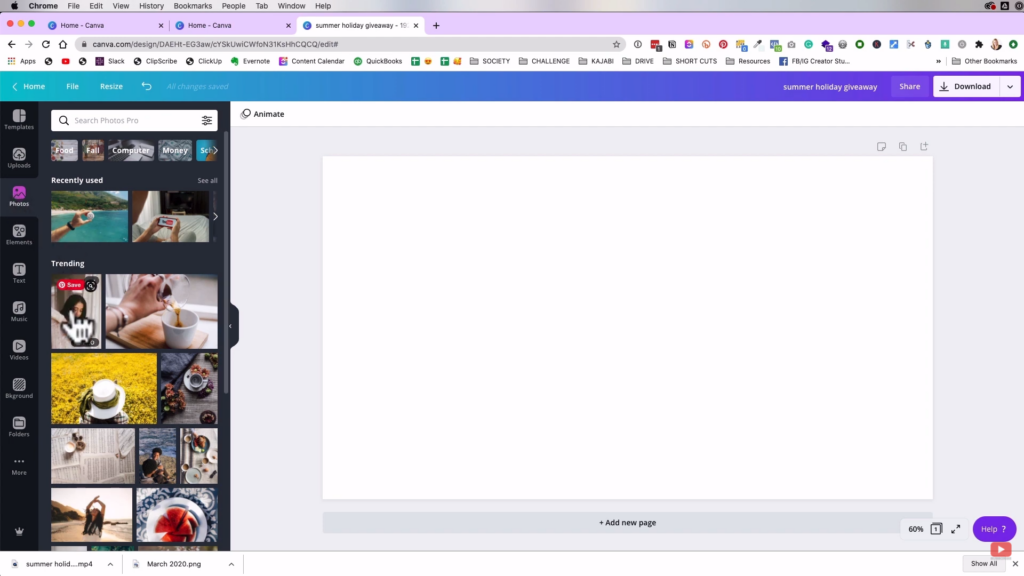
The first thing we're going to do there is come up to the top right, then hit Create a Design. Just choose custom dimensions. For me, I use 1920 by 1080 because that's the resolution of the video that I have in iMovie. So I'm going to hit “create a new design”, and it's going to give you a blank canvas and there, you can do anything you want.
Creating a Title Screen Using Canva
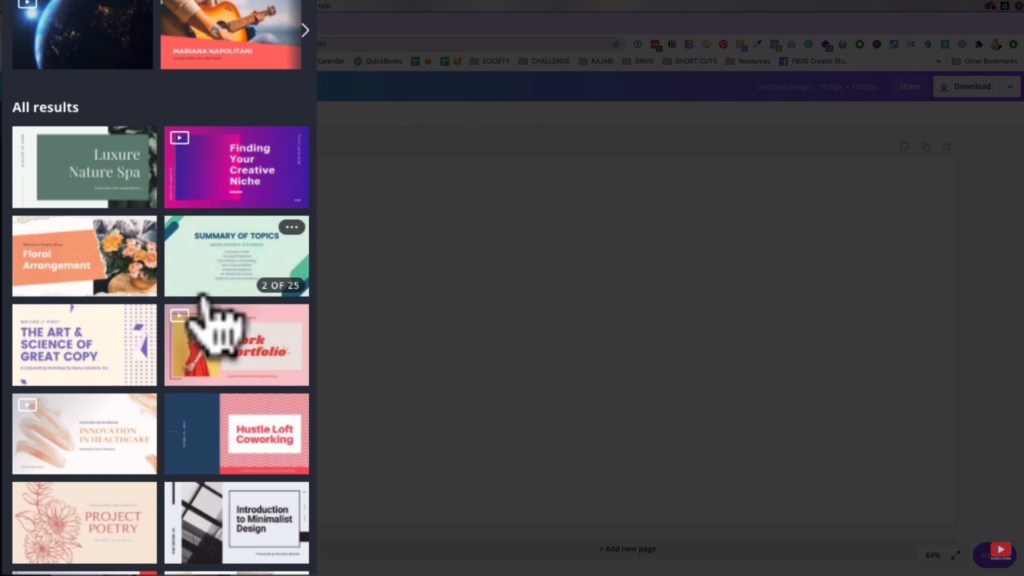
You can create something completely from scratch. However, if you aren't comfortable with your own design skills, you can use some of these predesigned templates that actually look really nice inside of Canva.
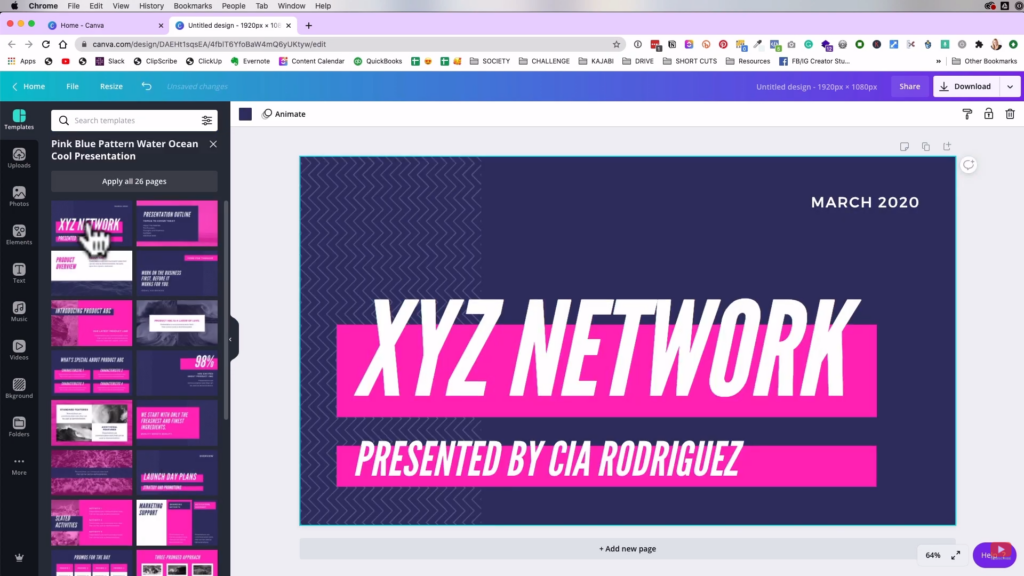
Once you find one you like, you can just select it, and then it's going to show up here as the right size and everything. If you select the background, you can change the color to whatever you want it to be. You can totally customize this for your own preferences, whatever you think is going to work best.
So you now have a design that took you like 45 seconds or something to make, right? In the top-right, you can just hit Download. You would want it to be either PNG or JPG file format, then just hit Download.
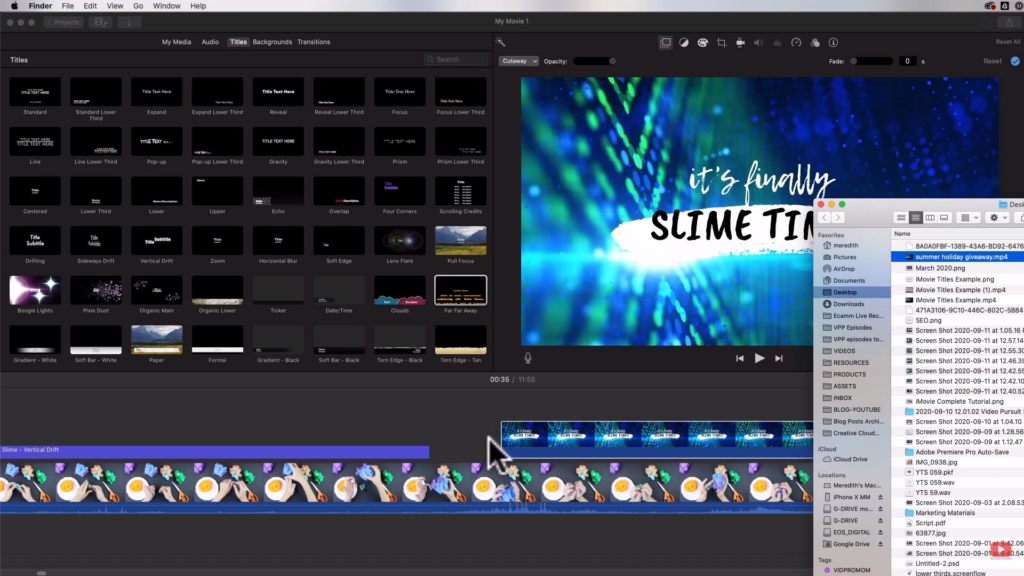
Importing to iMovie
Once done, you can just pull it into your iMovie project. So all you have to do is simply drag it down to the timeline and it's going to import itself right where you place it on the timeline. You can treat it just like a video file, just like you are importing a video clip. That is just an image, like importing a photograph.
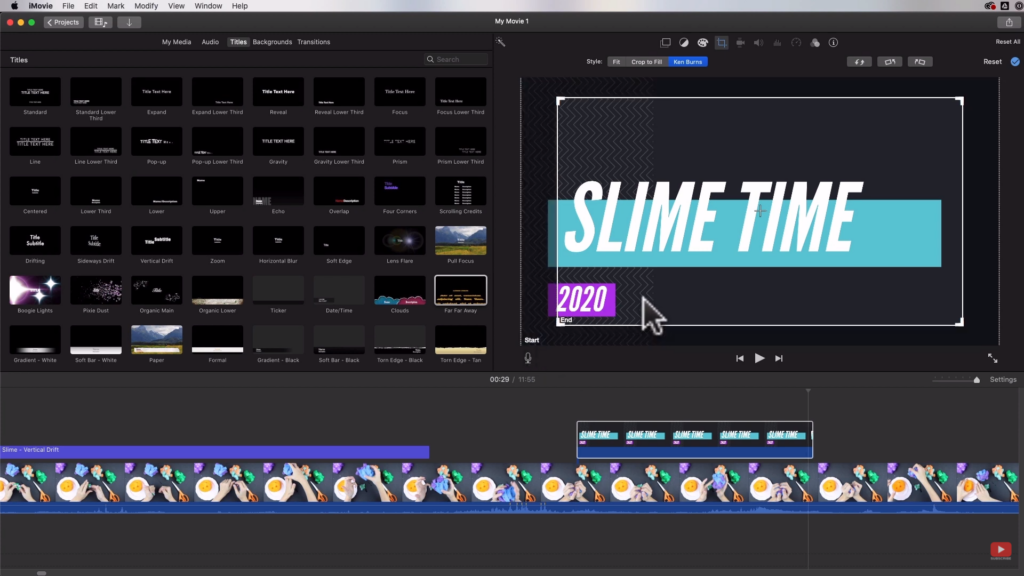
You'll probably notice that there's a little bit of animation happening there if you scrub through it. That's because, by default, when you import a still image or a still photo into iMovie, it's going to apply the Ken Burns effect. I explained what the Ken Burns effect is in the complete iMovie tutorial video. Basically, the Ken Burns effect is an effect where you have a starting place and size, and then an ending place and size.
Video Backgrounds in Canva
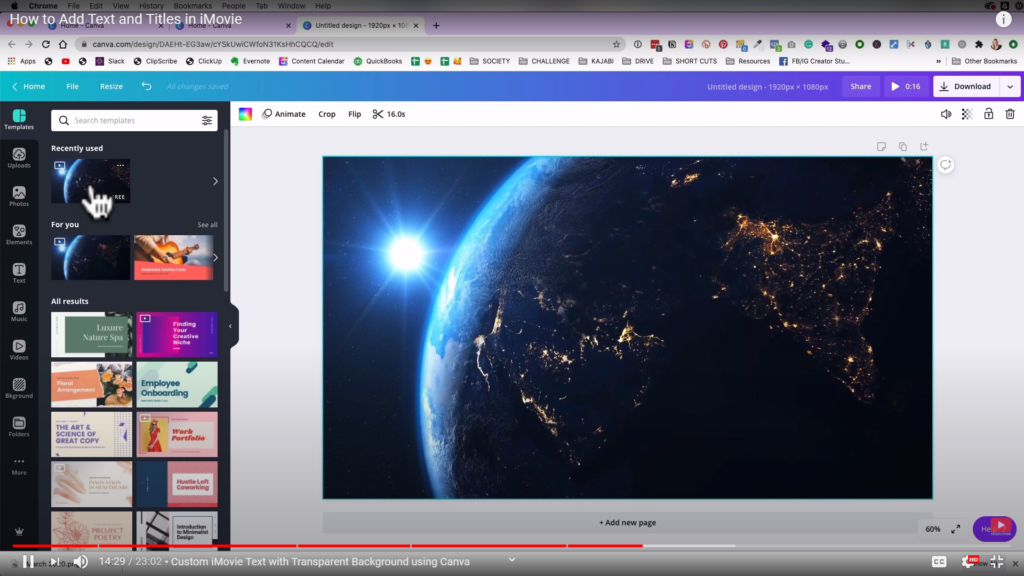
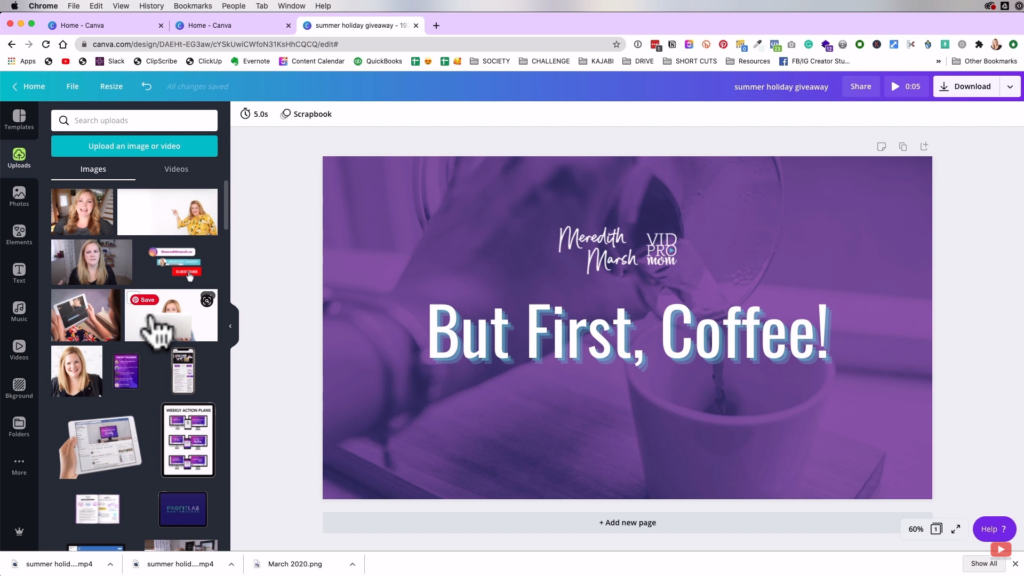
So that's what you can do inside of Canva but there are a couple of other really neat tricks though. An example is this background that I created in Canva where the Earth is rotating. I just found this animation, which I thought was pretty cool. So that's what I used for my background, and I just added some text to it for my title.
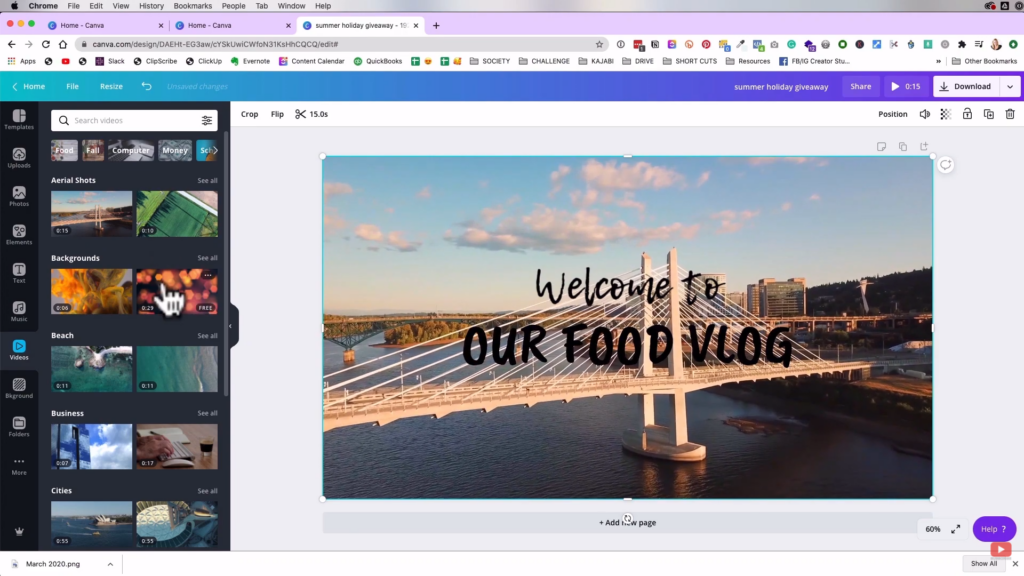
There are also lots of other animated backgrounds that you can use in Canva, like this moving aerial shot as a background. So you may want to incorporate something like that and then all you have to do is just add your texts to those backgrounds.
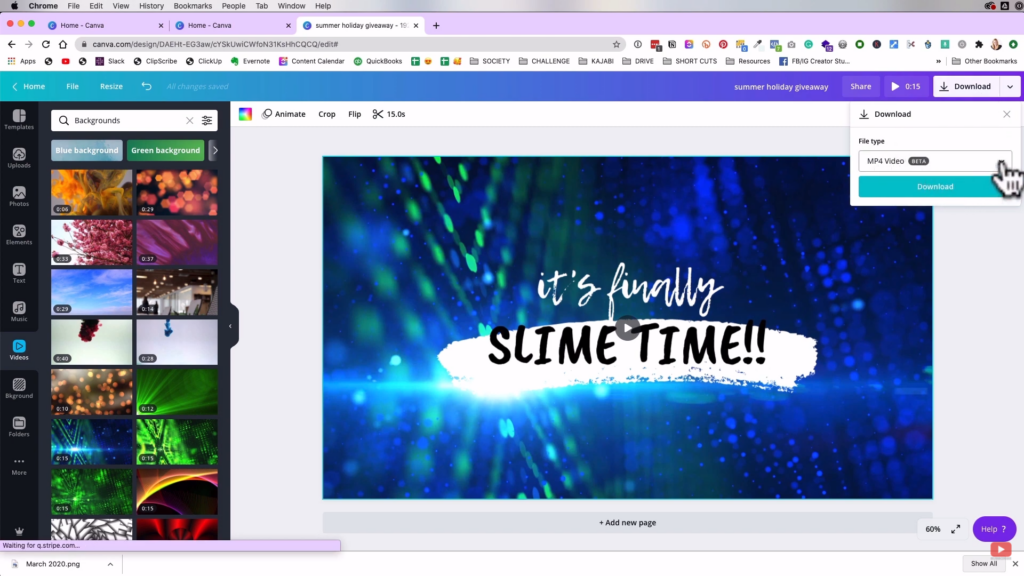
You can see the duration of your clip at the top right,, and if you hit download, it's going to download as an MP4 file. So that is a video clip. Then, you're just going to hit the Download button there.
Once done, you can simply come back to iMovie, then just drag the file down to your timeline. So that's pretty rad. I mean, again, it took us just under 2 minutes to create it. You can create as many titles as you want for your video, as many as you need. Then, just import them into iMovie as your title screens.
Creating Multiple Title Screens at Once
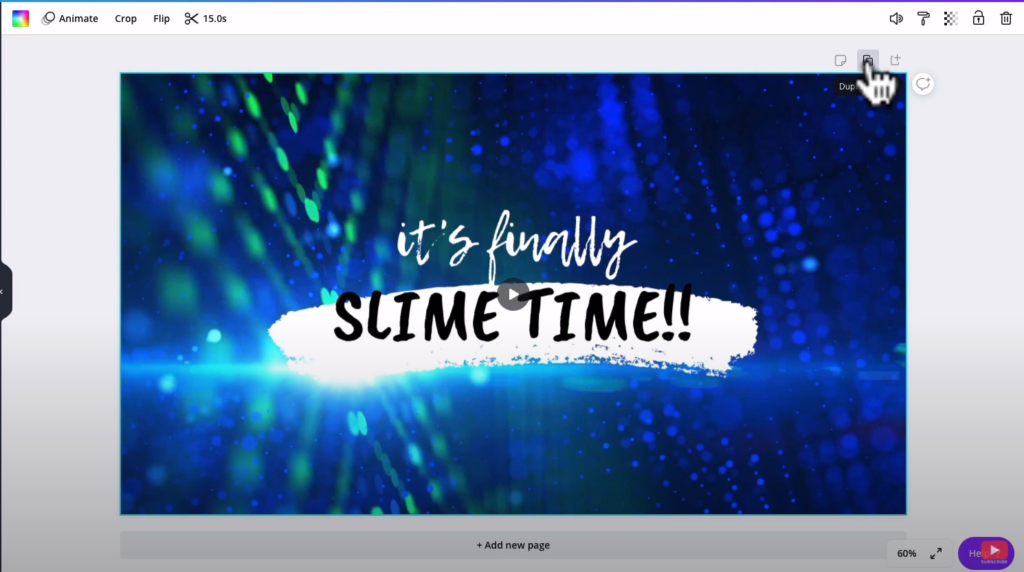
Now, one really quick way to create more than one title screen in Canva would be to just hit “duplicate page” if you are already good with the design and colors. It will create another page while keeping the same background and then you can just edit the texts to whatever your next title screen says. Then, you can download all of those pages at once. You can design the titles all at once and then download them and import them into your project.
Animated Title Screen in Canva
Now another thing that I want to show you here inside of Canva is that you can come over to Photos, and import your own photos into Canva and use those as backgrounds. You can also use their free photos if you have a free account. Or if you have a pro account like I do, you could use their pro images as well.
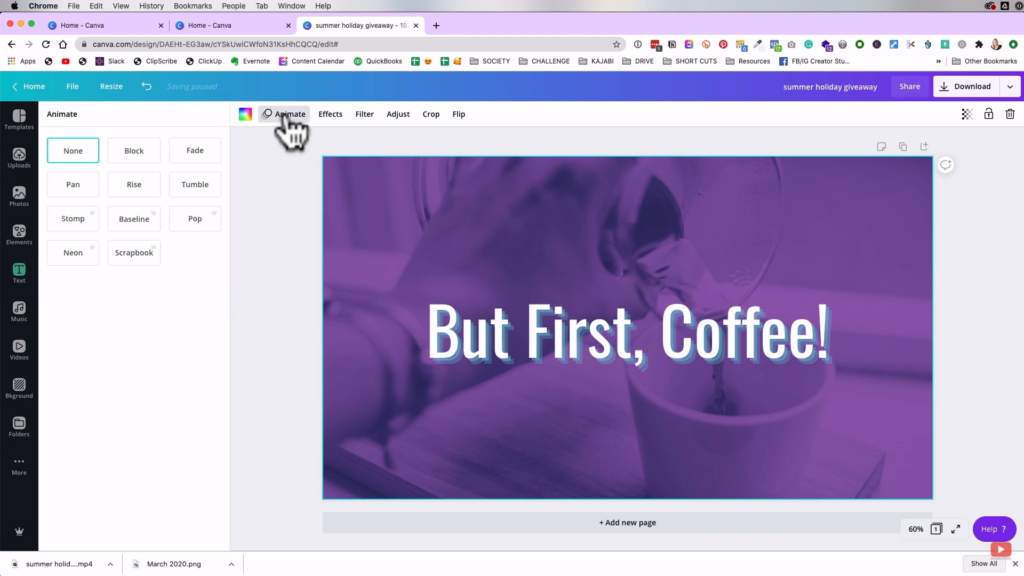
So let's say you created a totally custom title screen, like in the image above. Once you're happy with it, what you can do is actually animate your image in Canva. If you hit animate, you can give the text some effect like fade-in, tumble, pop, stomp, neon, scrapbook. Also, you could set the duration for however long your animation would last.
Once done, you can simply download it again, and pull it into your project in iMovie like what we did with the past steps. Voila! You now have created your own animated title screen using Canva. As I said previously, you could also add some branding elements to your title screens like your business logo, for example.
Adding More Branding Elements
For me, I use a lot of branding elements within my business, a lot for the graphics that I create for the Video Pursuit Society, and it has actually saved me so much time when it comes to creating graphics and animated graphics for my videos.
If you want to recreate those templates that I've used, here are the links:
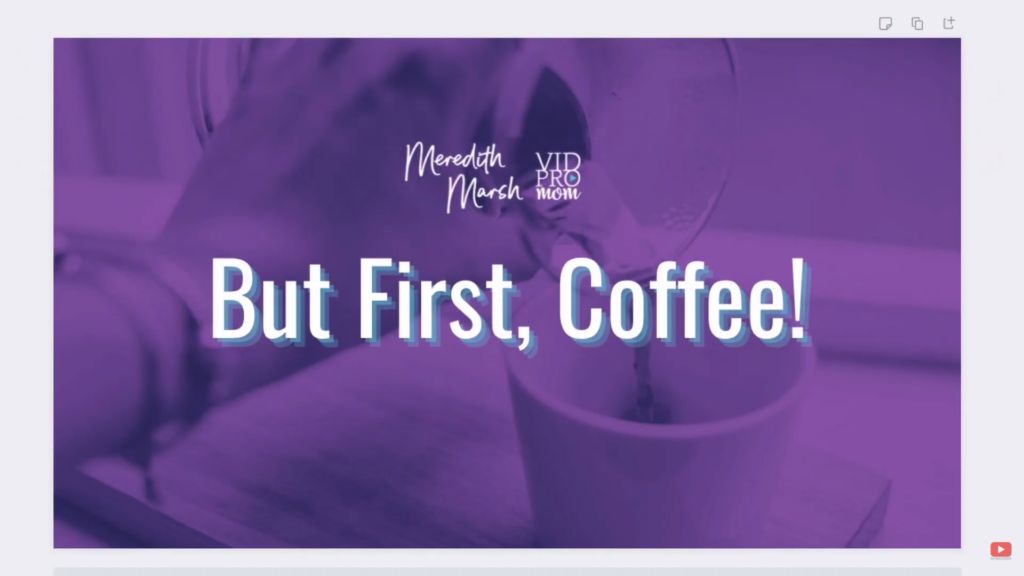
- But First, Coffee Canva Template
- Slime Time 2020 Canva Template
- Animated Earth Canva Template
- Transparent Background Canva Template
#4: Add Text with Transparent Background
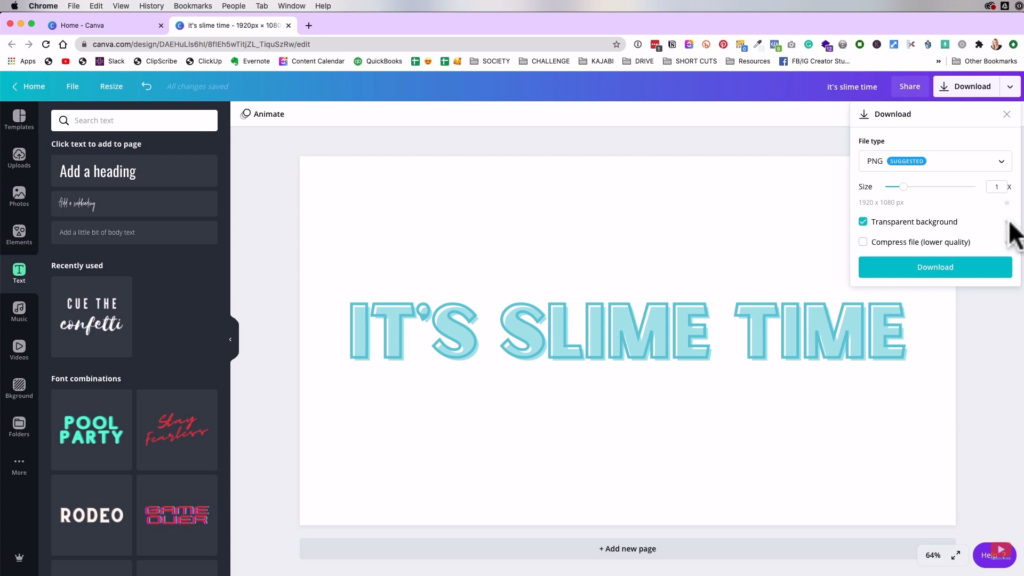
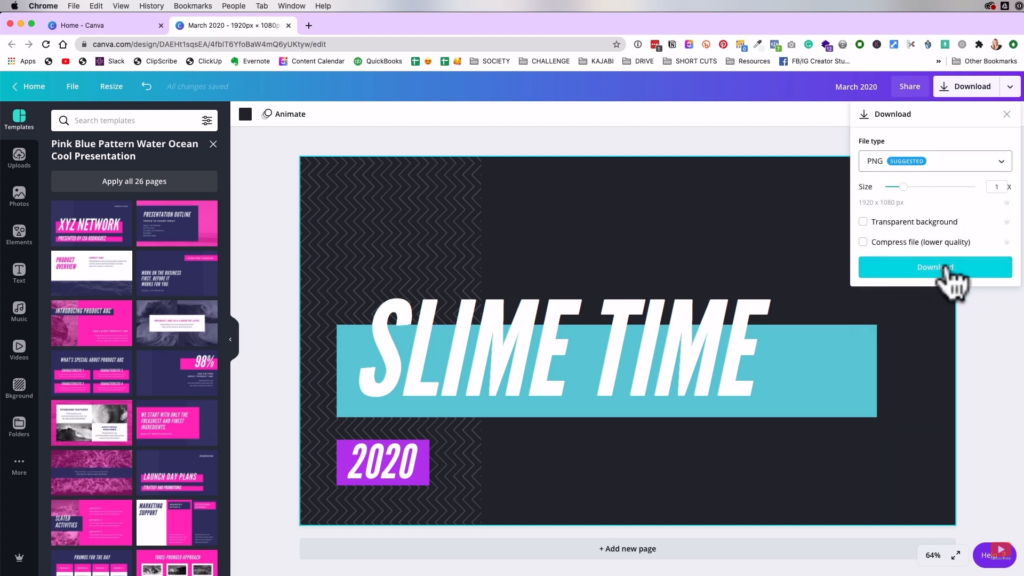
Lastly, I want to show you how you can add text in iMovie with a transparent background using Canva. In a blank canvas, I'm going to just add a heading. Then, I'll put in the title that I want for that screen and customize the text however I want it.
You can see there that we have blue text on a white background, but what if we want to have a transparent background? So just export it by hitting the Download button in the top-right. Then, for the file type, you may want to make sure that you have PNG selected. PNG, not JPG. Then, make sure that you have the “transparent background” selected.
The transparent background is a pro account feature, so if you don't have the pro account, you're not going to be able to do it. After downloading, you can just import and drag it into your iMovie timeline. So, we were able to use the custom effects from within Canva, export it with a transparent background, and then bring it into iMovie.
On to the next one!
Now that you were able to add text in your iMovie project, you probably have a pretty sweet looking video. But to really polish it up, you may want to add some background music and even some sound effects. That's exactly what I will cover in my very next blog post and YouTube video, so make sure to subscribe to my channel here so you don't miss out on anything.
Also, if you're totally new to editing YouTube videos, you can grab my Edit Like a Pro cheat sheet so that you can edit your videos like a pro, even if you're a total newbie. Then, you can stop making some of the mistakes that could be costing you YouTube subscribers. You can get it here for free!
Related: Animated Titles and Text in Premiere Pro
Be sure to subscribe to the VidProMom YouTube Channel so you don't miss fresh new videos from Meredith! Click here to subscribe now.