Canon R10 – Setup Guide for Videos
Right out of the box, Canon EOS R10 has some default settings that we need to change and adjust to make your YouTube videos look better and speed up your workflow. Follow along with me here and grab the R10 cheat sheet through the link down below.
Some product links in this post are affiliate links, and I will be compensated when you purchase by clicking our links. Read my disclosure policy here.
Canon R10 Setup Guide for YouTube Videos
Right out of the box, the Canon EOS R10 has some default settings, as all cameras do. But we still need to tweak and change those settings to make our workflow for creating YouTube videos a little bit easier and a little faster. With that, we can get more done, create more videos, and be consistent on our YouTube channel. There are a lot of settings, these cameras are really powerful.
You might not know where to find the settings or what to even change, or maybe you're afraid of hitting the wrong button and totally screwing everything up. But if you don't tweak some of the default settings on the Canon R10, then you're not going to have access to some of the really great features that will improve the quality of your YouTube videos and help you create videos faster. I promise you can't mess this up, just follow along with me here, and then grab my cheat sheet here. You can print it out, and save it to your device.
Start in Automatic Mode

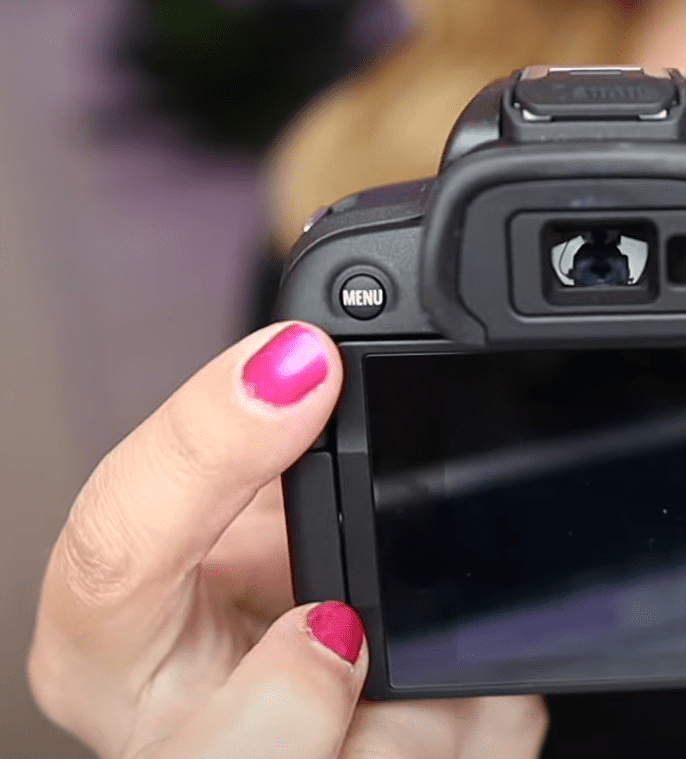
So I've got the R10 connected to my computer so I can record the screen. We can go through all of the menu settings. With your battery in, just turn the camera on. Make sure you just keep it in auto mode, that's the green “A.” And if you press the menu button in the top left, you're going to see a bunch of different menu stuff. It is a touchscreen, so you can just use your finger to touch the menu options that you want to get into. Let's dive into some basic camera settings and preferences. We don't need to touch on every single setting here in the menu. But there are a few things we want to get out of default mode.
Tools Menu: Format Card

So we're going to start at the “Tools menu,” which is the little wrench icon right there. I'm going to go down to “Format card.” Formatting your card before you shoot anything, record anything, in your camera is really important.
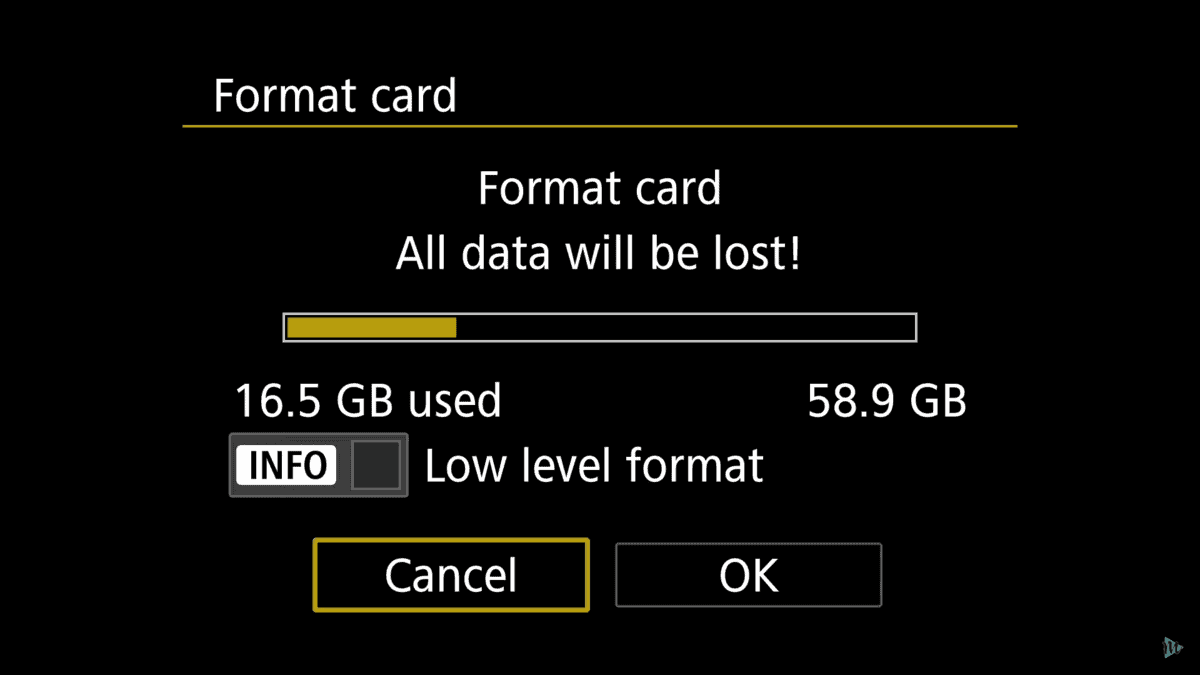
You're going to need to format your card when you put it in this brand-new camera. Just bear in mind that if you have anything on that card, it's going to be wiped out when you hit format. Just select okay. As a tip, here is the list of the cards that are best for the Canon EOS R10.
Tools Menu: Auto Rotate Videos
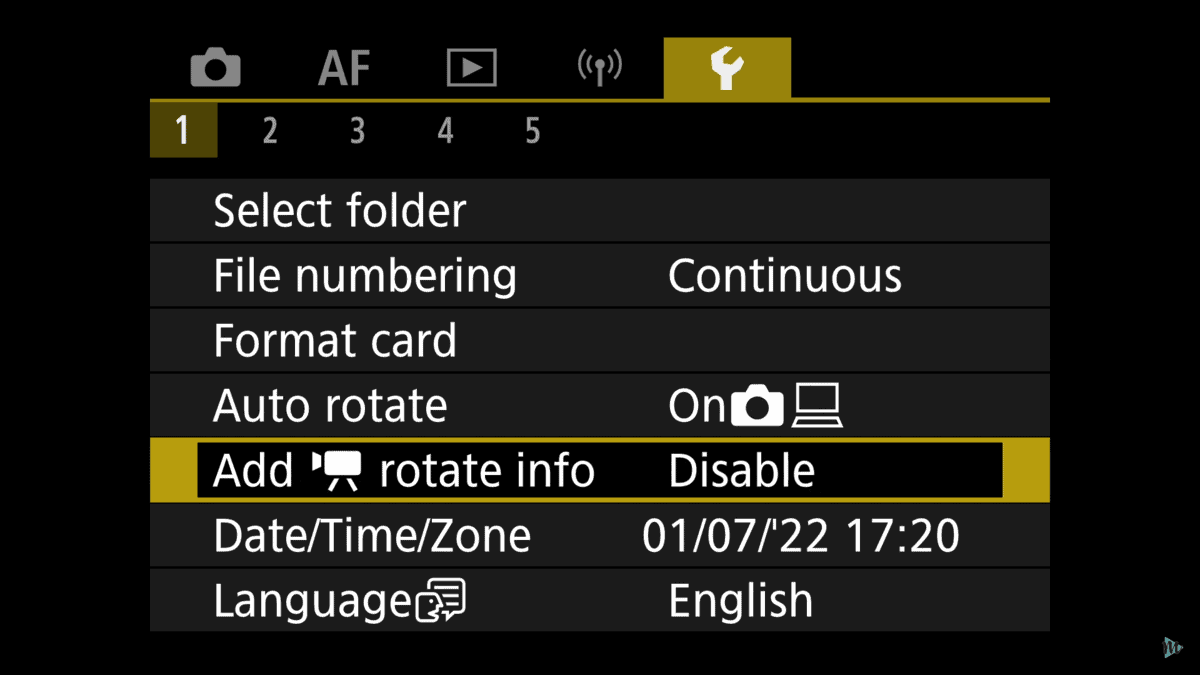
Go down to the next one where it says “Add [movie camera icon] rotate info.” Select that because that's going to be disabled by default. I'm going to bring it up to enable. So that way, if you are using your camera to shoot TikTok reels, shorts, stories, or any vertical videos, it's going to record as a vertical video. You won't have to rotate it in your editing software.
Tools Menu: Set Date and Time, Language

Now, if you haven't been prompted to set your date and time, you're going to want to do this because all of the photos and videos that you record there are going to be stamped with that date and time. Moreover, moving down, of course, you're going to set your language as well if it's not already set for you.
Tools Menu: Video System – NTSC or PAL
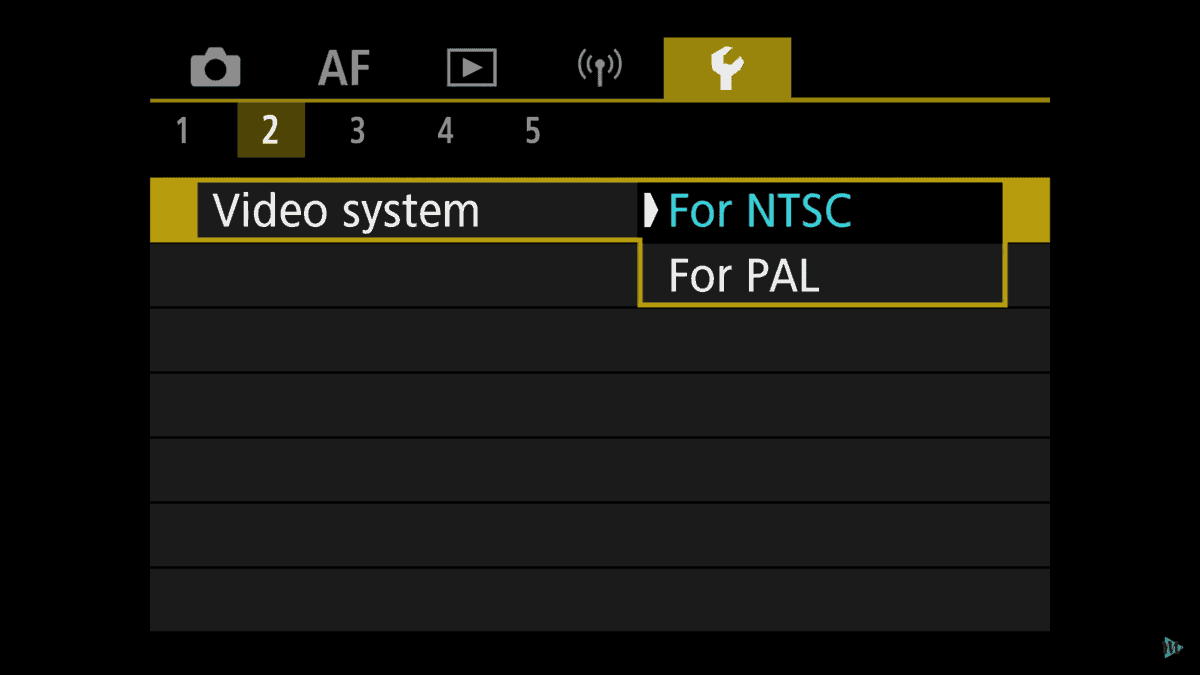
Moving on to the next page of the “Tools” menu, we have the video system. For me, in the US, I'm choosing NTSC. In other countries like UK or Australia, you might want to choose the PAL format. If you're not sure which one to choose for the country you're in, you will probably find the answer through a quick Google search.
Tools Menu: Mode Guide
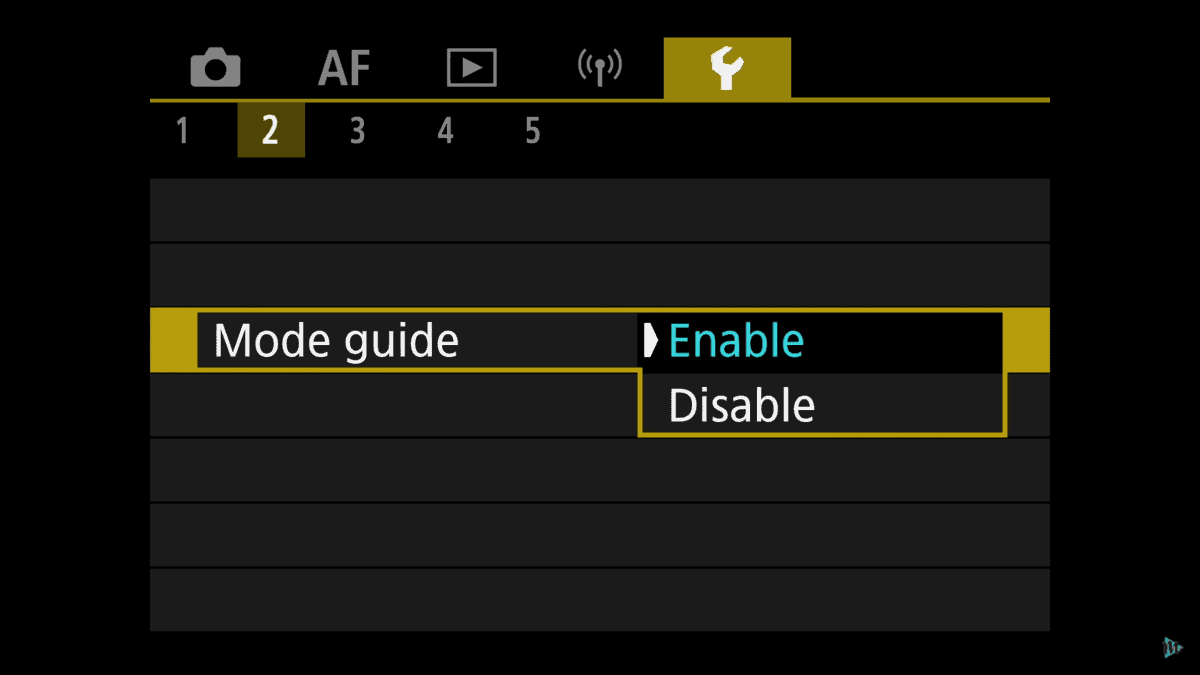
Moving down to the “Mode guide,” you can see that is set to enable. We're going to disable that setting. It's like a weird notification that pops up anytime you change to a different mode on your camera.
Tools Menu: Beep
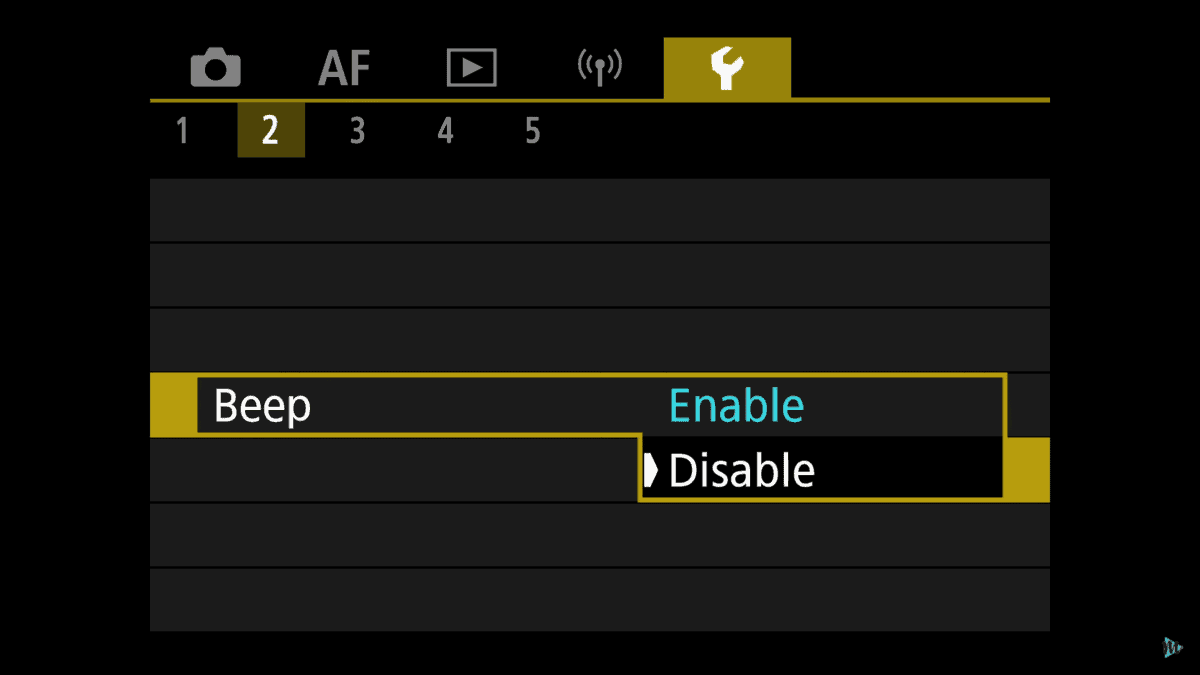
The next thing is the beep. Now, my camera's not beeping even though it says beeping is enabled. I don't want it to beep every time I go through a menu option or change anything. So I'm gonna go and disable that.
Tools Menu: Power Saving

So moving down to power saving, this is where you can set your camera to stay on for a little longer. For example, this is set by default to turn the screen off after 10 seconds. For me, I think that is pretty annoying. So I'm going to switch it up to 30 seconds.
Why Does the R10 Screen Turn Off?
Now, one thing you might be noticing about your Canon R10 Is that when you move your fingers in front of the screen to touch something or change a setting, the screen might actually be turning off. What's happening is that the viewfinder there is detecting that you're putting it up to your face or you're in front of it. Then, it will shut the screen off. It'll disable the screen. If you are using your viewfinder to take a picture, you're not accidentally changing settings with the tip of your nose, I guess. But it is kind of annoying.
Tools Menu: Screen/Viewfinder Display

If all you're using your camera for is video, and you're always using the screen and you're not really using that viewfinder, you can just change that setting up. So here's how that works. Under the screen/viewfinder display, you can see it set to “AUTO1.” Just tap that menu and set it to “Screen.” Now the screen will stay active as you're using your camera. Whether you wave your hand or put it up to your eye, that viewfinder is not going to engage. It will just stay on your screen.
Tools Menu: Firmware

Moving on to the last page of the Tools menu, let's go down to firmware. Firmware is your camera's internal software. Every few months, like a year or so, Canon will update the firmware for all of its different camera models. Sometimes it happens more often than that. Now, the camera's not going to tell you that there's a firmware update. For that, you're going to have to go to Google.
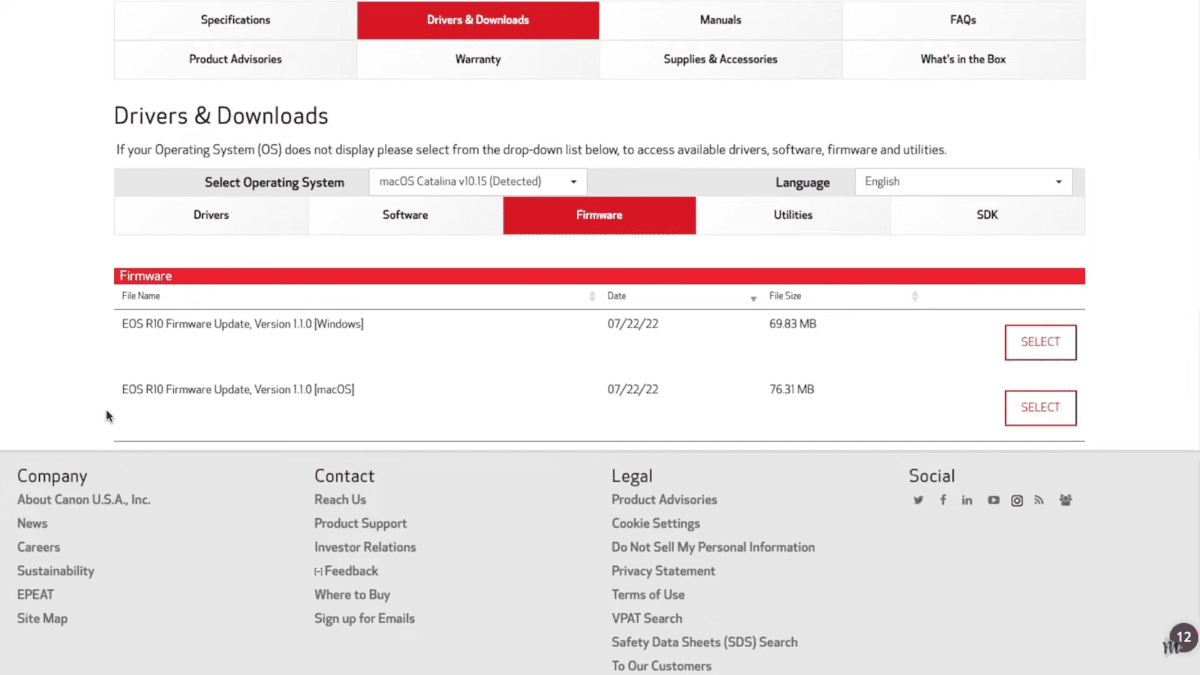
The easiest thing to do is just Google Canon R10 firmware, you're going to click on support for EOS R10. Roll down to drivers and downloads and then select firmware. This site will let you know what the current version of firmware is that is available. So you can see here on my R10, that my firmware is version 1.0.1. But the latest firmware that's available is 1.1.0. So I need to update this, but I'm not going to do that here in this blog.
Put Camera in Shooting Mode

Let's keep going with our video settings. Now, I want you to take it out of the auto mode with that green “A”. We're going to move our mode dial over to the little video camera mark. Press the menu button up at the top. Again, we're going to go all the way over to the camera menu. That's right there at the very beginning, it's going to be the red menu with a camera icon.
Shooting Menu: Manual Video Mode
We're now already in shooting mode for video. However, we have to turn this into video manual mode so that we actually have access to all of the different features, functions, and settings that we want to do to create great YouTube videos, right?
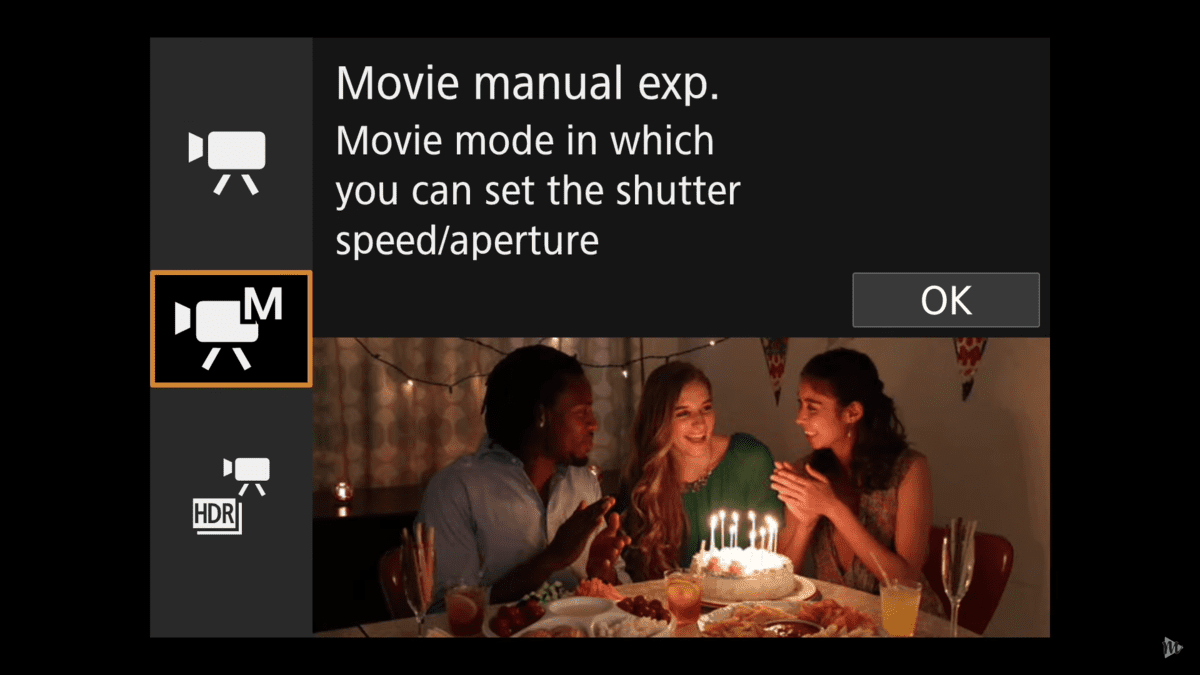
So we're just gonna go down to the video camera that has the “M” on it. M stands for manual, we're going to select that. And you can tell on the upper left-hand side of the screen that it is in video mode, and it is in manual video mode. So we want to make sure we see that up there.
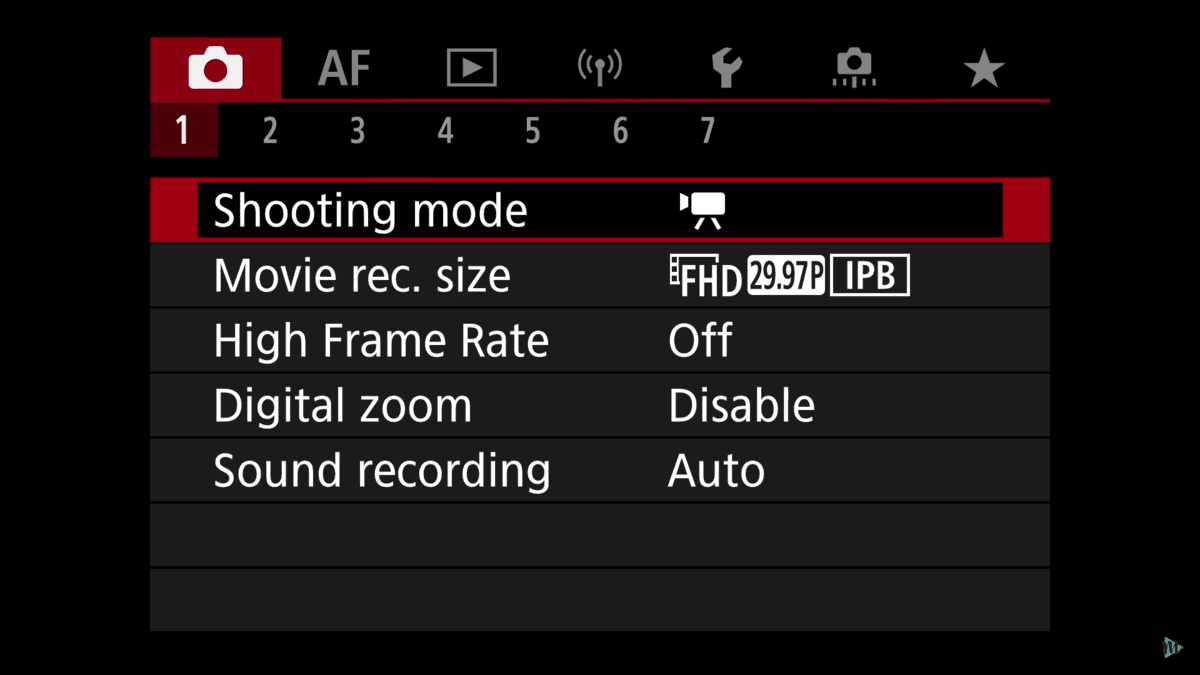
Shooting Menu: Movie Recording Size

Going back to our menu, we're going to come down to the movie recording size. We have lots of different options here on the R10. You could shoot 4K @ 30 frames per second. You could also shoot at 24 or 60 frames per second if you wanted to. But it's going to be cropped in a little bit. I always shoot at 1080P @ 30 frames per second, usually for the most part for these kinds of videos. So I'm going to keep mine where it says FHD, that's 1080P. It's going to be 30 frames per second.
Shooting Menu: Sound Recording
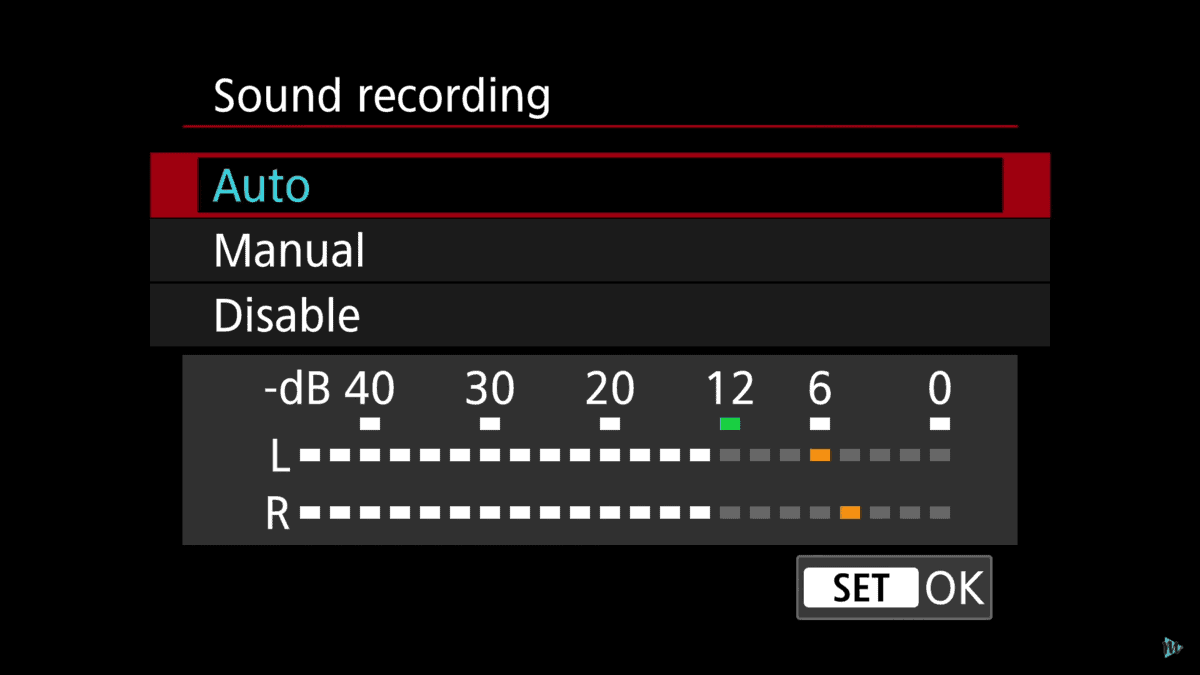
We move on to the sound recording settings. Now, I always put mine into manual mode. If you're using a microphone like I'm using, the DJI mic, then you definitely want to have it in manual mode. Because you're going to want to set your sound level so that you're not peaking. So you will always have to move this pretty far down and then hit OK. On the other hand, if you're just using the camera's microphone, the “Auto” is probably going to be fine for you.
Shooting Menu: White Balance

Let's look at white balance. Now I keep my white balance on “Auto.” I don't mess around with this too much. I'm always shooting in my office, there's a window right here, you may have noticed my exposure changed a little bit sometimes because the natural light changes, like when the sun comes out. I also have a light right behind my camera so I'm just not that worried about the white balance.
I'm always in the same spot, and I think it's okay. It's fine the way that it is. So I keep mine on “Auto.” If you have a different shooting situation or different settings, different lights. If you're outside, you might want to adjust these to your liking. Now, there are still a lot of other settings under the menu. But we don't need to change any of them, we can just keep them default as they are.
Custom Menu/MY MENU: Create a Custom Menu
Right now, one last thing I want to show you is how to set up a custom menu. It's so easy and it's going to save you a ton of time so that you can access some of the menu items that you access regularly. It is so much easier when it's just a press of your finger rather than having to like tab through all of those different menu options.
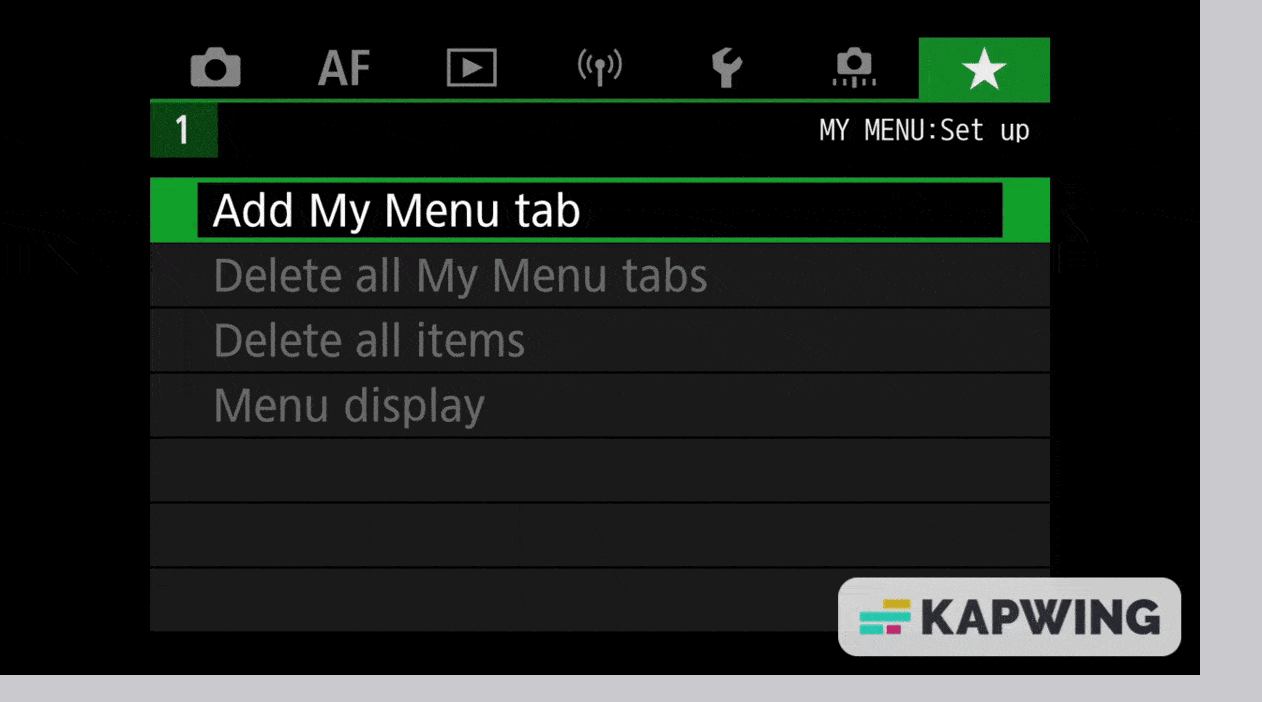
The way that you do it is just select “Add my menu tab.” It's going to say ‘Add my MENU1 tab.” Yes, we're going to hit OK. Now, we go to configure and select items to register and this is just going to give you a big long list of all of the different features that you can access.
All the different settings that you can access through your menu, you can put into your custom menu. I'm going to choose sound recording, I like to have that option there. I'm also going to choose the HDMI display. Wi-Fi Bluetooth connection is also a good one to put in there. Format card, I want it there for sure.
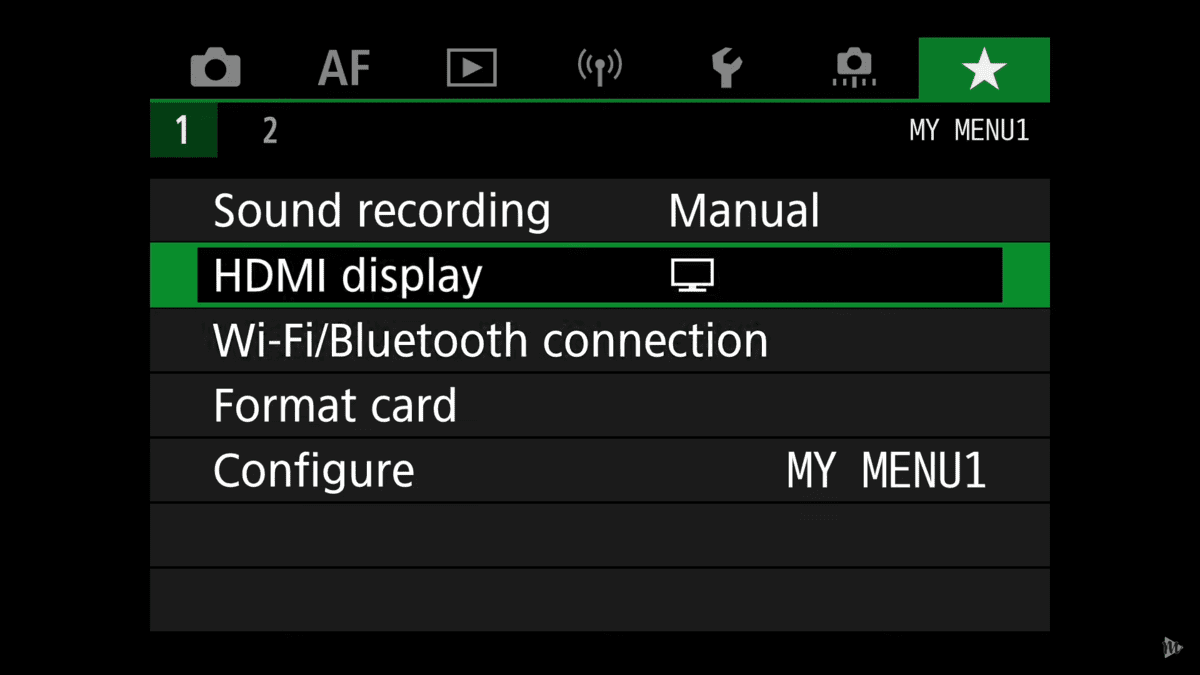
There we go! We now have a whole menu that all I have to do is go to that menu and I can access my custom menu tab. I can add more items to this and I can have several different custom menu tabs. Maybe I would have one for shooting videos and another one for shooting photos. Anything that you can access quickly is going to save you so much time you'll know right where to go to access that.
Conclusion
You might be wondering about shooting settings like ISO aperture, Frame rate, and F-stop. I've got you covered in the very next blog post in this Canon EOS R10 series. Watch out for that!
We're going to dive into the simple video settings so that you can create great-looking YouTube videos with your Canon R10 every single time, quickly and easily. But for now, don't forget to grab the cheat sheet with all of the settings that I just went over, plus the ISO, framerate, aperture, and all those kinds of fun things that we'll cover in the next blog post!
VIDEO: Canon R10 – Setup Guide for Videos
Click here to subscribe to Meredith Marsh on YouTube.
CTA Reusable Block Goes Here. Delete this block.