Content Calendar with Notion
If you're ready to create a content calendar, Notion is amazing! You're going to love this! In this blog, you'll see how I have my editorial calendar (content calendar) setup for planning content (videos, blog posts) and I'll show you how to set one up for yourself.
Some product links in this post are affiliate links, and I will be compensated when you purchase by clicking our links. Read my disclosure policy here.
My Favorite Tool For Content Calendar and Planner
One of my favorite new tools that I have implemented in my business this year is called Notion. Although I'm using it to basically manage my entire business from my YouTube channel to the Video Pursuit Society, my membership program, and so on. In this blog, I want to show you how I plan and organize my YouTube content. Also, how to create a content calendar or editorial calendar using Notion.
Now, we're going to dive into exactly what I have set up inside of Notion so you can create it for yourself. For me, I think the planning out content has become sort of a personal process for people. If I don't know what I'm doing and what I'm supposed to be working on this week, then I just won't work on the things that I'm supposed to be doing.
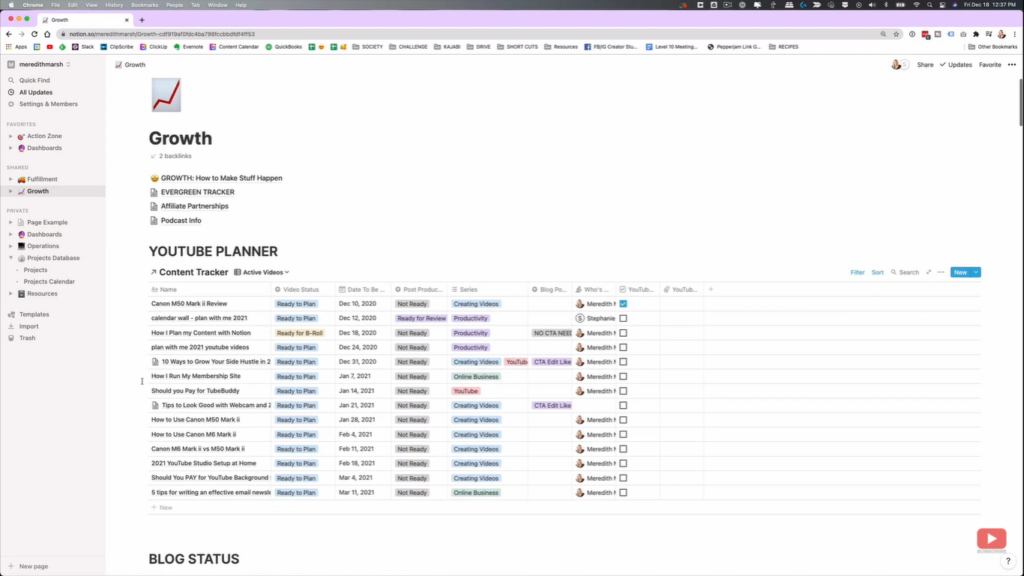
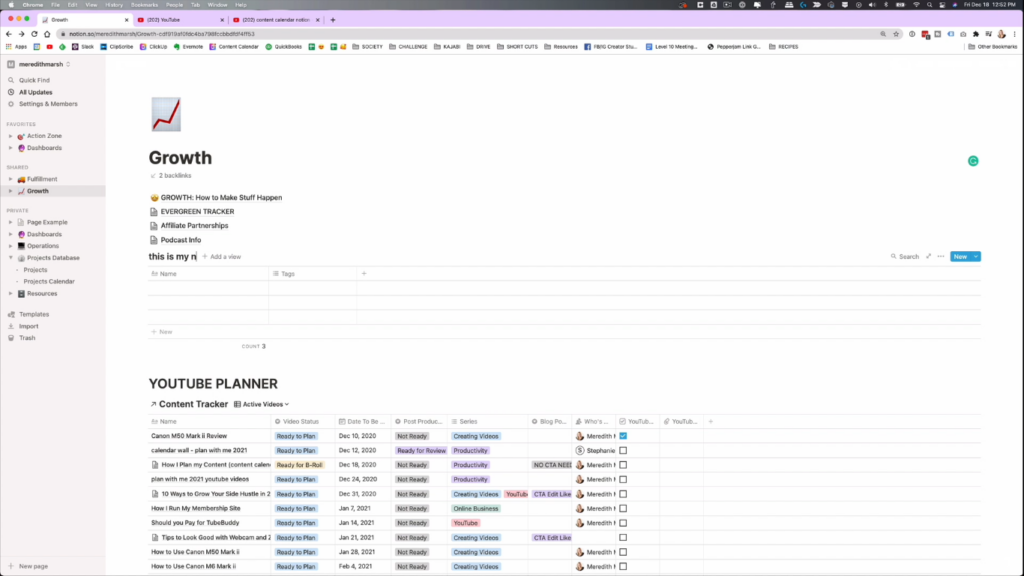
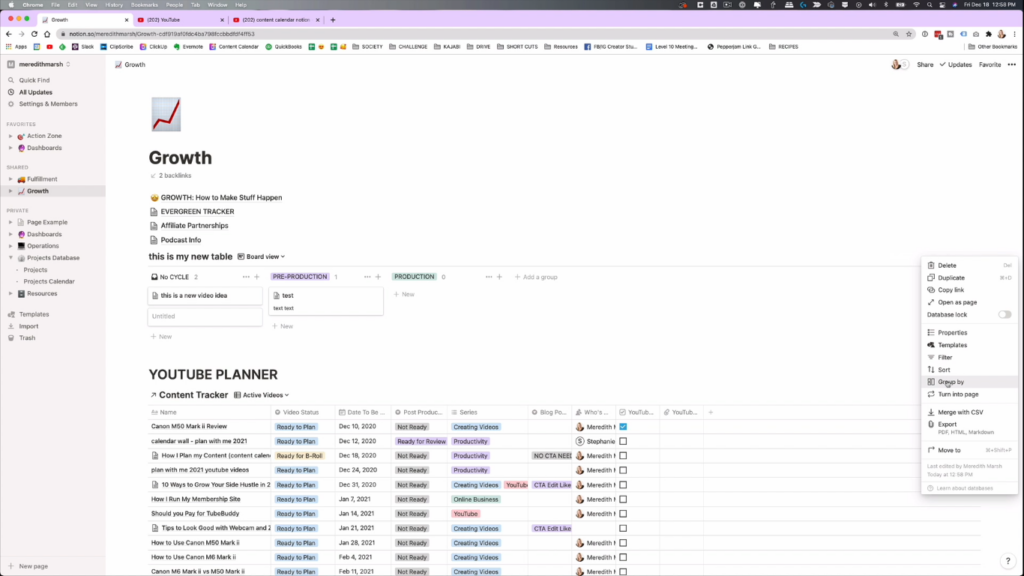
Having said that, Notion helps me keep everything organized. The content calendar that I had created in Notion is actually the very first thing that I did. As you can see above, I have my YouTube planner, and those are the topics that I have actually planned on creating. They're not all completely scripted out, but they are all keyword researched.
Also, you can see that I have dates in here on exactly what I am planning to create. This topic, about how I plan my content with Notion, I have down for February, but I felt like doing it this week. So I did it, and I'm just going to update my YouTube planner for this topic and set it right.
Content Calendar Properties
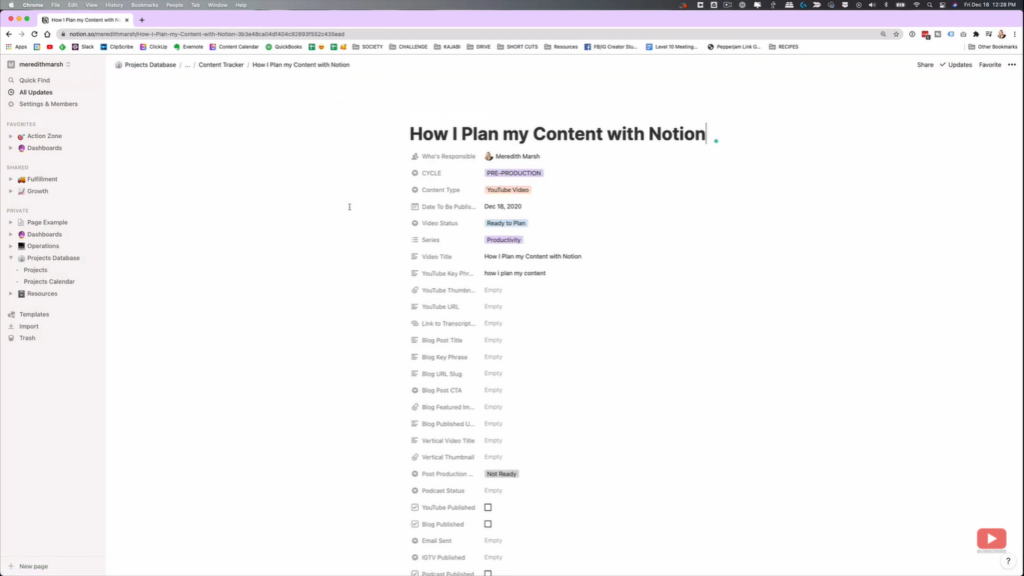
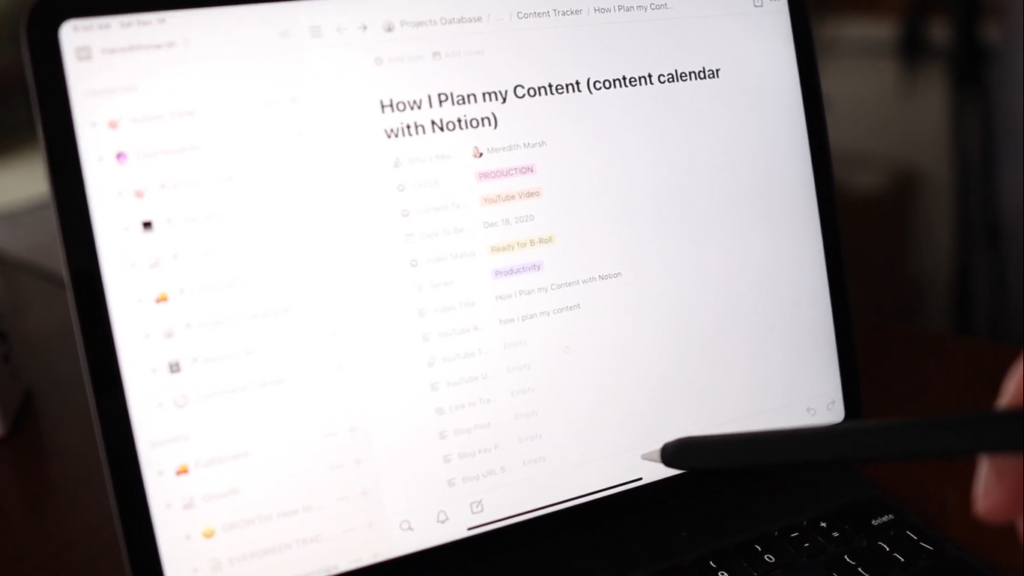
If I select a topic on my YouTube planner, that is what it looks like when I open it up as a page to see the whole thing. All of the things there are like properties. It's like a massive checklist.
Essentially, I like to have my content organized by this cycle below:
- Pre-production
- Production
- Promotion
- Evergreen
- Complete
What this means is when I have not created the video of a certain topic yet, it is currently in pre-production mode. Once I'm recording, it's considered as production. If I'm already done editing, it'll be in promotion mode. Which means I've published it on YouTube and now I need to send it to my email list. Then, turn it into a blog post and share it on Twitter. All those kinds of things are in promotion mode. Then, once the video is no longer new anymore, then I would switch it to evergreen. Evergreen is like, “Okay, now we can share it on our Facebook page or our Twitter or something after a month.” Also, I can just simply mark it as complete if it's just not a topic that works for re-sharing over time. To be honest, most of my stuff is evergreen content.
Content Types
For the content type, this topic that I'm doing about Notion is a YouTube video, it's not just a blog post or a podcast episode. The “Date to be published” is already easy to understand. Then, video status, this pertains to the status of the video itself. It's a little bit different than the cycle. The cycle is for the whole entire cluster of content. The video, the blog posts, and the IGTV video of a certain topic is all there in the cycle. It's like a cluster of content. So the cycle covers the whole cluster. The video status is just for the status of the video.
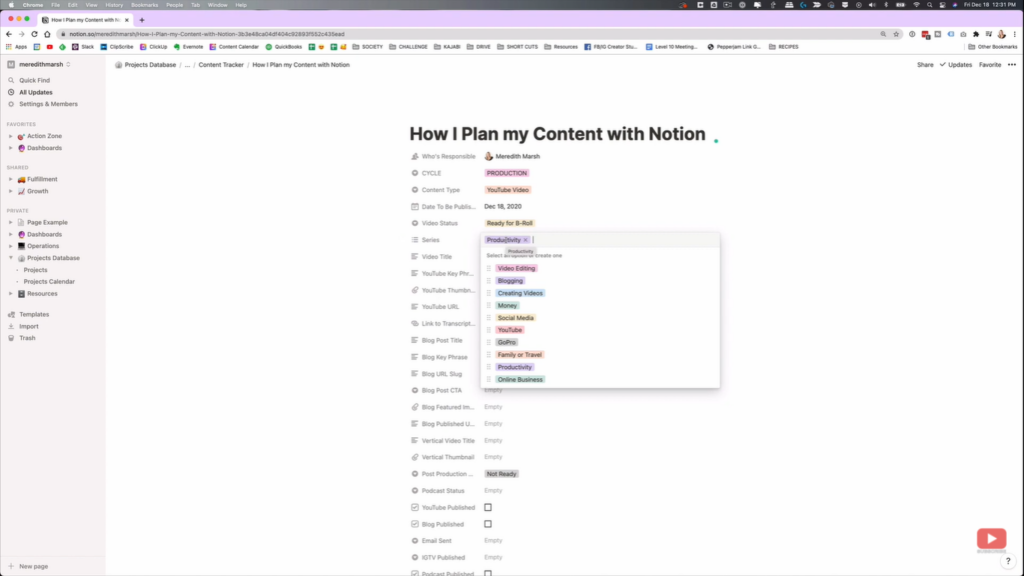
Moreover, series is just a way for me to categorize my content within my own kind of content planner. I also have there my video title and my focus key phrase. When I have my thumbnail created ahead of time, I can also upload it there, just so that I have a visual.
Checklists
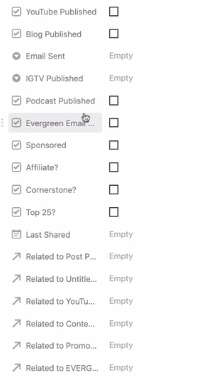
As we go down to the other properties, some of these things are more like post-production type of stuff. I have there the checkbox for the YouTube video. Once the video gets published, I will check the box. The same goes for the blog post. We might also send out an email depending on the content, and I also have a check box for that too.
Example of my Content Calendar

Now that we've gone through my entire checklist system inside of Notion, let's take a look at a topic that's already been published. So “How to add text and titles in iMovie” has already been published. The blog post has been published. You can see there who's responsible, which is completely empty. The cycle is already “complete.” The content type is YouTube video. It was published on the 17th of September. All of those things are completed.
Why Is It Important For Me?
The reason why this whole YouTube planner and content calendar with Notion is important is because if someone in my Facebook group, the thriving side hustle video content creators Facebook group, asked me, “Hey, I'm trying to learn iMovie. Do you have any tutorials on iMovie?” I can simply come to my content calendar and search for just iMovie related content. Inside that, I have the blog post URL over there along with the YouTube URL. I could just easily send those links to whoever needs them. I can also go and find all of my content on a particular topic or even a particular series.
For example, if I want to review all of my video editing content and see what have I already published, I can also plan to create some piggyback content on a certain previous topic. It's all right there inside of Notion. Instead of me having to go to my YouTube channel and to my blog, which are two completely separate platforms, I can just find all of it inside of my content calendar using Notion.
Functionalities of Notion
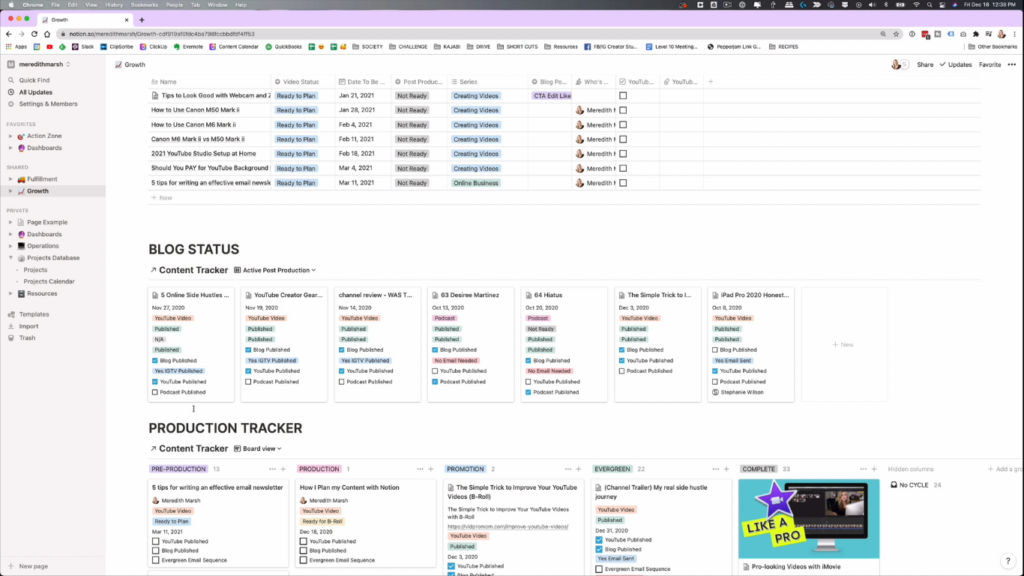
Notion can do so many different things. It's not just like a simple spreadsheet, it also has some database kind of functionality. That's how I use it to plan out my content. Because of that, it makes it possible for me to see every piece or even clusters of content in different ways. For example, under “blog status,” I can see which of my pieces of content are either waiting to be published to the blog or waiting to be reviewed to publish to the blog. I can see all those things right there.
In addition, I could also look at it from the perspective of “these are the videos that I need to create.” Even if they're under different pages, I'm still looking at the same database. They are all the same information. Notion is just displaying it a little bit differently so that I can look at it from different perspectives.
Production Tracker
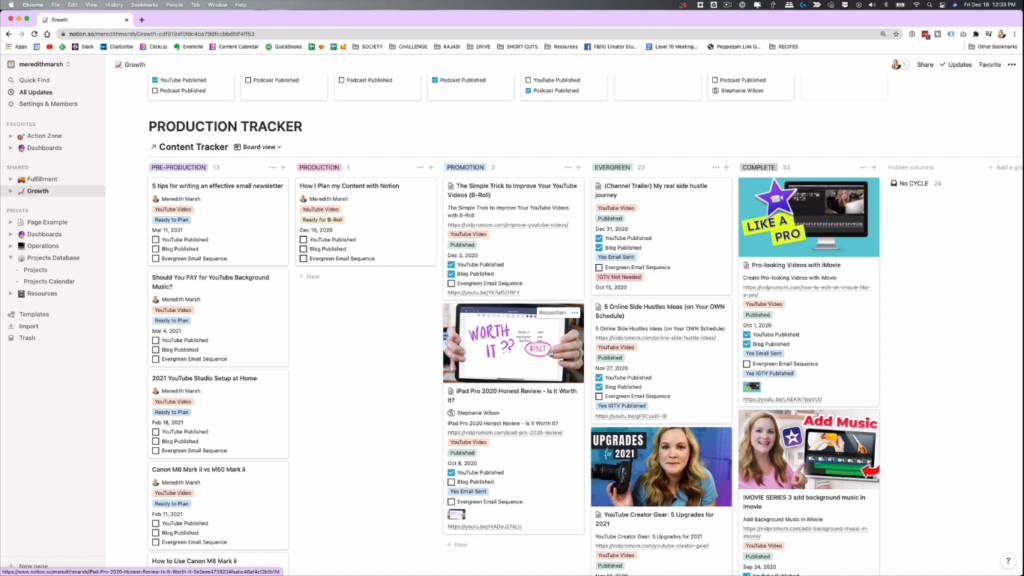
Under Production Tracker, I created a board like you can do inside of Trello or Asana. This way, I can actually move things around. So once it's is done, I can just move it over to the other side. I can move everything back and forth easily. Any changes will propagate across all of the databases within Notion. So for example, we have the cycle under “Production.” If I move it under the “Promotion” cycle, then you can view the same topic on a different section/perspective. Then the cycle of that topic will also change.
Notion Pages
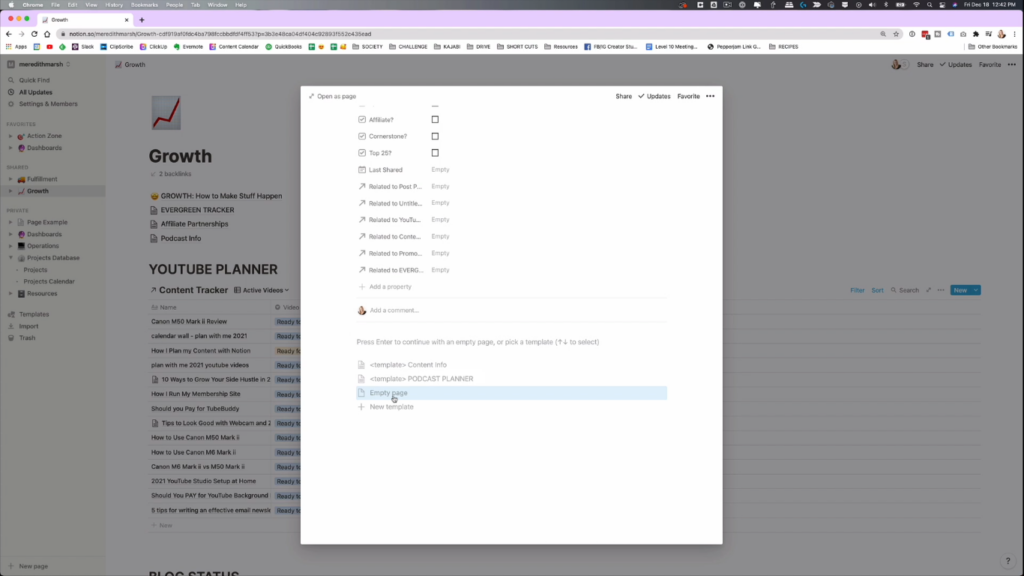
So down below all of the properties there, I have a couple of templates. I don't really use those anymore. What we can do is actually select “empty page” to create one. Then, that is where you can actually just start typing. That is where I would put some notes about what I wanted to say in my video. If I wanted to create an outline of my video, I can put that information down there. If you're the type of person that likes to type out a word-for-word script, put that script down there. That way, it's inside of Notion. It's all in one place.
You can also open this up on your phone and drop some ideas in there. When they come to you, open it up on your iPad, do the same thing, and it will all be tied to this piece of content within Notion. Lately, I've been doing a little bit of a different scripting technique. I'm actually using a piece of paper. I call it “block scripting process.” And it's something that I'm creating for myself to make content creation go quicker for me and go easier and create better content quickly. So that is just kind of like my own framework that I'm working on. Maybe at some point, I'll share it with you, but I will definitely be sharing it with the Video Pursuit Society members first.
Creating Your Own Content Calendar with Notion
Now, if you're anything like me, you might be wondering, “Okay, how do I actually create this for myself?” I want to let you know that I've learned how to do this from a YouTube tutorial by Thomas Frank. There are some other content calendar template tutorial videos out there on YouTube if you search for them, because the way that I do it might not work for you. However, I'm still going to show you exactly how I set up my content calendar.
Related: Planning Out YouTube Videos

So inside of Notion, which by the way, you can get a free Notion account, just go here. So right there from my growth page, I can add a whole new one of those databases there. You can add text, heading, a list, a check box, anything like that there. But what we want to do is create a table. An inline table, and you can find it by just scrolling down to the options there.
It's a lot like an Excel spreadsheet, but it's way more robust. You have your columns, you have your rows, you have your cells. It's the columns that are the properties that I was showing you in my table where I have the production cycle, the date that it's going to be published, and so on.
Creating Properties
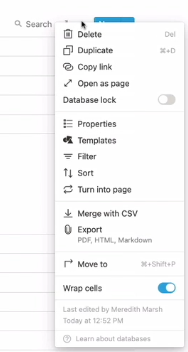

If you click the three dots, then come down to Properties, that is where you add those columns to your table. If we hit “add property,” we can create “cycle” here, and you could do it just like mine. So we now have a property called “cycle.”

Then, in order to create those different kinds of categories under the cycle, we'll create an actual row. We don't have any options for the cycle to select there yet, so you can just type a certain option first and hit create. For example, you can create pre-production, production, and so on.
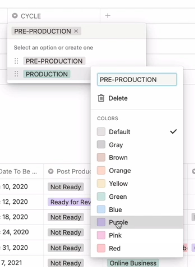
After creating those, it will now all be there under Cycle. You can also change the colors there to whatever you want. You don't have to use the default. That's how you create your drop-down select boxes.
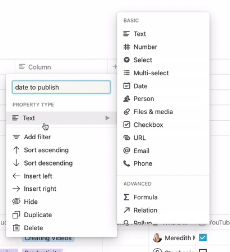
Again, you can actually come over to the “+” button on your table to create a new property, give it a name and choose its type. So come through here, play with those properties, see what might work best for you. Maybe just a regular old text box might work best, and then you can put in whatever you want there.
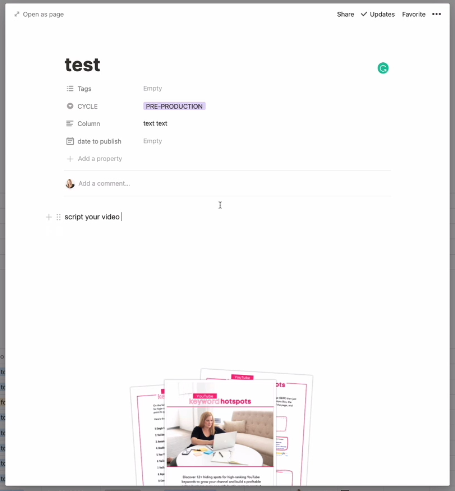
Then, when you click on that certain topic to open it up, you can see all of your properties are right there. And you can start to script your video right below that. Moreover, you can also add other stuff in there. Like you could add another table, a check box, or an image there. If you wanted to upload an image, it will be saved right there for you. You can open it up at any time.
Creating Your Own Template with Notion
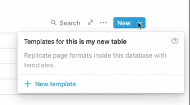
If you want to get really fancy, you can actually create a template for yourself using the little blue box there. If you hit that down button, hit new template, and now you have a content template.
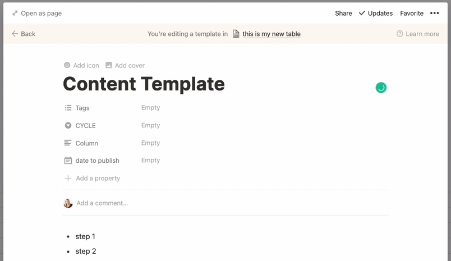
Maybe there you have a bulleted list of steps, table, or anything that you need to do to create your video. You can put anything you want in there.

Now, when you go to create a new piece of content and open it up, you can see at the very bottom that you have that content template there. All you have to do is hit that and it's going to pull up whatever you have created in that template, and you can still add more to those.
Other Views
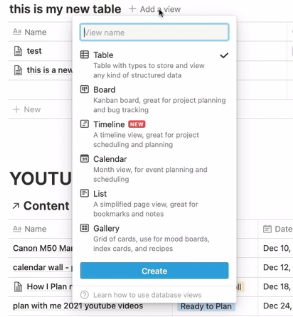
Now to your content calendar in Notion as a board or any other kind of way, all you have to do is select “add a view”. If you want it to be a board, a timeline, calendar, a list or a gallery, you can just select any of those and hit create.
So if I select Board, we're going to have a new view. Then you can also sort, filter, or group the contents of your table. Just hit these three dots, select which one you want to do, and it will automatically arrange it for you.
Related: Huge Calendar Wall – Plan With Me 2021
More Questions?
I know that this has been a little bit of a whirlwind tour of how I use Notion as a content calendar to create my YouTube videos, my blog posts, and run my entire business. We didn't even get into any of the stuff outside of the content creation, but let me know in my YouTube channel what questions you have about Notion because I am totally game for creating more templates, tutorials and things that I know might help you out. In fact, I have created a template in Notion and you can get it here.
Content Calendar with Notion
Click here to subscribe to Meredith Marsh on YouTube.