Rode Wireless Go Setup – 7 Tips for Better Audio
We hear all the time that audio quality is more important than video quality, but if you're just a regular person making YouTube videos… how do you know if you have good audio quality? With the Rode Wireless Go Setup, I will share with you my tips for better audio quality.
Some product links in this post are affiliate links, and I will be compensated when you purchase by clicking our links. Read my disclosure policy here.
7 Tips for Better Audio Quality Using the Rode Wireless Go
If you are a regular person that just started creating or putting content on YouTube, you could be wondering how you could improve your audio setting, or better yet you don't even know if your audio is good or sucks.
Well, fellow content creators, you have come to the right place. I will be sharing with you 7 tips for better audio quality using the Rode Wireless Go from both me and Anthony. These tips will make sure your audio quality doesn't deter people from actually watching your videos.
VIDEO: Rode Wireless Go Setup – 7 Tips for Better Audio
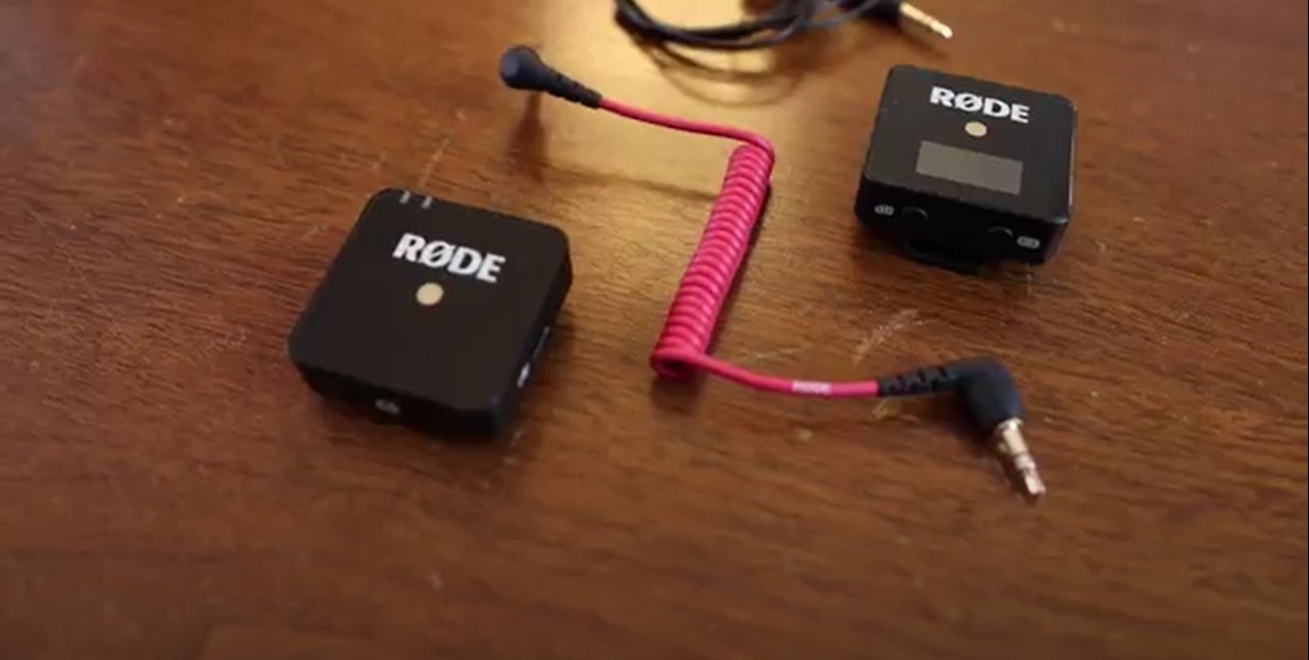
Overview of Rode Wireless Go
Before getting into the audio settings tips, I want to give an overview of the Rode Wireless Go which is one of the upgrades that I made last year. The Rode Wireless Go setup comes with a transmitter and receiver.
Related: YouTube Creator Gear: 5 Upgrades for 2021
How do I setup Rode Wireless Go?
The setup is pretty simple. You have a transmitted and a receiver, and a red cable the connects the receiver to your camera. The transmitter has a built-in microphone. The receiver is plugged into your camera and sits on top of the hot shoe mount. When you turn these on, the receiver's display screen will show the audio level and in-use status. Since the receiver is plugged directly into the camera, your video automatically connects to the audio through the external microphone.
Tip #1: Sound Treated Room
When you use the Rode Wireless Go setup or any wireless microphone, you want to be in a sound-treated room to get the best sound quality. You want to be in a room or space that doesn't have too many echoes; the less room noise that gets into the mic, the more the mic will sound like how the manufacturer intended it to sound.

If you are like me that is using a spare room in my house, you may not have a sound treated room. To help soften the space and reduce the echo, you can use carpets, pillows, curtains, and sound panels.
Tip #2: Get a Lav Mic
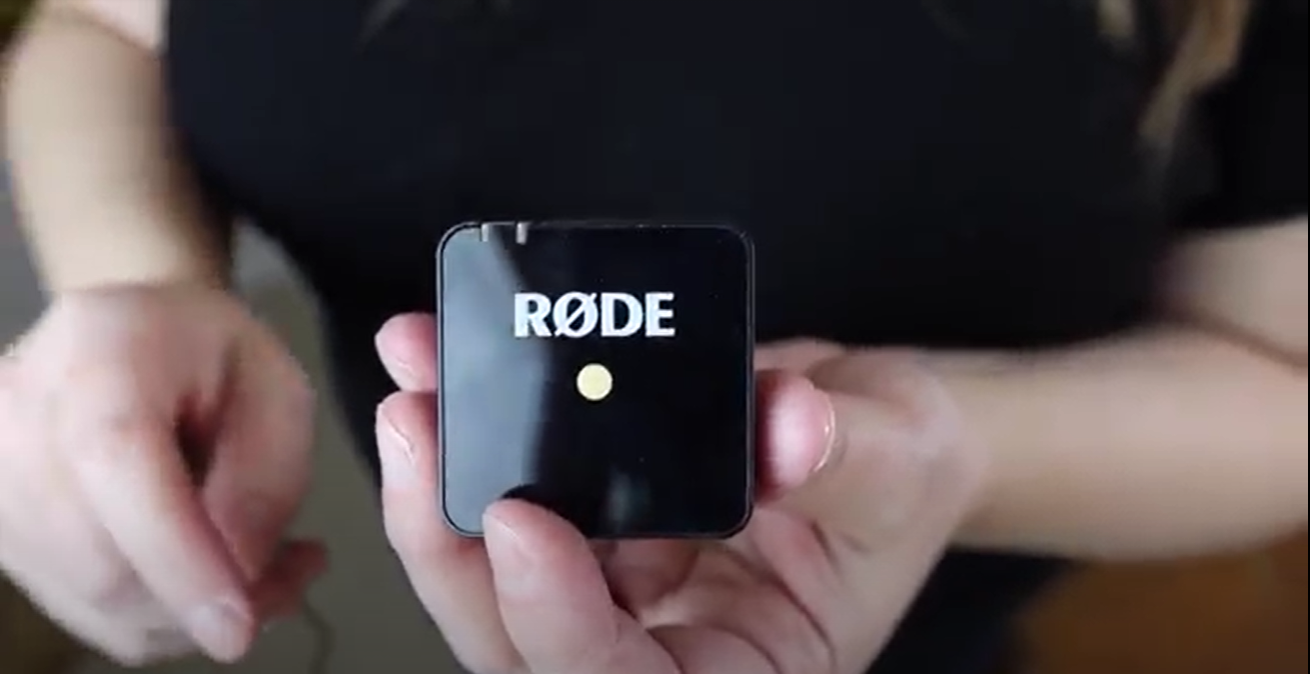
Some people would clip the Rode Wireless Go setup transmitter to their shirt, which is super noticeable and honestly not very eye appealing. The best way to tackle this is to purchase a lav mic and plug it into the transmitter. You can place the transmitter in your pocket or the side of your pants and clip the lav mic to your shirt.
I highly recommend you test the placement of your lav mic to get the best audio quality. If you don't like having the lav mic showing, move down to tip #3 on how to hide your lav mic.
Tip #3: Hide the Lav Mic
To get the best audio quality, consider using a small clip to clip your lav mic to the front of your shirt. However, if you really want to hide your lav mic, you can get some medical tape, tear a bit off, and fold it into a little triangle.

Put the lav mic in the tape and fold it. Place the tape in between the buttons of your shirt or somewhere on your shirt and start feeding the wire down into your shirt. If you look at it now, it's like the mic isn't there, but it's there.
Related: How to Edit Audio For Female Youtubers
When you do something like this, you should wear a thin shirt so that it doesn't block the sound. If you're wearing too many clothes on top of the microphone, the audio will sound muffled. You want to avoid this because it will ruin your audio and make it unstable. So be careful when you use this method to hide your microphone.
Tip #4: Use Manual Audio Settings on the Camera
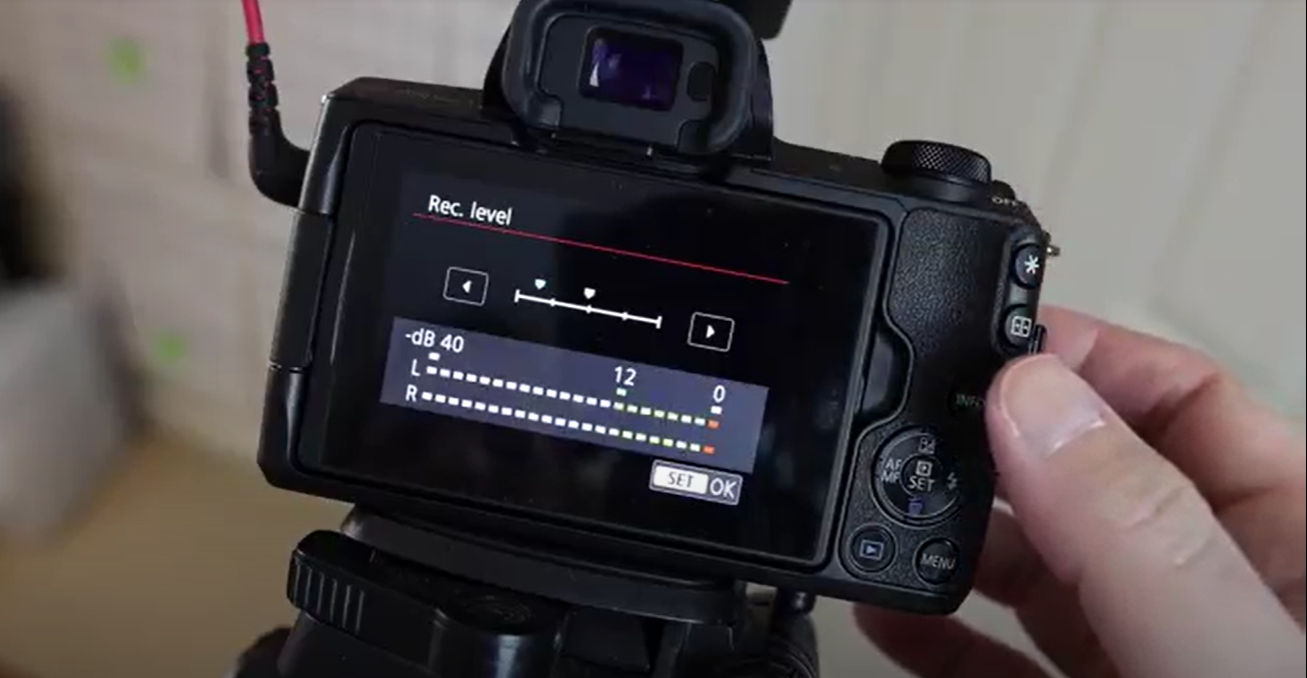
When you are using an external microphone like the Rode Wireless Go, you need to set the audio settings in your camera. I'm using my Canon m50 Mark 2 to show you how to set the audio settings on a camera. You want to open your audio settings and set it to manual, which will allow you to see the levels. This allows you to see the microphone's level and the amount of audio input and recorded into your video.
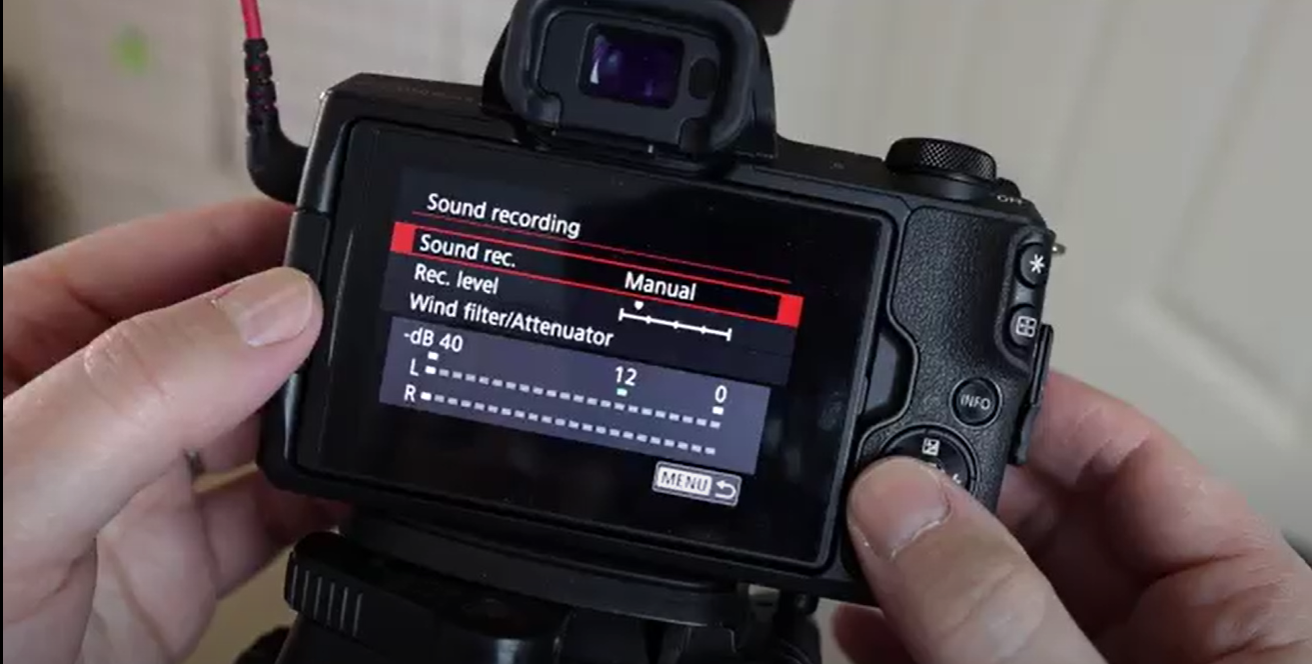
The level for my microphone is very low. If you go up a little bit more, you're going to see it start getting into the yellow and the red. This is called peaking, and you don't want this to happen. When it's peaking, it's difficult and impossible to fix your audio. Therefore, I like to have mine below those yellow dots.
No matter what microphone situation you have going on, you want to test this out. I have recorded videos before without looking at my levels, and I had to reshoot the entire video. Do a few test shots, pull the footage into your computer, put it in your actual editor, and you can see the levels.
For more details on how to adjust your audio settings, be sure to watch the complete YouTube video here.
Tip #5: Get the Rode Magnet
One of my favorite things about the Rode Wireless Go setup is an accessory, a magnet that is designed to be placed on the clip behind the transmitter to clip it onto a shirt. For me, I use the magnet on the receiver; I can clip it on any metal part of the tripod. This allows me to see the levels, the battery, and the power. If the receiver was placed on top of my camera, I wouldn't see the display screen.

Tip #6: Editing Your Audio
To edit my audio, I use Final Cut Pro. To make sure I see my audio meter on Final Cut Pro, I go over to Window and select workspace then audio meters.

On the right hand side, you have the audio meter display. When you hit play on your footage, you can watch the audio level of the footage. You want to aim for the audio levels to be between -12 to -6 decibels.
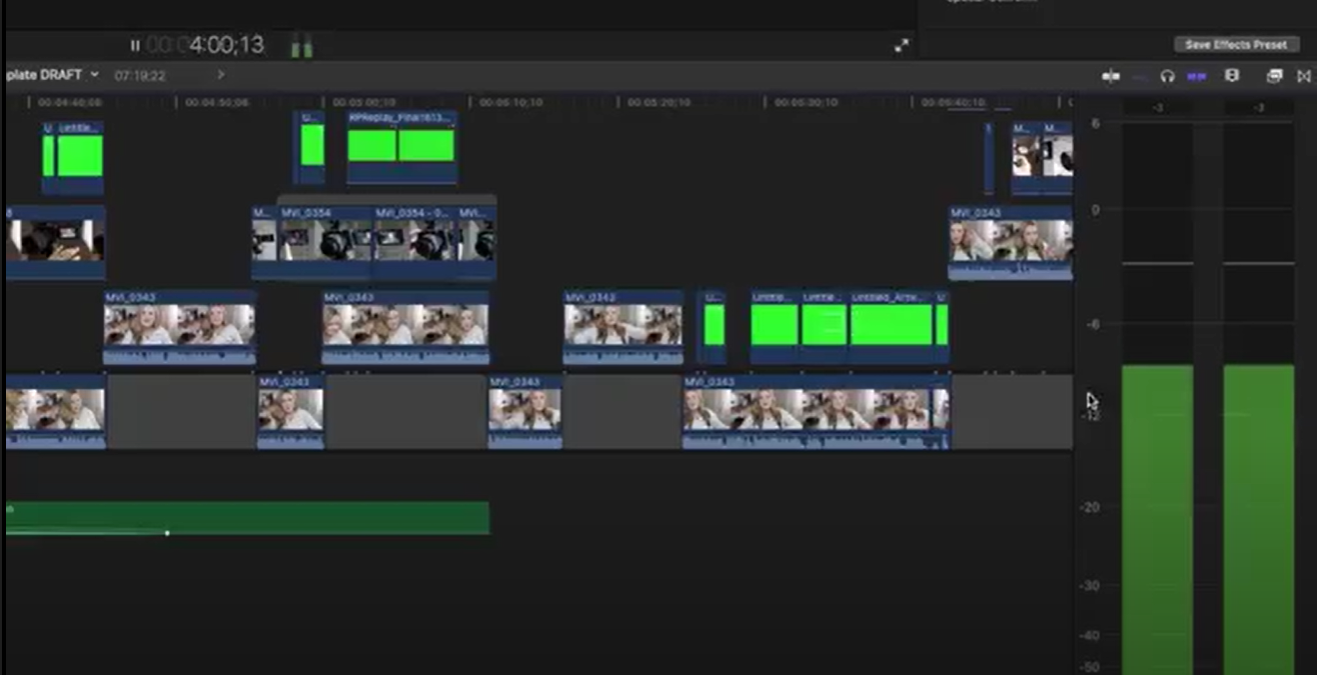
On my camera, I set my audio level to a pretty low level in the manual setting. To adjust the audio on the Final Cut Pro, I can either adjust the volume in the timeline and go to the audio menu.
Tip #7: Enhance Your Audio
To make your audio sound better and more professional, you can do things like play with the D noise or the channel equalizer, and the compressor.
Well, I have some good news for you! Anthony covers how to enhance your audio in the tutorial that he published a couple of weeks ago. Also, he's giving away a free preset that you can use in Final Cut Pro or Premiere Pro. All of my clips you see in this video are automatically using Anthony's preset.
I found out when I made these adjustments using Anthony's preset, my audio sounds brighter, cleaner, and more natural. If you want great audio quality off of your Rode Wireless Go or any microphone, hop over to Anthony's tutorial, and learn how to properly edit and enhance your audio, which is an easy way to make your videos a bit more “pro-level.”
I hope my tips will be helpful as you are looking to improve your audio quality using the Rode Wireless Go or any microphone.
If you haven't already, check out Anthony's YouTube channel for videos on improving and creating better videos. Also, check out the YouTube video I did with Anthony which was included in my video.