Complete ScreenFlow Tutorial – Screenflow 9 for Beginners
Here is a step-by-step tutorial on how to use ScreenFlow 9! This is good for anyone that is a beginner or just download ScreenFlow after reading that ScreenFlow is my screen recording secret weapon (best screen recording software for Mac!).
Some product links in this post are affiliate links, and I will be compensated when you purchase by clicking our links. Read my disclosure policy here.
Complete ScreenFlow Tutorial – Screenflow 9 for Beginners
You probably already know that ScreenFlow is an easy-to-use screen recording and video editing software for the Mac. If you don’t have ScreenFlow yet, I highly recommend going directly to Telestream’s website to download ScreenFlow because you get a free trial, and it makes updates easier in the future.
Before we dive into this ScreenFlow 9 Tutorial, I also want you to know that I create a ScreenFlow Cheat Sheet for you! Just download this one-page PDF and you'll some of the common shortcuts and other ScreenFlow tips that you can reference any time.
Related: BEST Screen Recording Software for Mac
The ScreenFlow Welcome Window
Now, I'm hoping you have the ScreenFlow 9 up and running on your Mac as you are going through this blog. Let's get started.
It may be easier to watch this tutorial in the YouTube video at the bottom of this post or click here to watch it now.
When you first open ScreenFlow 9, you will see the ScreenFlow window. Below the left-hand menu is “New Recording,” where you can choose exactly which screen and audio to record.
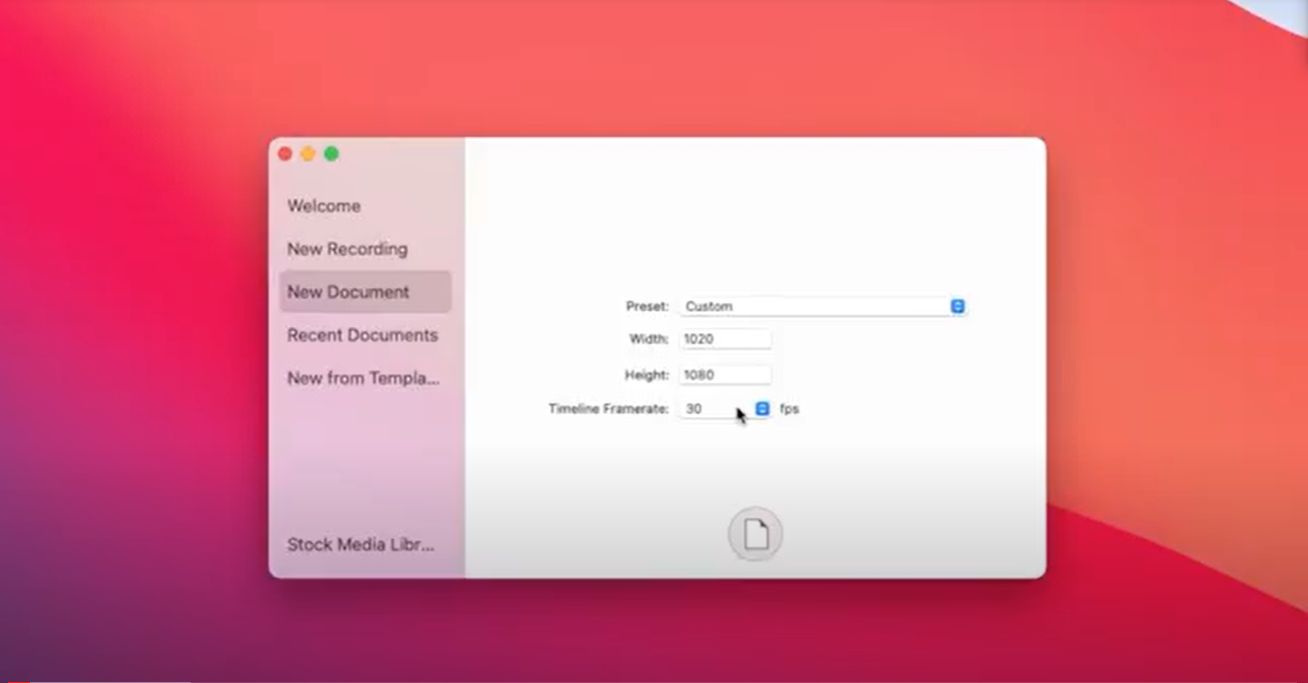
Under “New Document,” you can set up a document or a project as I like to call it. You can start with a blank screen, then add media to your document. The Preset menu lists several typical document dimensions like 4K, 1080p, which you can choose from or customize and set the frame rate. If you want to play around with ScreenFlow, “New Document” is a perfect place to start.
Inside “Recent Documents,” you will find the recent projects you have been working on. Below, you will see “New from Template,” which I will talk about in a future blog. For now, you do not need to worry about it.
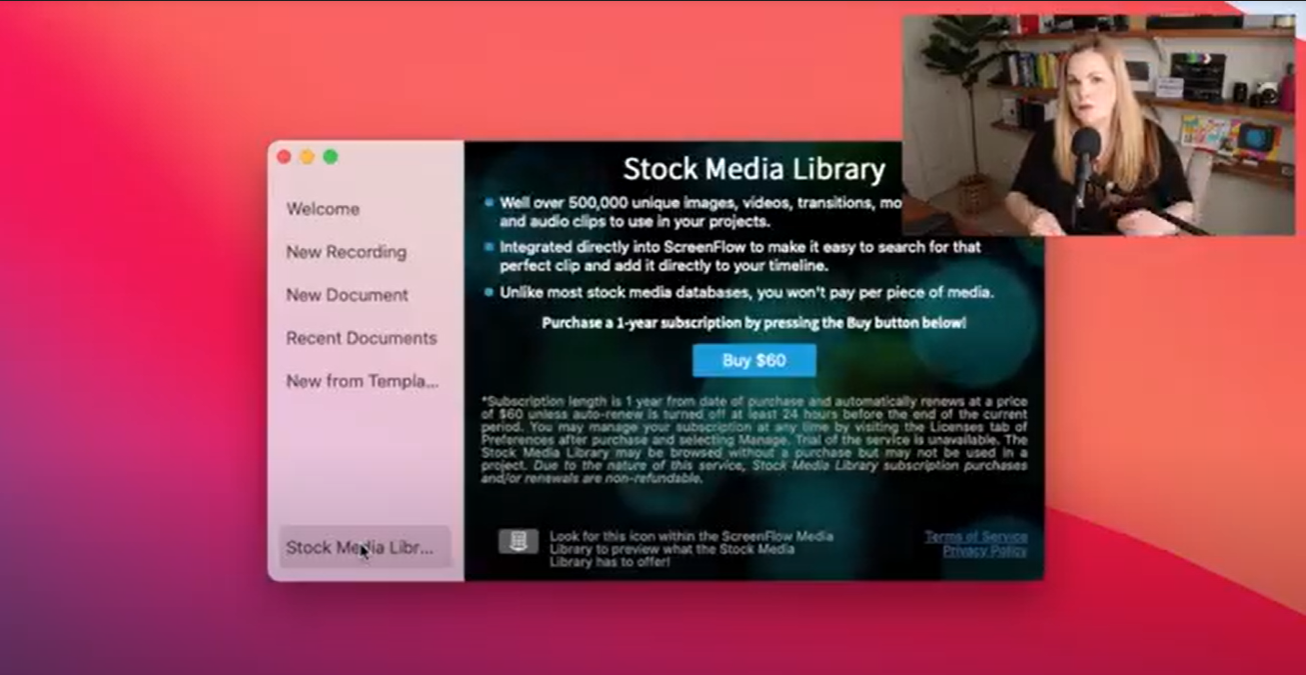
You will also see an option for Stock Media Library. This is unnecessary for me since I don't use any stock footage in my screen recordings. However, if you want to pay for this, consider if you actually need photos or videos from outside sources. We won't be covering stock media in this Screenflow tutorial.
Configure Recording in ScreenFlow
Let's start with a brand new screen recording here. Use ScreenFlow Helper up here in the menu bar of your Mac–you’ll want to get familiar with this because it’s essential for recording, pausing, and stopping your recordings.

Before you hit “Record,” let's configure exactly WHAT we want to record first. On the ScreenFlow Helper, choose “Configure Recording.” It will bring up the New Recording window. If your desktop has many icons, go to the ScreenFlow Helper and select “Hide Desktop Icons.” Your desktop will look neat and professional.
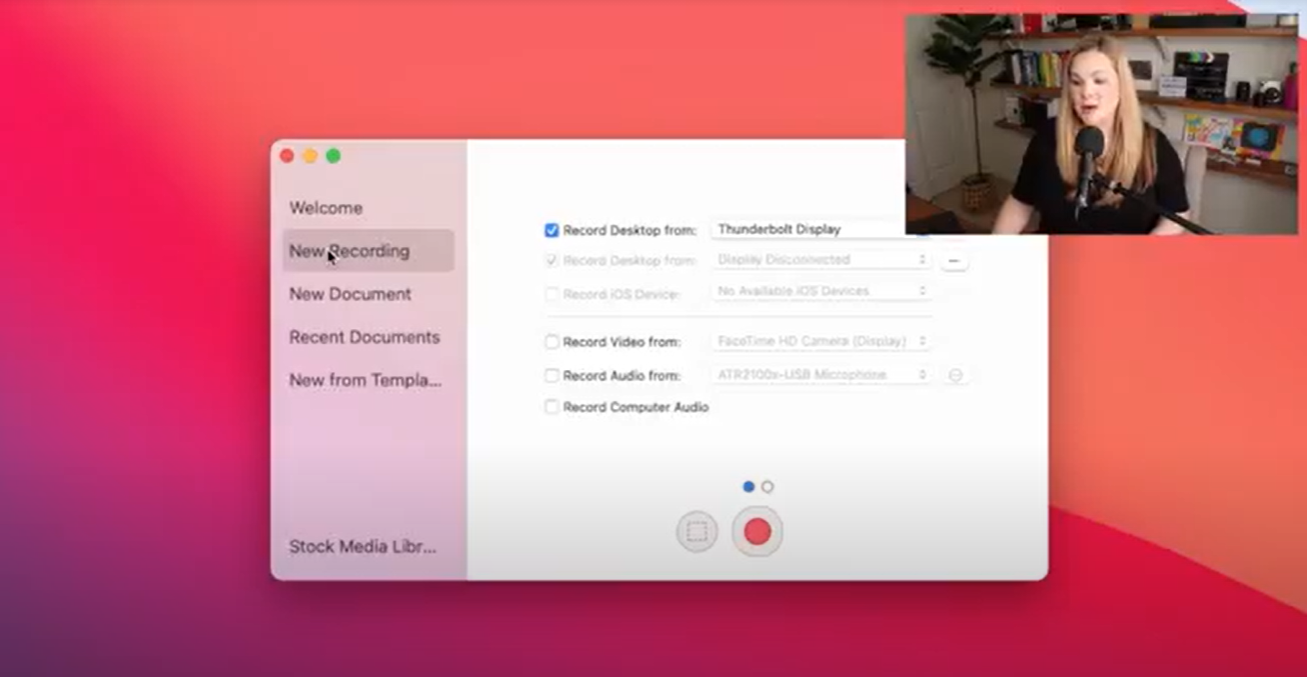
In the “New Recording” window, you can check, uncheck, and select all of the devices you want ScreenFlow to record for you:
- “Record Desktop” is your computer monitor. It’s what you see on your computer screen. If you have more than one monitor, you can hit the plus button to add a second screen. That’s a new feature in ScreenFlow 9, but I only have one, so for this ScreenFlow tutorial we'll be using just the one.
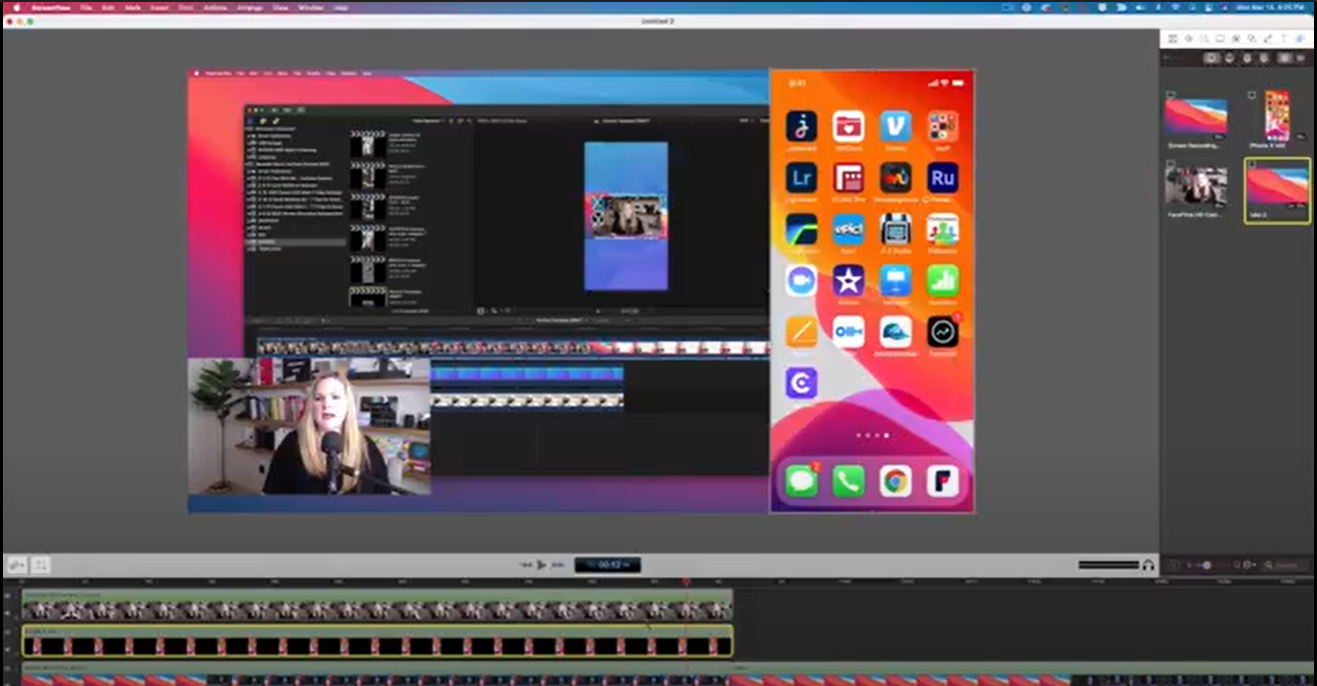
- “Record iOS Device” allows you to select a connected iOS device like your iPhone or iPad through a cable. If you want to record your iPhone screen, make sure you have the blue check. If not, then uncheck it.

- “Record Video” gives you the option to record your webcam. There is a couple of options here: my built-in webcam and “Cam Link 4K” which is my Canon M6 Mark ii connected to my computer through the Elgato Cam Link.
- “Record Audio” will provide you with the option to record from an external microphone or built-in mic. I record from my external microphone, Audio Technica ATR 2100x. Using this microphone is much better than a built-in mic. Plus, it's super affordable. The built-in microphone is my Display Audio, which is part of my Thunderbolt display. You also have the option to record your computer audio. It will pick up any audio coming through the computer speakers. You must install the ScreenFlow audio driver for your computer audio, but it's a bit more complicated.
Before we start our recording, let me show you the Advanced Settings, which you can access when you click the second little blue button. Set the Record Desktop Frame Rate to Highest and the timeline frame to 30. That’s fine for me and most projects. If you combine a screencast video with a talking head video as I do, you’ll want your timeline frame rate to match your video frame rate. For me, that’s 30 Frames Per Second.
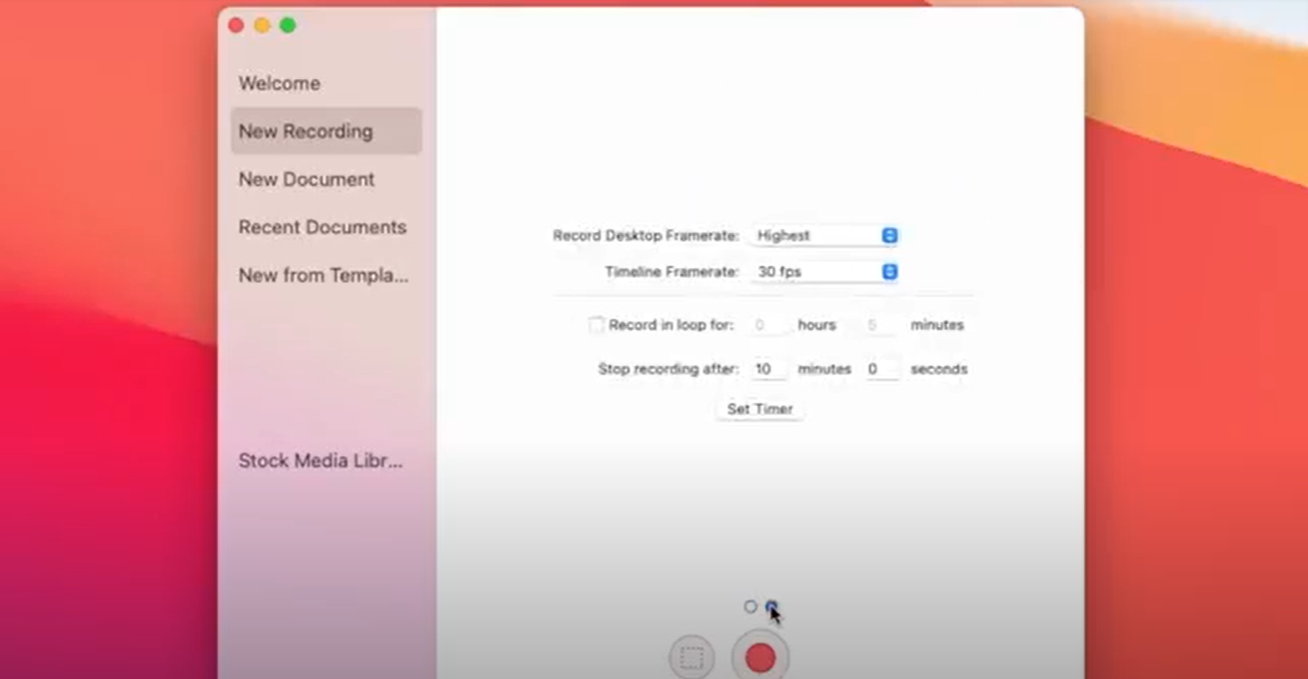
If you want to “catch” something happening on your screen, you can select and set up the “Record In Loop.” For example, you’re a gamer and you want to record a particular action, but you don’t know exactly when it will occur–you can check “record in loop for 10 minutes.”
As you record your screen, you play your game for 30 minutes then hit stop record; you’ll have a screen recording that’s 10 minutes long and consists of the 10 minutes of the recorded screen before you hit the stop record button. You can also set a timer to record for only a certain length of time.
I'm not a gamer, so I can't demonstrate the Loop feature in this ScreenFlow tutorial.
Start and Stop Recording in ScreenFlow
Go back to the regular settings once you have set up the Advance settings. When you’re ready to record, hit the red record button, and you’ll see a countdown with a summary of everything recorded. From the menu bar, you can then select Stop Record or hit Shift Command 2. By the way, I put the keyboard shortcuts in the ScreenFlow 9 Cheat Sheet along with a checklist summary of this video so make sure to grab that.
When you stop recording, you’ll see ScreenFlow automatically open up the editing window with all of your media – the screens, video, audio you just recorded – all placed directly on the timeline for you.
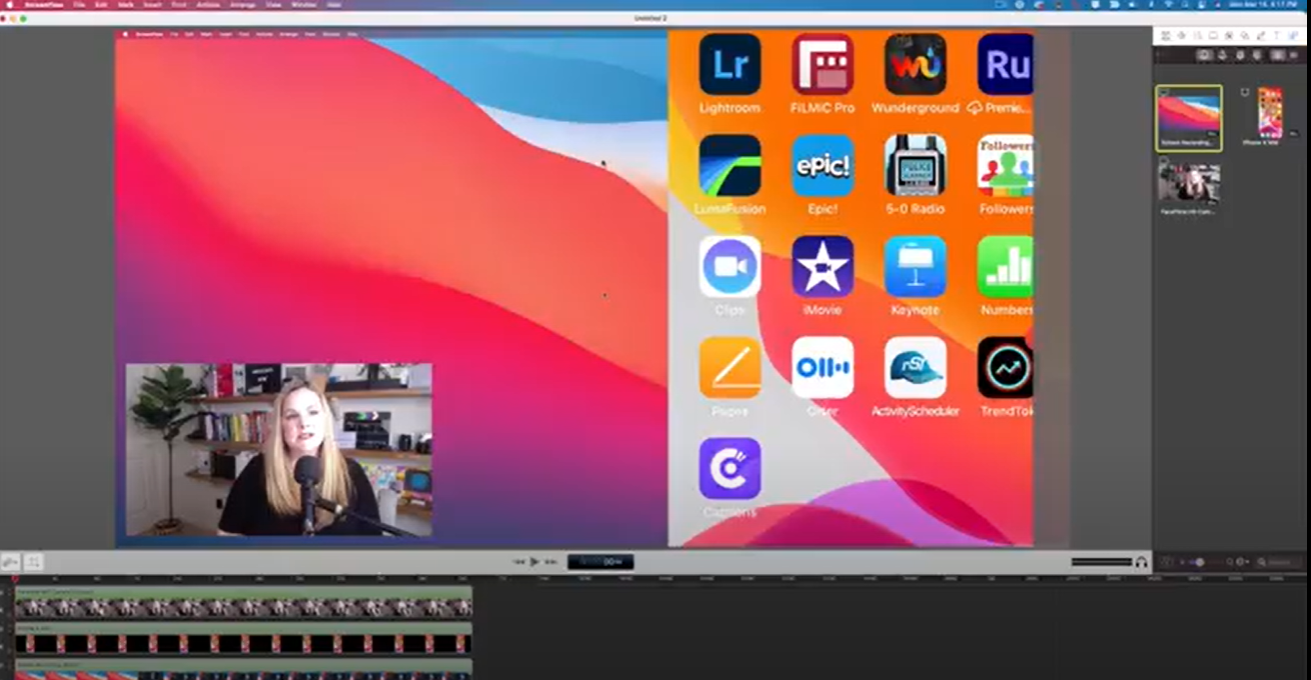
If you have recorded your display and your computer audio, they will be combined into one clip. Camera video and external audio are combined into one clip. You can easily detach these if you want by choosing Edit > Detach. It might be easier to leave them together that’s what I usually do.

How to record only PART of your screen in ScreenFlow (partial screen capture tutorial)
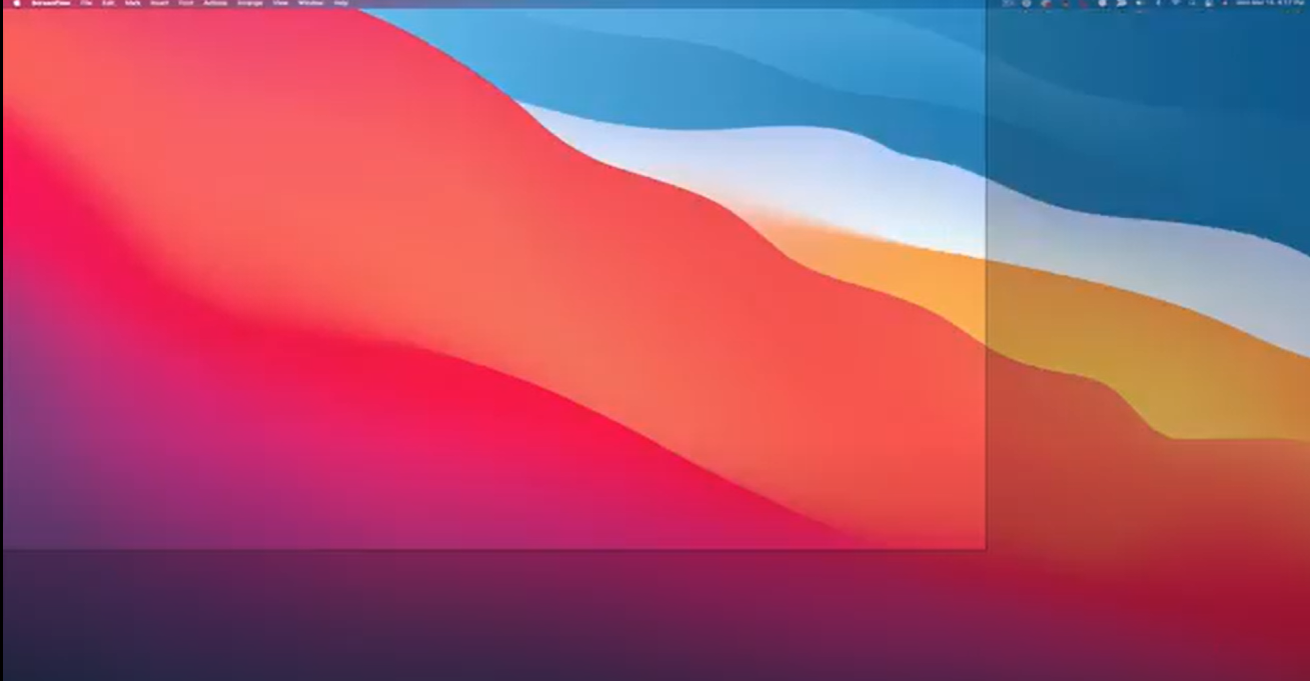
Most of the time, I don’t want to record my whole display instead, I would record part of my screen. To do that, I go to “Configure Recording” and select the Partial Screen Capture, which is next to the big red record button. You have a window; you can move it anywhere around your screen. Inside the window is where the recording will happen, while outside the window no recording occurs.
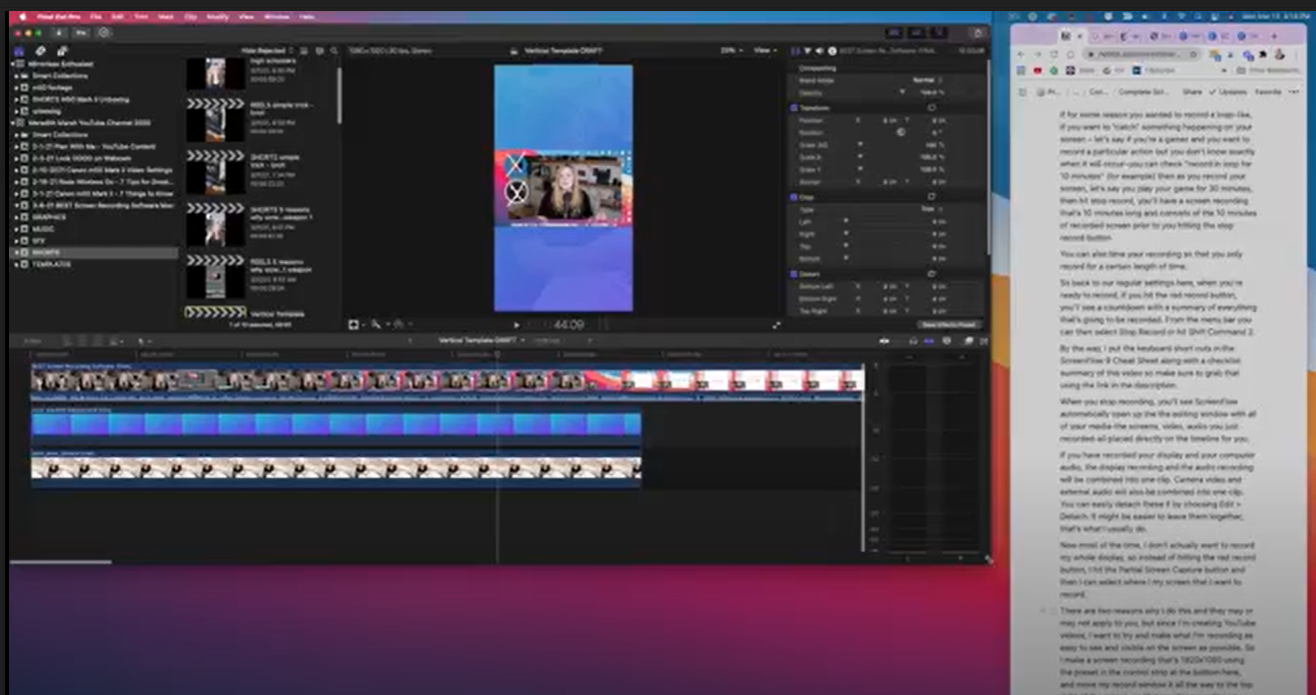
There are two reasons why I do this. Since I’m creating YouTube videos, I want to try and make what I’m recording as easy to see and visible on the screen as possible. So I make a screen recording that’s 1920×1080 using the preset in the control strip at the bottom and move my record window all the way to the top right of the screen, so I’m recording any menu dropdowns as well.
Then I hit the red record button, and only that selected portion of my screen will be recorded. On the right-hand side, I can have my notes or script open since it will not be visible in the recording window. When you hit Stop Record, you can add the new document to your recent project by inserting it into the timeline from your media bin.
Related: How to Edit Zoom Video Recordings
ScreenFlow 9 Video Editor – The Basics
So those are the basics of recording your screen with ScreenFlow. Now where ScreenFlow REALLY shines…the reason why I like to call ScreenFlow my screen recording secret weapon is really in the editing features and functions.
ScreenFlow's setup is similar to any video editing platform. However, if you're new to editing videos, ScreenFlow editor is easy-to-use and easy to learn. In the Editing Window, you have your canvas. This is the visual part of your project or document that you’re working on. You have your timeline area at the bottom with the canvas controls and playback controls right between them.
The timeline is where you’ll see the media files in action here. Also, this is where you’ll cut out parts that you want to remove from your project, switch things around, and delete clips entirely. Over on the right-hand side is the properties panel; you can make changes to your project’s properties, add effects, pointers, text, and graphics.
VIDEO: Complete ScreenFlow Tutorial – ScreenFlow 9 for Beginners
Click here to subscribe to Meredith Marsh on YouTube.