How to Burn Captions to Videos (add titles and subtitles)
In this post, you'll discover how to burn captions to videos but adding titles, subtitles, and text to your videos for IGTV, YouTube, or any social media platform! Here are a few easy ways to create “baked in” captions which is perfect for Instagram and IGTV!
Click here to subscribe to Meredith Marsh on YouTube.
Some product links in this post are affiliate links, and I will be compensated when you purchase by clicking our links. Read my disclosure policy here.
Burn Captions to Videos
Related: Easily Edit Videos with the YouTube Video Editor
3 Web-Based Apps to Use for Burning Captions to your Video
Turning your YouTube videos into vertical format will give you more reach and engagement on different platforms like Instagram's IG TV. That's one of the most important things that I do after I released new content on YouTube, but a lot of people have been asking me how do I burn those captions and transform my video into that format.
It's actually pretty simple and easy. I will show you 3 different ways on how you could burn the title and the captions to your video. Moreover, you won't also need some fancy software to do it because all of those are online tools only that you can access from your browser.
Most online platforms today want content that will make the audiences stay on their platform as long as possible. One of the keys to succeeding in that metric is to have those burned captions to your videos so that people will keep watching.
Kapwing
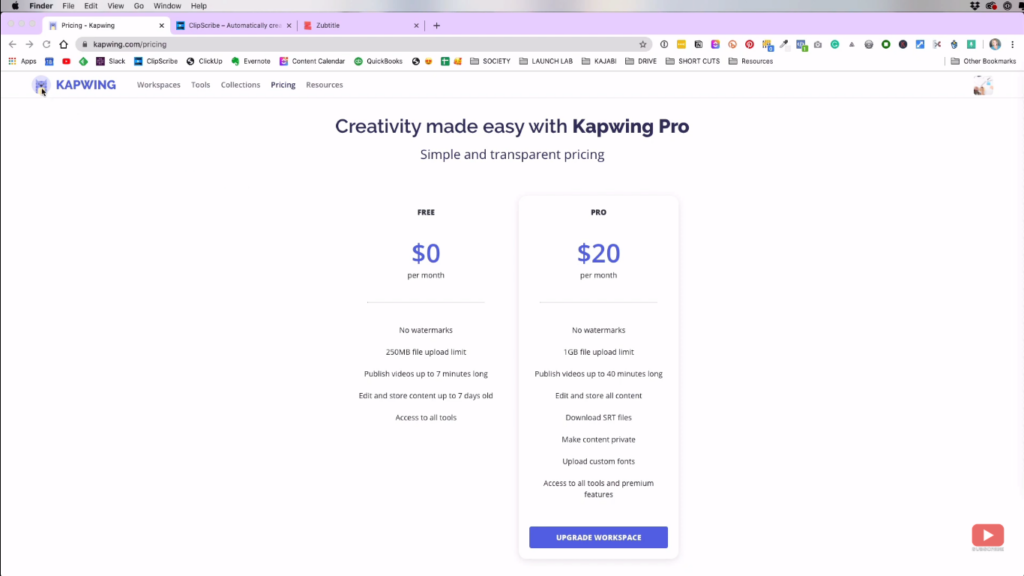
So the first one that I'm going to show you is called Kapwing. It has a free and paid version. However, we know that free versions always have some limitations. In this case, the free version has some file size upload limit, video length should be 7 minutes long or less, and so on.
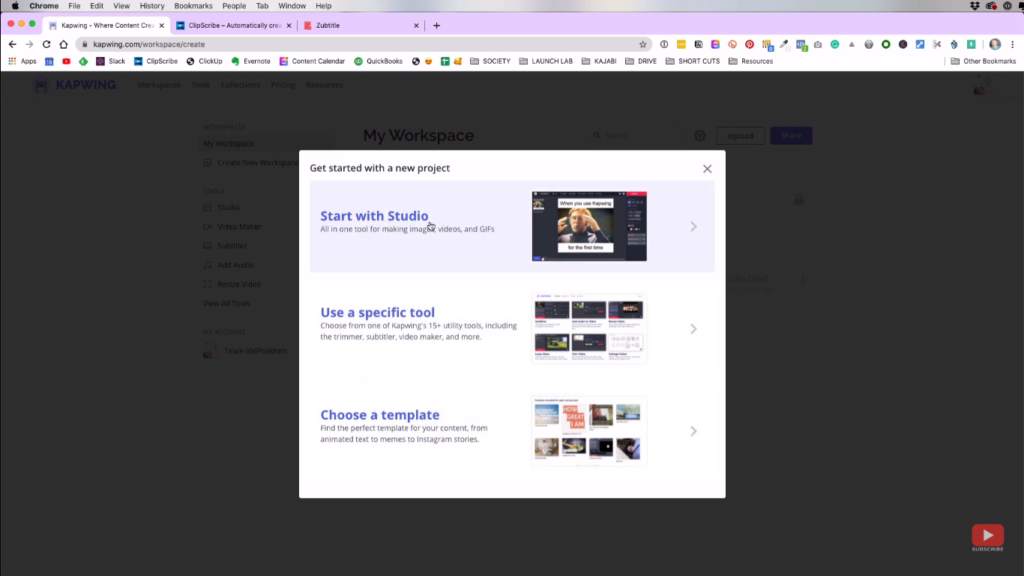
To use Kapwing from scratch, just click “New Project” in your workspace then select “Start with Studio”, and then just upload your video.
Auto-Generate Subtitles
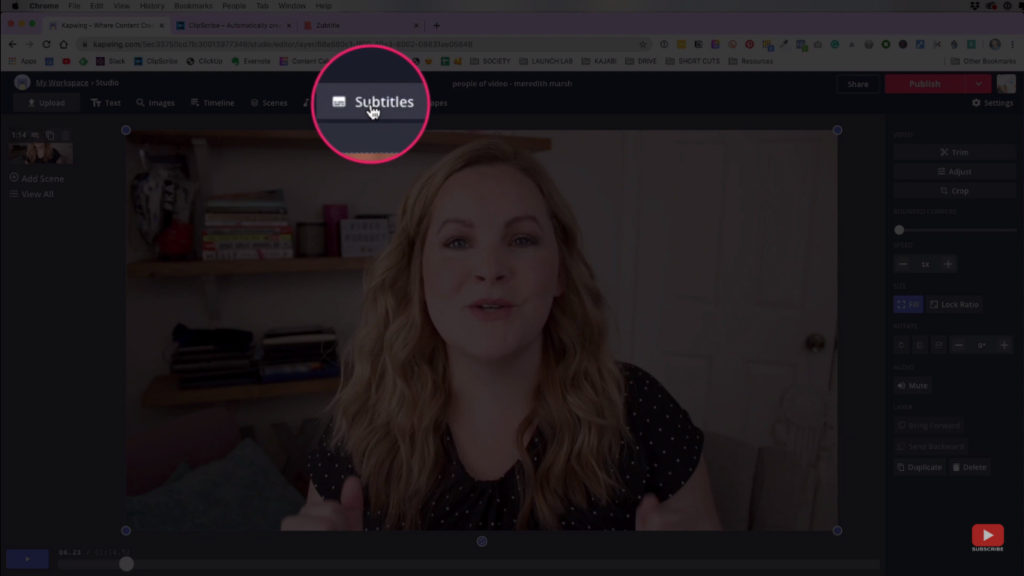
After that, you will see that it has some pretty handy tools like trim, adjust, crop, and more. But what you really want here is to go to “Subtitles”.
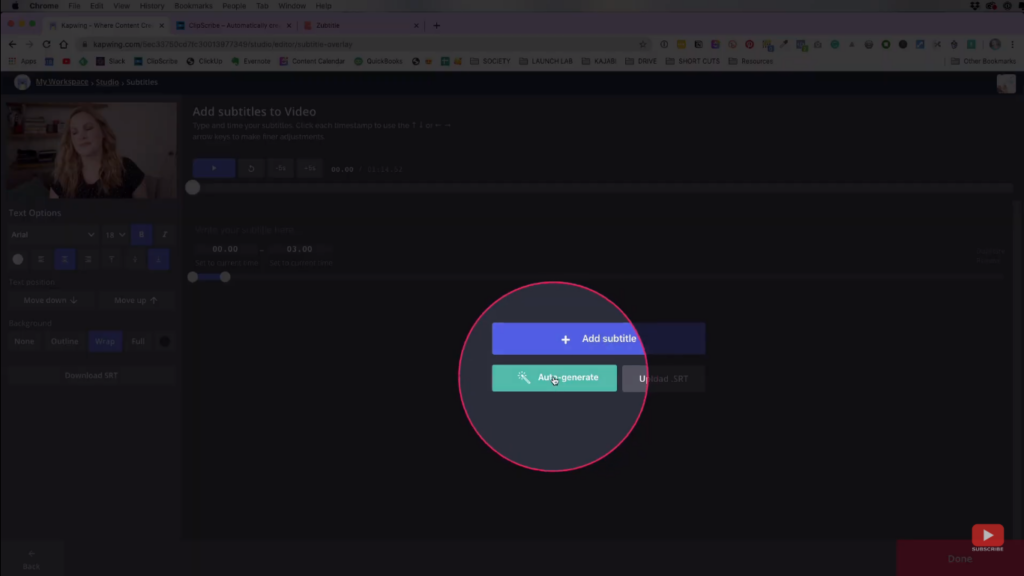
Once you're in the Subtitle Studio, just click “Auto Generate” and it will just ask you what language did you use to your video and just confirm it. What Kapwing does after that is basically what YouTube also does to your videos. It uses its own system to generate closed captions to your video.
Having said that, it's not really error-proof, so you might want to have to take a look and double-check it once it's done processing. After all, it's still much faster than typing it all manually.
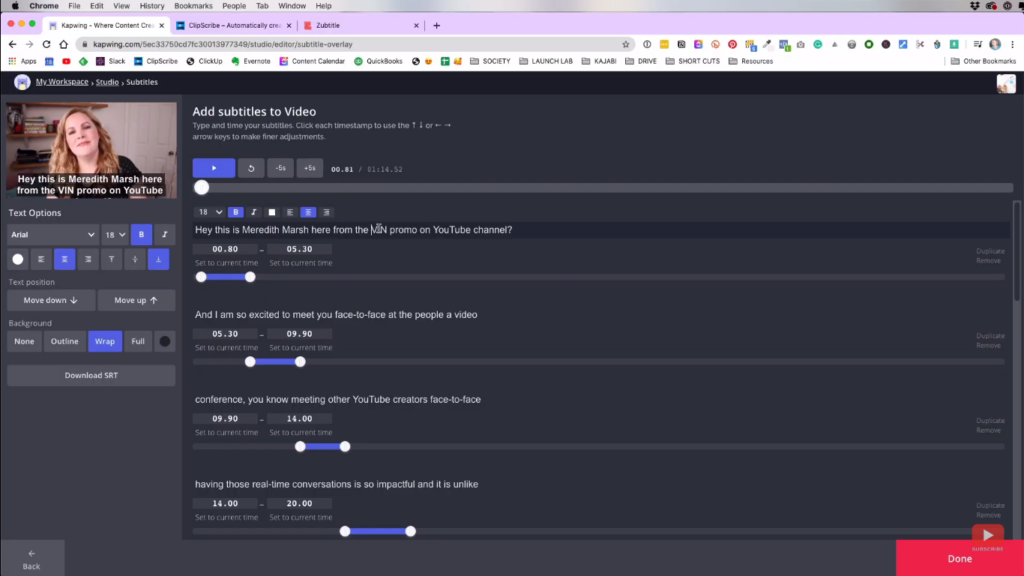
Once it's done transcribing, it will take you to a page that looks like this. This is where you will review the subtitles that they have generated for your video so you can start reviewing them. Once you're done, just hit the big red “Done” button on the bottom-right corner of the screen.
Converting to Vertical Video
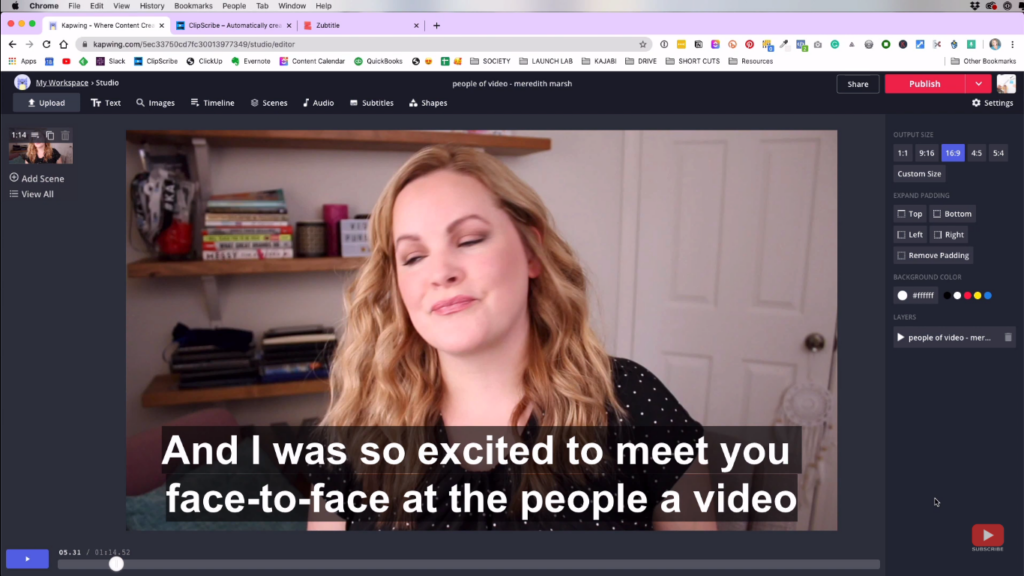
After that, this is what it would look like. However, there are still some steps that you should do. We still need to make it a vertical video so that it's good for other platforms like Instagram or Facebook.
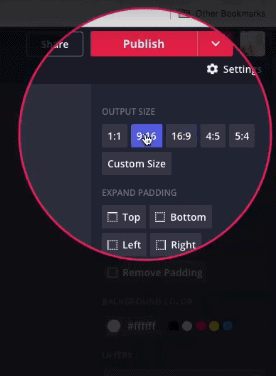
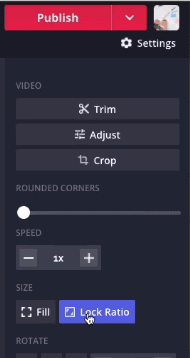
To make your video in vertical form, just switch the output size from 16:9 to 9:16, then click “Lock Ratio”.
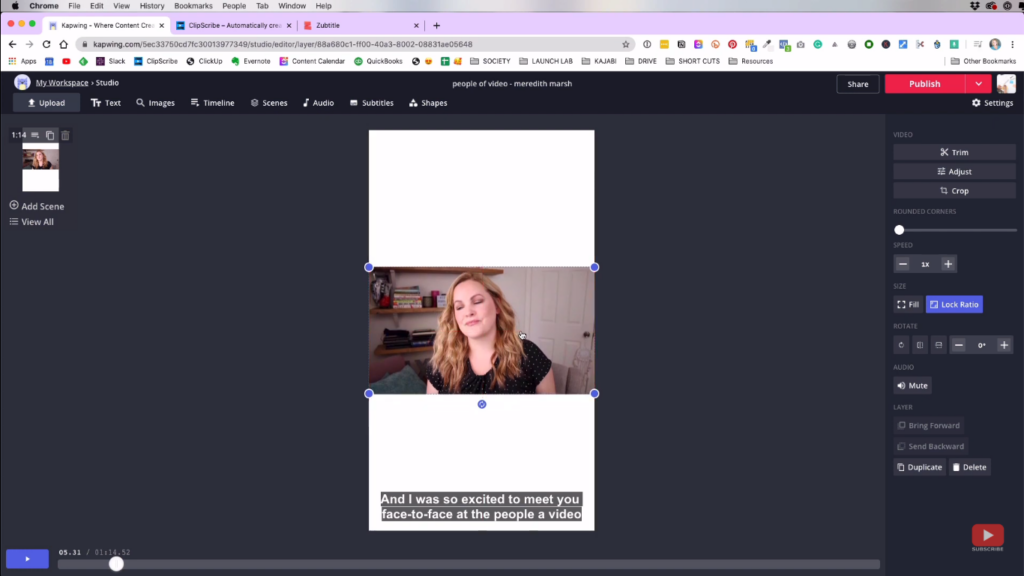
This is what your video would look like after that. However, one small problem that I have with Kapwing is that I cannot reposition the subtitles which is why it's way down on the bottom.
Adding Titles
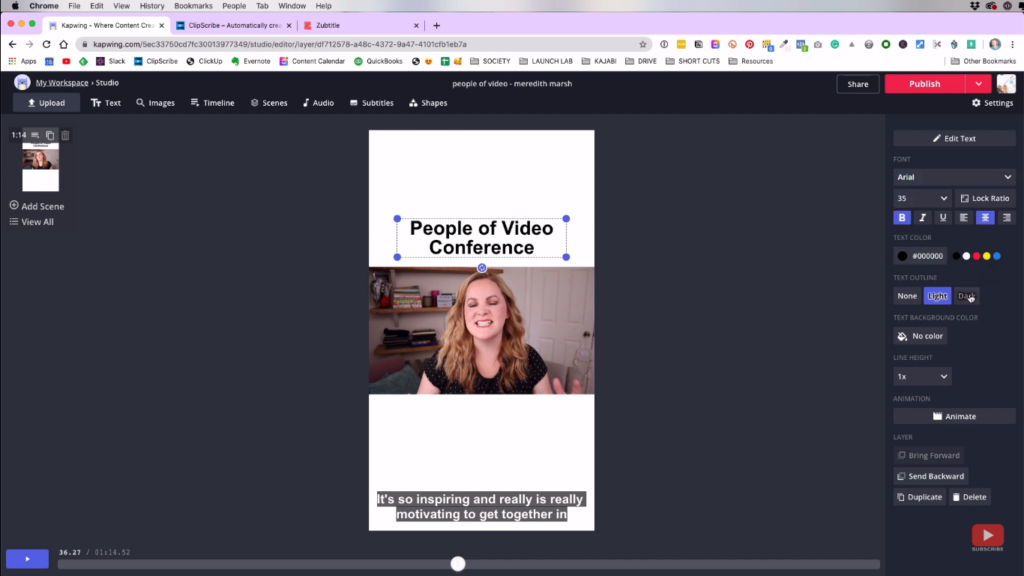
In the “Text” tab above, you can add some title text to your video and customize the font, size, color, outline, and so on. Once you're all set and done, just hit “Publish” on the upper-right corner of the screen so it can start rendering the video, and you can start downloading it.
ClipScribe
I'm fairly new to Kapwing, but ClipScribe is what I use the most to burn captions to my videos. It has 2 different plans, one for $45 and the other is for $90. I'm not sure if it's already forever or annual, but either way, it is worth the price with all the amazing features that it offers.
Upload Your Video
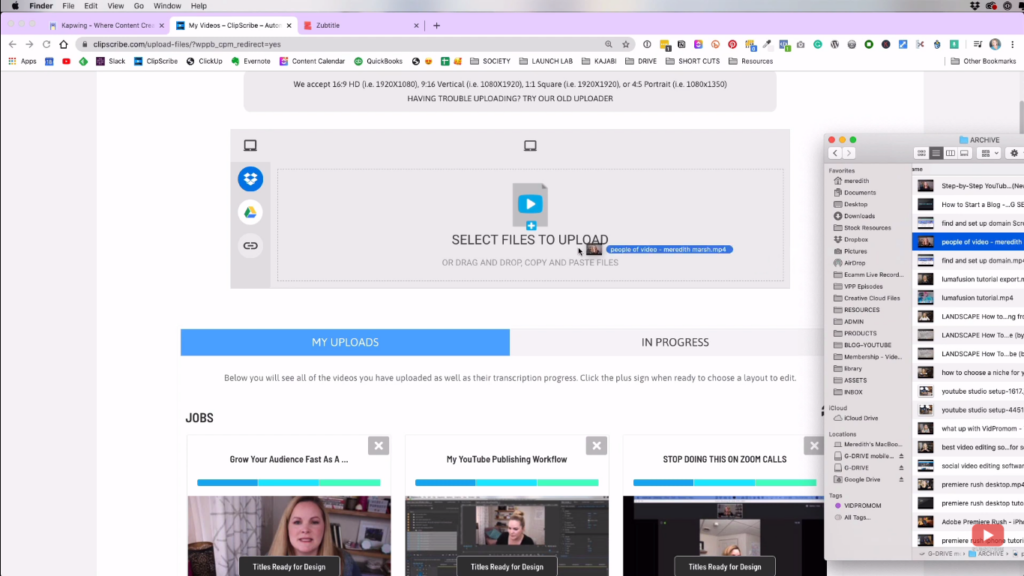
I already have lots of projects uploaded inside of ClipScribe, but I want to show you the complete process of using this app. Basically, you need to upload your video first so that you can get going.
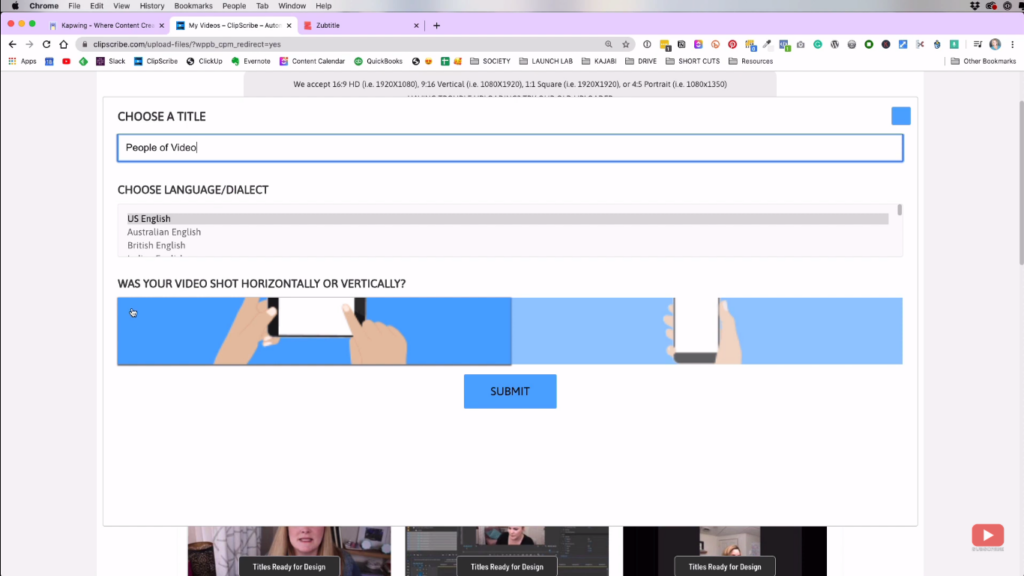
It will ask you to choose a title for your video, the language you have used in that video, and whether it was shot in landscape or portrait mode. Then, just click “Submit” and it will start processing.
Edit Your Video
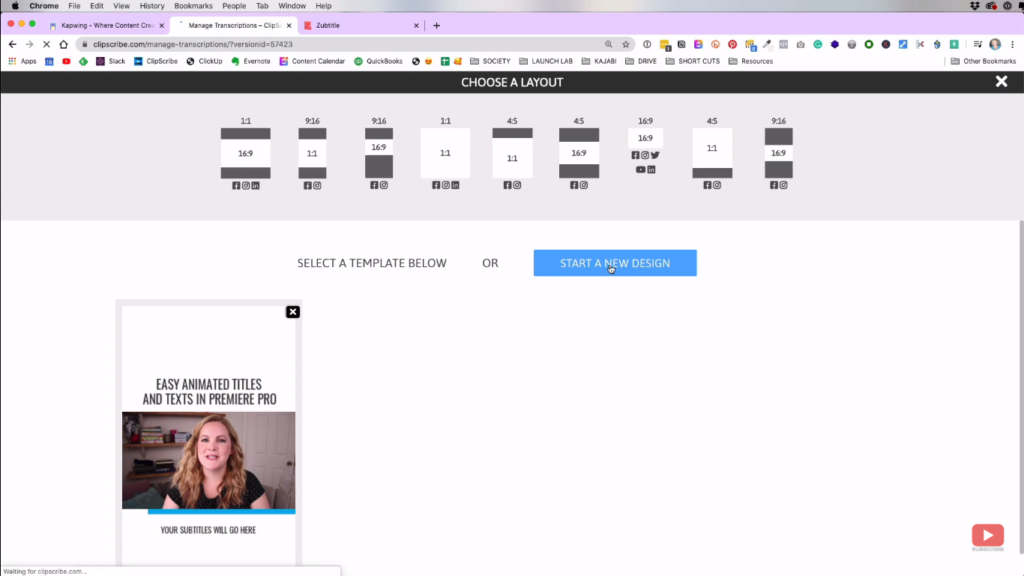
Once it's done processing your video, you can just click the plus button on that certain video. Then, it will take you to this page. This is where you can choose the layout and template (if there's any) that you will use.
So, just click the layout, then it will show you your templates. But for now, we'll start with a new design.
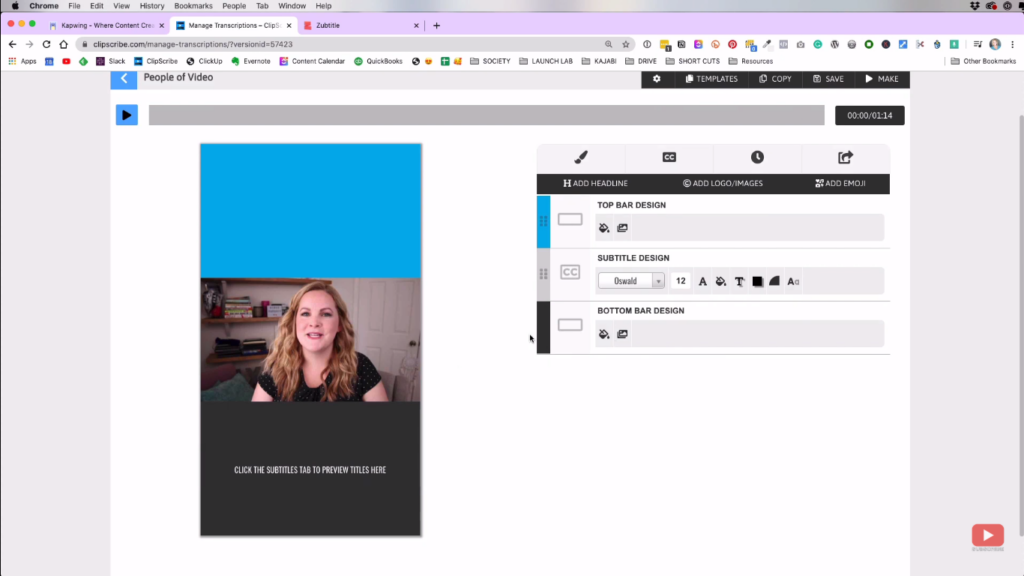
So this is the default look for your video if you started from scratch. You'll see that you have there the blue and dark gray area and the subtitles. You can still change those if you want. One of the plus sides of this app is that it's very easy to reposition the elements in your video including the subtitle.
What I do is move my subtitles up just a bit closer to the bottom of my video. Then, I click the “Add Headline” for my video title. You can add multiple headlines, logos, and so on. So, you can just be creative and play around with the designs.
Edit Subtitles
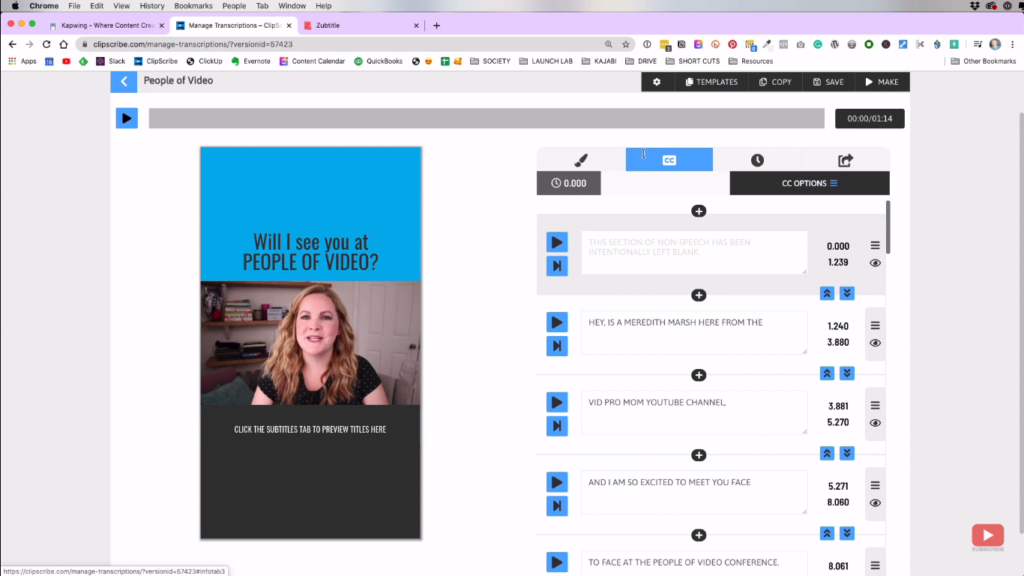
Once you're done with the design, you can click the tab with the “CC” icon. That is where you can edit the auto-generated subtitles created by ClipScribe. It is still not error-proof, but it's quite better than what Kapwing does.
As you go on, you can check for some errors in the transcription and just correct them by yourself. You can even check it word-for-word if you want.
Add a Timer Bar
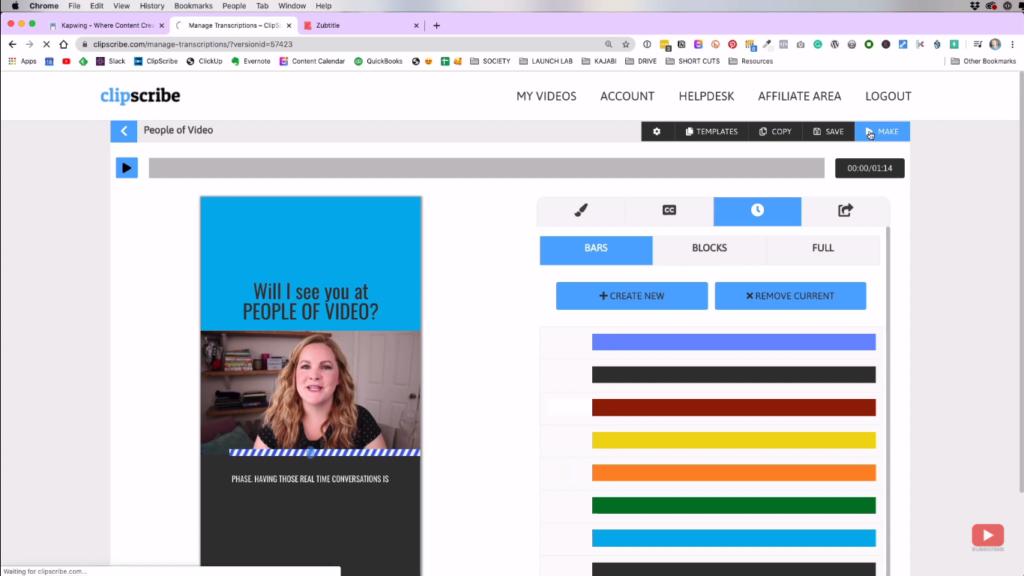
Once you're set with the subtitles, you can also check out and add a timer bar. This is like a bar that goes along your video, and it lessens gradually as your video reaches its end.
Once done, you can now click the “Make” button on the top-right side of the screen so it can start rendering your video and download it.
Zubtitle
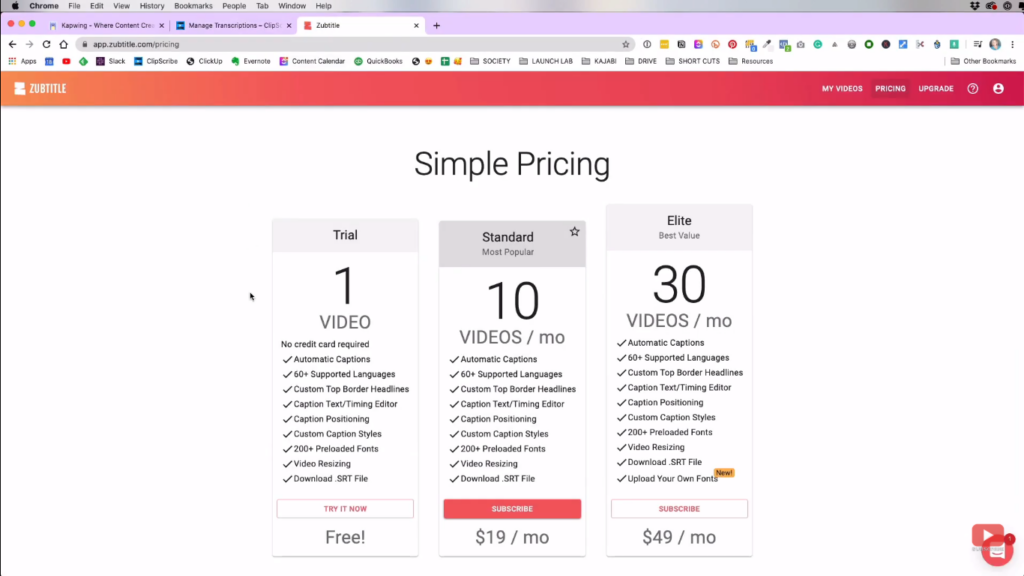
Unlike the first two, I haven't really used Zubtitle but I have heard some feedback about it so let's try it out. It has a 1 free trial video so you can try it out here, then you can either choose between $19/mo for 10 videos or $49/mo for 30 videos.
Edit Captions
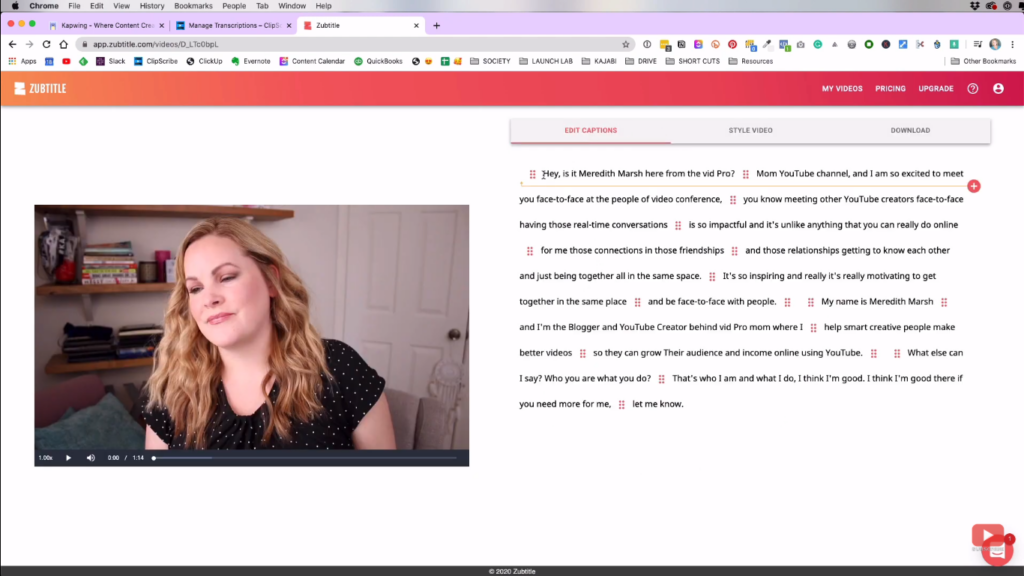
Once you've uploaded your video, this is what it should look like. This is where you can edit the captions. To be honest, this layout is quite different compared to other apps, and I like it. It's easier to read and check it this way so that's cool.
Video Style
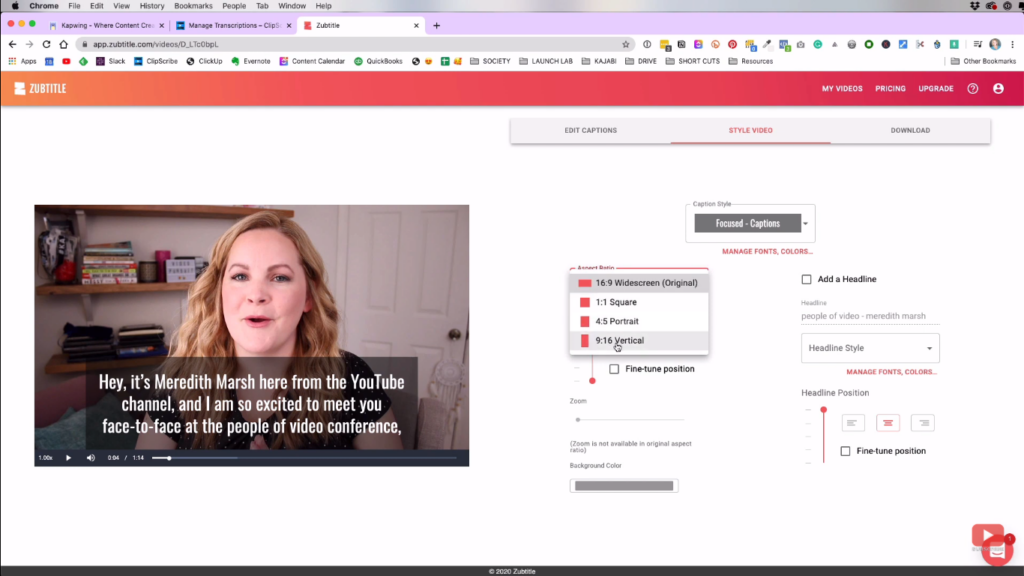
After editing the subtitles, you can move on to the “Style Video” tab. Just click the “Aspect Ratio” then choose “9:16 Vertical” to make it a vertical video.
Then, you can start exploring the other features, positioning, headings, background color, fonts, and so on. Once you're done, you can hit the “Download” tab so it can start burning those captions to your video.
Final Looks
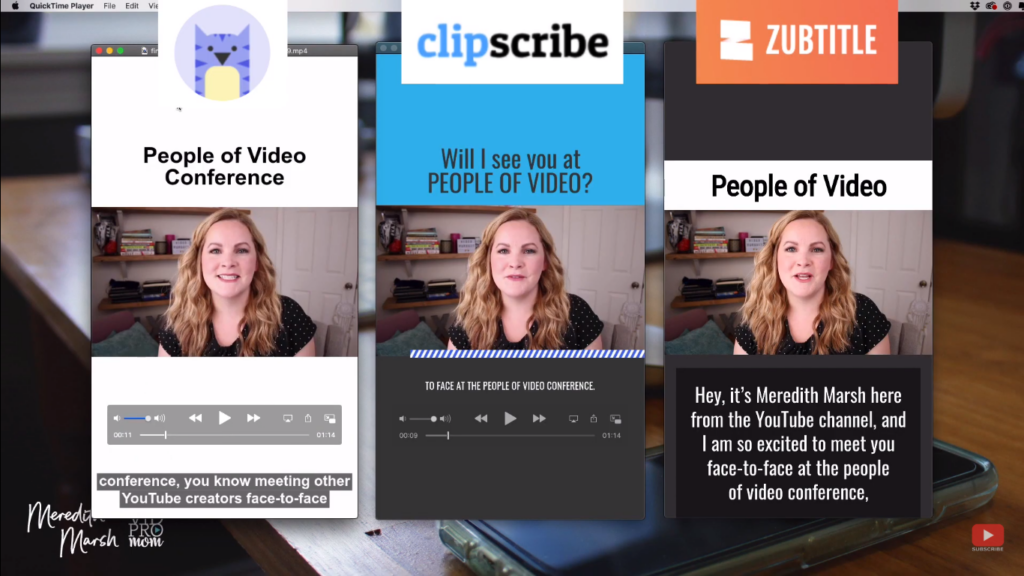
So, this is what the 3 videos look like side-by-side. The first one on the left is the one we've made in Kapwing, next is the ClipScribe, then the Zubtitle video. Those are the different ways to burn captions to your videos.

Related: IGTV vs YouTube
All 3 of them are really good, but my personal favorite is still the ClipScribe. It's very easy to just edit your videos there and reposition your subtitles. Unlike the 2 other apps where the subtitles are stuck on the bottom part of the video.
It's very important to me because I want my subtitles to be easily readable when I post it over on Instagram as you can see in the image above. But overall, it was a great experience from all those apps.
If you want to see more of my YouTube videos with burned-in captions, check out my Instagram page here, don't forget to follow me, and head over to my IG TV. You can also get my “Edit Like A Pro” cheatsheet here, a very important guide for online content creators.
Related: How to Edit Vertical Video in LumaFusion
Be sure to subscribe to the VidProMom YouTube Channel so you don't miss fresh new videos from Meredith! Click here to subscribe now.