How to Export Videos in iMovie (for Mac, iPhone, and iPad)
Ready for the steps to export video, in iMovie (on your Mac, iPhone, or Pad)? You found the easiest step-by-step iMovie tutorial here, updated for 2020! Don't miss these common mistakes for saving videos in iMovie, uploading to YouTube or social media, exporting an iMovie video to a thumb drive, or emailing an iMovie video.
Some product links in this post are affiliate links, and I will be compensated when you purchase by clicking our links. Read my disclosure policy here.
Export Videos in iMovie
I will show you how to export your iMovie project so that you can share it on YouTube, Vimeo, social media platforms, and even to Email. However, there are just some couple mistakes that I want you to watch out for.
I guarantee you that this tutorial will not be over complicated. In fact, this tutorial will just be quick and easy which is perfect for beginners.
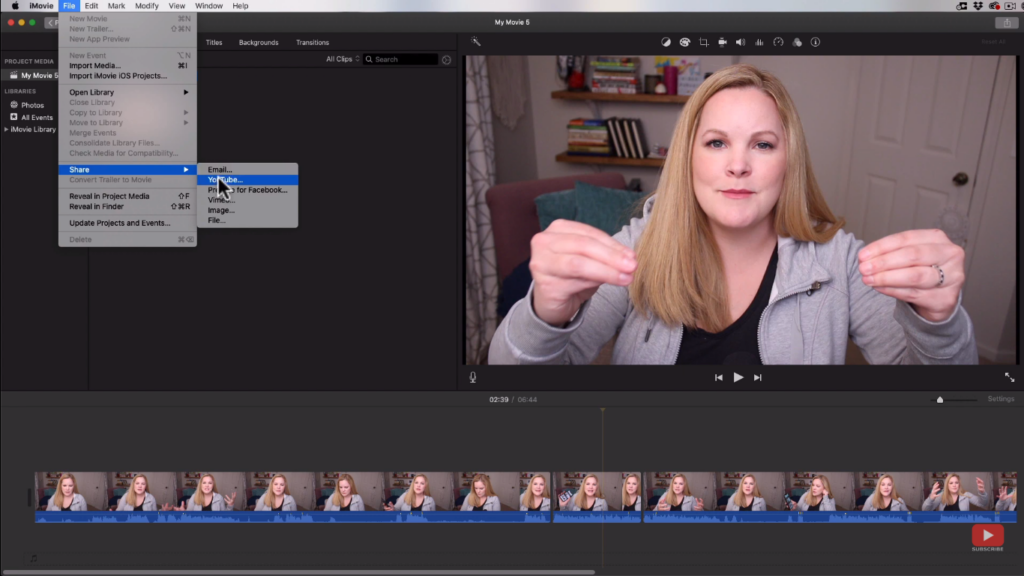
One of the common mistakes that people commit when exporting their project in iMovie is that they want to directly export and share it to YouTube, Facebook, Vimeo, or any platform, but DON'T DO THAT.
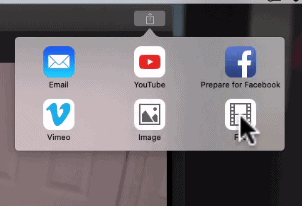
You should export your videos in iMovie as a file first, then store it to your drive and then upload it to your social media platform. You can also export your project through this small button on the upper-right corner of iMovie and choose “File”.
VIDEO: How to Export in iMovie
Click here to subscribe to Meredith Marsh on YouTube.
Exporting on MacBook/Desktop
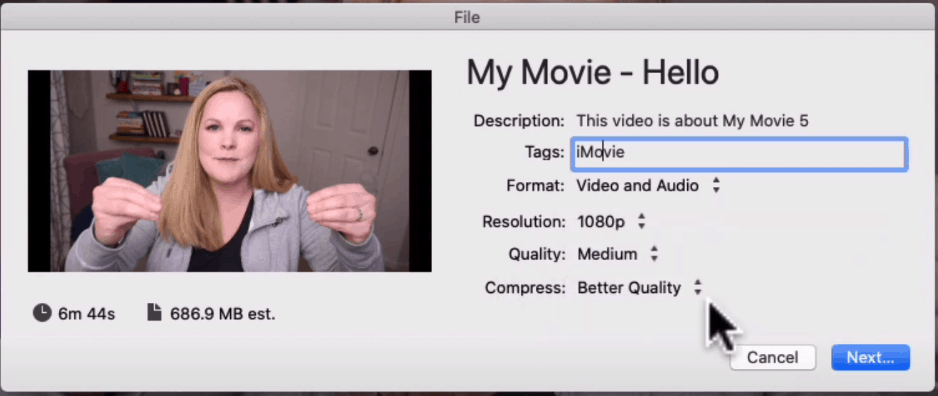
Another thing that you want to make sure is to check the format as “Video and Audio”. Otherwise, it would just be exported as audio, and you don't want that.
With the resolution, I recommend that you go for the best resolution that is available. For me, it's 1080p because it was shot in that resolution.
Related: Best Video Editing Software for Social Media
Next, with the quality, this is where people get confused most of the time. Naturally, we want our video to be exported with the best quality as much as possible so they choose “Best (ProRes)” for the quality. But, that will make the file size of your video so big.
That might give you some problems in the long run. So I suggest to just stick with medium, high, or even low in this one if you want a much smaller file size. I assure you, it won't ruin the quality of your video.
For the compression, I would go with “better quality”. Then, just hit next and you will be asked for the file name and the save location. Just make sure that you store it somewhere that you can easily locate so that you won't have a hard time finding it.
Now, the exporting might take a few minutes depending on the length and size of your video, your computer's processing speed, and so on. On the top-right, there's an icon that looks like a pie chart. That tells you how much longer before the exporting gets finished.
Uploading the Video From Your Computer
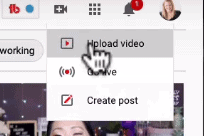
If you want to upload your video to YouTube, just wait for your video to be exported to your desktop. Then, go to your YouTube, hit the video camera with plus icon, and hit upload video. From there, you can just drag and drop your video file and upload it. It's also the same thing with Facebook, Vimeo, LinkedIn, or wherever it is that you want to upload it to.

Now, if you want to store it to your thumb drive, just open it under “Locations” in the menu bar. Then, you can also just drag and drop it to your thumb drive or hard drive.
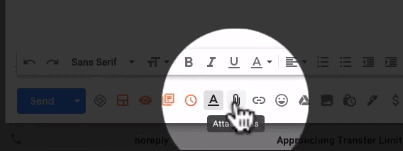
For those who want to share their videos via Email, I highly recommend using Gmail. It's easy and free to use. So, once you're composing an email, just head down and click “Attachments”, the one with the icon of a paper clip. Then, just locate and select the video that you want to attach.
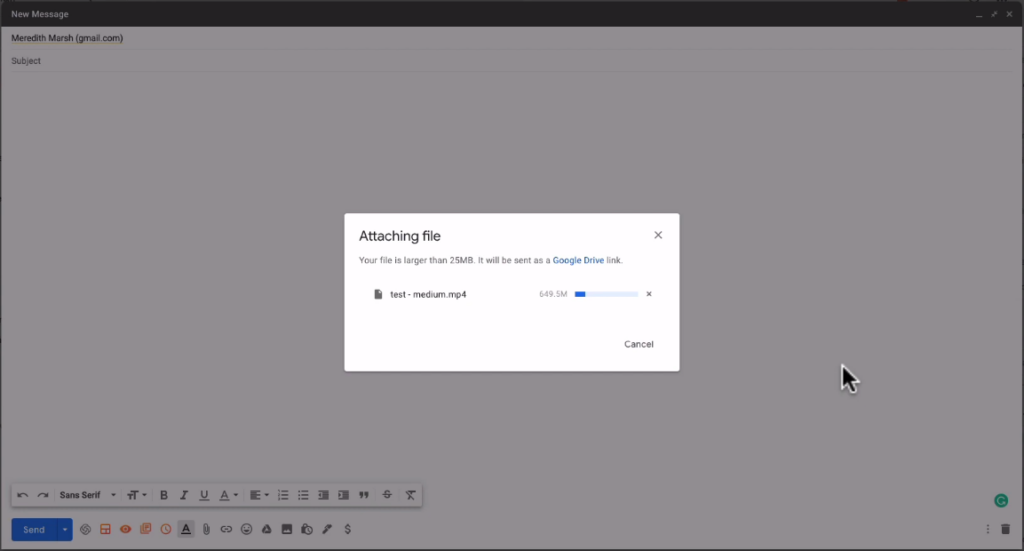
Next, this is where the file sizes come to play. You can only attach a video with 25 MB file size at most in an email. If you're file size is greater that that, it will just upload it to Google Drive and attach the link to the email, instead.
Exporting on iPhone
I've shown you how simple it is to export videos in iMovie through the desktop, but there are just some differences when it comes to the iPhone. Once you're done editing just hit “Done” on the upper-left corner of the screen.
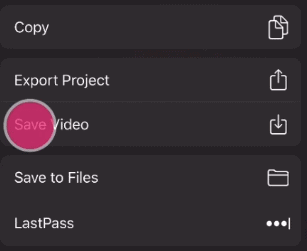
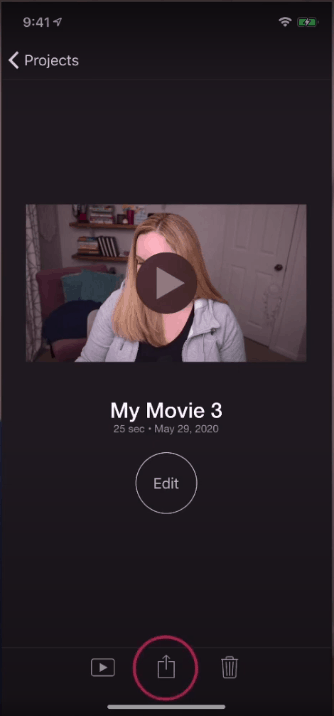
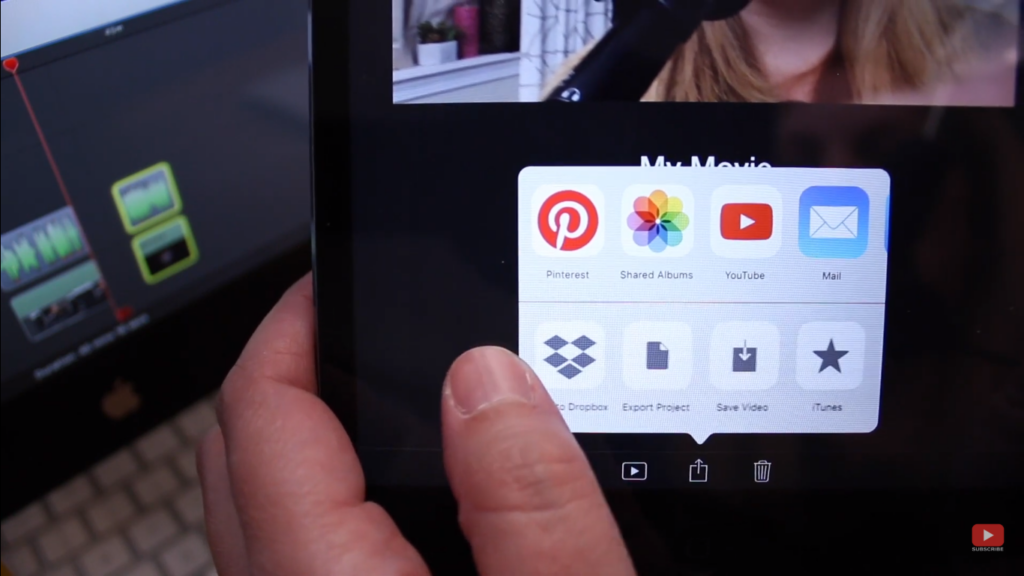
Then, hit the export or share button, the one encircled in the image above. It will give you some options but choose “Save video” so that it saves the video file right into your iPhone.
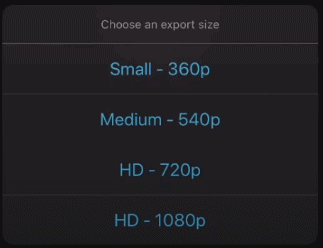
Next, you can choose what quality do you want your video to be exported. You can choose the best possible quality, but just be mindful of the file size especially if you want to email it or you don't have enough space.
You can also directly share it to YouTube, Instagram, Facebook, iMessage, etc. But just like what we did on the desktop version, I highly recommend it to be saved in your phone just in case anything happens.
Exporting on iPad
When it comes to the iPad, it's pretty much the same with the iPhone. Hit “Done” on the upper-left corner, then hit the share button below. Just choose “Save video”, and then select the video quality that you want.
Again, keep in mind to export your videos in iMovie on your device first, find it in your Photos app, and you can finally share it to any platform that you like.
All Set and Done!
If you find this tutorial very helpful and you want to learn more about video editing like a pro, make sure to subscribe to my YouTube channel here. Check out some of my other tutorials, you're going to love it!
Related: Background Music for Social Media