Easily Edit Videos with the YouTube Video Editor
Did you even know you can edit videos with the YouTube video editor? No video editing software? No problem! The YouTube video editor is a handy editing tool that you can use from the YouTube Studio to trim, split, and perform all kinds of editing function within your browser.
Click here to subscribe to Meredith Marsh on YouTube.
Some product links in this post are affiliate links, and I will be compensated when you purchase by clicking our links. Read my disclosure policy here.
Edit Videos with the YouTube Video Editor
Before we start, the first thing that you would want to make sure is to use the new or updated version of the YouTube video editor. Some reports even say that it’s only working on a Chrome browser. So if it’s not working you, make sure to double-check that.
The other thing is that you can only edit a video that you have uploaded or live-streamed to your channel. It doesn't have to be public, it could be set to private or unlisted, but it does have to be accessible in your creator studio.
Related: How to Plan Your YouTube Videos
How to Edit Videos with the New YouTube Video Editor?
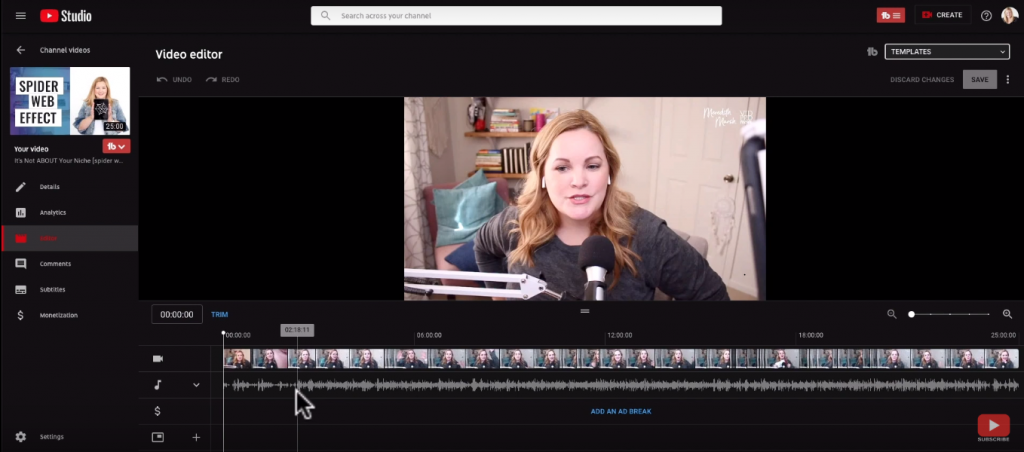
If you are new to using video editing apps, you might want to familiarize yourself with these different parts before you edit videos with the YouTube video editor:
- Preview window
- Timeline and media tracks
- Ad Break
- End Screen
- Scrubber Bar
Once you’re done with that, we can now start editing.
- Trimming and Splitting Clips
In trimming your clips, you need to put your scrubber bar to the timeline that you want to delete. You will just need to click the trim and then drag it to the spot where you want the trim to end. You can also edit the parts you’ve trimmed and changed. Also, you can reset all the trimming you applied through the clear all button. It also goes the same when removing a certain section of your video. - Audio/Video Track
Actually, there’s nothing we can do much with this feature of the YouTube video editor. This feature lets you choose a background track from YouTube’s audio library, but you cannot put some modifications to it like fade-in and fade-out. Those audios are free to use royalty free background music. - Ad Break
Down below the audio track is the ad break. That feature is for those whose YouTube channel are monetized. This feature lets you put ads from any point in the video, but make sure that the video is not less than 10 minutes long. - End Screen
The end screen is something that you can put in the last 20 seconds of your video. For this feature, you can apply a certain template, link to a suggested video/playlist for my viewer, put my subscribe button, link to a channel, or link to an external link. When linking to a suggested video, you can opt to suggest your most recent video, let the YouTube choose the next video, or choose a specific video. - Blur Tool
For me, this is one of the features in the YouTube video editor that I love. This is actually a handy feature especially for vloggers who are filming outside and want to blur the faces in the background. It has 2 custom options. The first one is for blurring the faces in the background and the next is for the blurring something with custom blurring. This might take a few minutes when using it because of rendering.
So that is basically everything that you can do when you edit the YouTube video editor. The changes or edits that you have made to the video will just be applied once the rendering is done, but the viewers can still watch the old version of that video. If this was helpful for you can visit my channel here and check out my different videos that you can actually use and help you in your business online.
Related: Video Editing for Beginners
Be sure to subscribe to the VidProMom YouTube Channel so you don't miss fresh new videos from Meredith! Click here to subscribe now.