How to Customize WordPress 2020 Theme
If you recently installed WordPress for the first time, you might feel like the WordPress “twenty twenty” theme is pretty dull… and it is! So in this post, you'll learn how to customize “WordPress 2020” theme to add your branding, change colors, and add menu navigation!
Click here to subscribe to Meredith Marsh on YouTube.
Some product links in this post are affiliate links, and I will be compensated when you purchase by clicking our links. Read my disclosure policy here.
Customize WordPress 2020 Theme
How To Customize Your 2020 Theme
Picking up where we left off with our Step-by-Step Blog Setup Series, you can see that our blog looks pretty bit dull, so let's start to customize your WordPress 2020 theme.
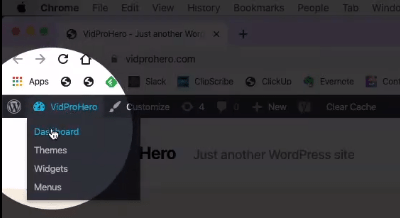
First, on the top-left side of your screen, click “Dashboard” and that will take you to the back-end of WordPress. Then, on the left side, find the “Appearance” in the menu and then go to “Themes”.
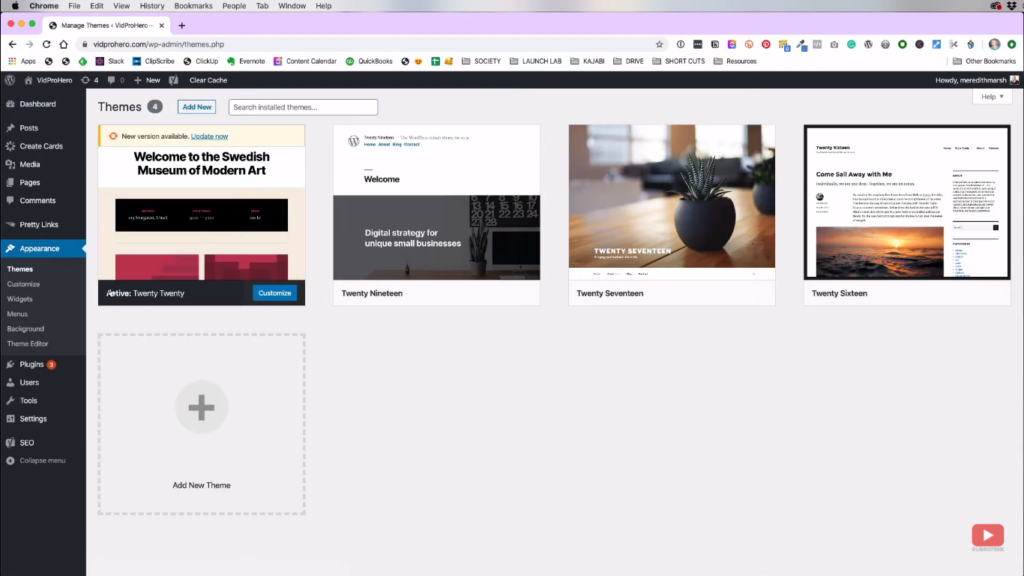
Now, you'll see that WordPress have already some default themes that you can use but we'll use the “Twenty Twenty” theme, and that's what we're going to tweak to make our blog site prettier.
As you can see, it recommends you to update the theme, and that's the first thing that we'll do because it's important that it's up-to-date. Once that's done updating, you can now click that “Customize” button.
IMPORTANT: You might want to do this on your desktop or laptop instead of your tablet so you can fully see the changes that you're doing and it's easier for you. You can still go back anytime and change any settings the way you like.
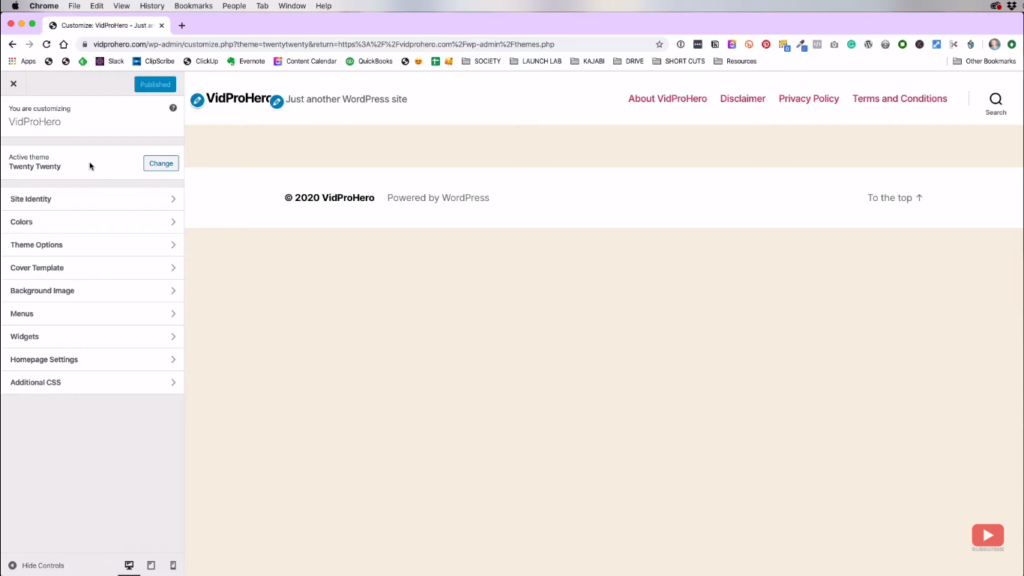
It also says that it is an active theme, but none of the changes that you've made will actually be live on the site until you hit the “Publish” button on the very top. So, when you're already ready to be saved and applied, make sure you hit that button.
Related: Step-by-Step WordPress Blog Setup 2020
Site Identity
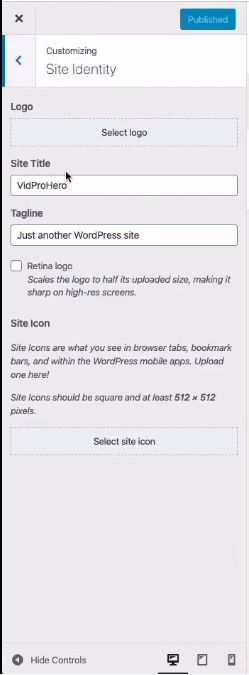
So, we are going to start with the first thing on the sidebar menu which is the “Site Identity”. This is where you can change your logo. However, you don't really need to have a logo for it, you can just set the title to the name of your site.
If you want to upload a logo, just hit “Select Logo”. Once you upload your logo, you can crop the logo, put an Alt Text, title, caption, description, and copy link, but it's not really necessary to fill them all.
Then, the site identity is also where you can put your tagline for your business or your branding. For me, I'm not really a fan of those so I prefer to just remove them by leaving it blank.
Next up would be the site icon. It would be the little icon that would show up in the tab of your browser. It is not really that necessary, but it is tricky to create those. Sometimes, you can't just use your own logo.
Colors
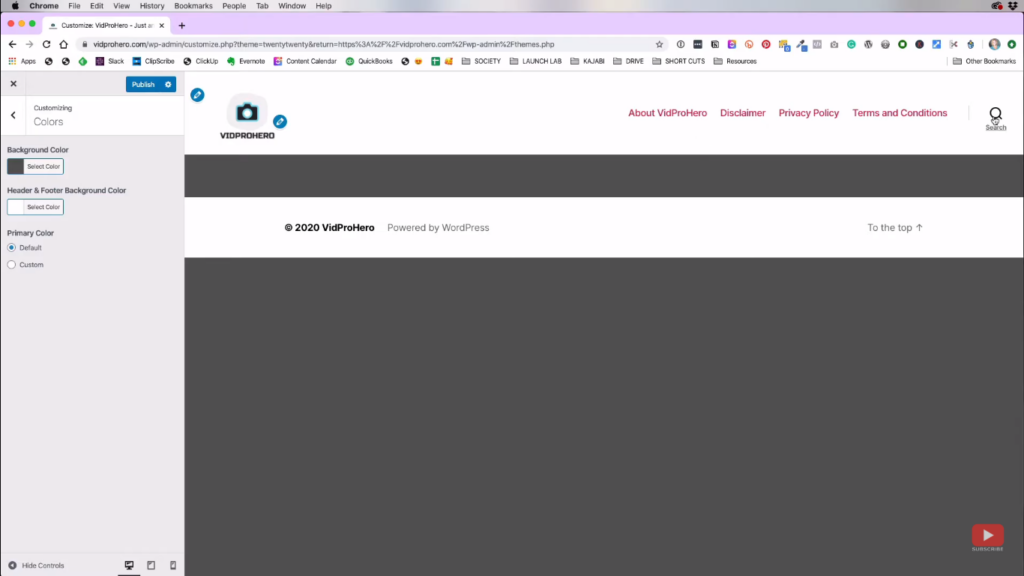
Once you're done with the site identity, just hit the back button on the sidebar menu and go to “Colors”. This is where you can edit your background color and the Header & Footer background color.
If you hit “Select color”, it'll give you a palette which you can choose from. The footer is the one that says “Powered by WordPress”, the header is the one with the logo, and the background is the empty color gray space.
Then, we'll just keep the Primary Color setting to “Default”, for now.
Theme Options
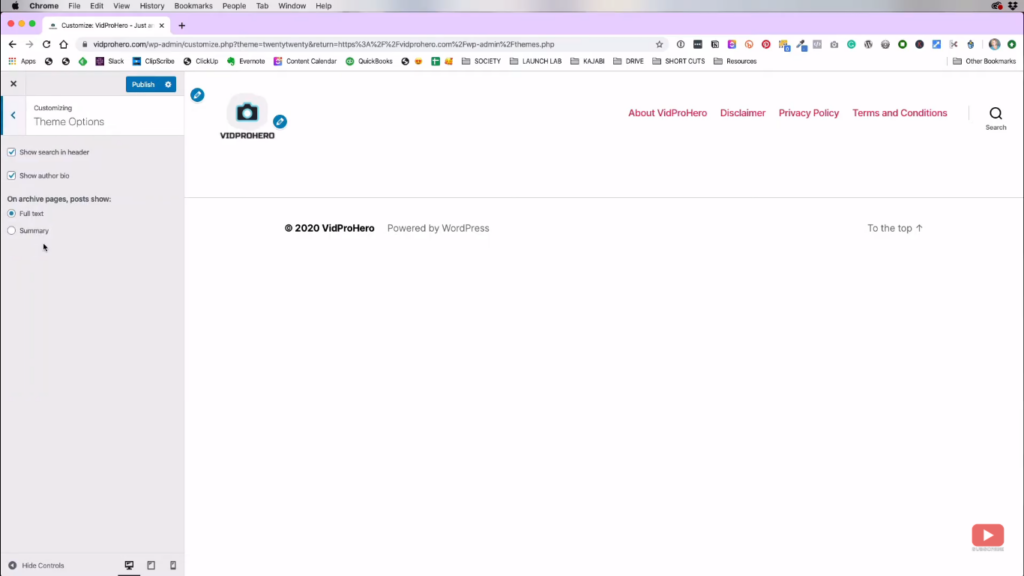
Next would be the “Theme Options”. This is where you can choose if you want to keep the search bar in the header. If you uncheck it, the search bar will be removed.
For the author bio, I prefer to disable that. The archive pages would be kind of hard to explain right now because we don't have any posts yet, so let's just ignore that for now.
Cover Template & Background Image
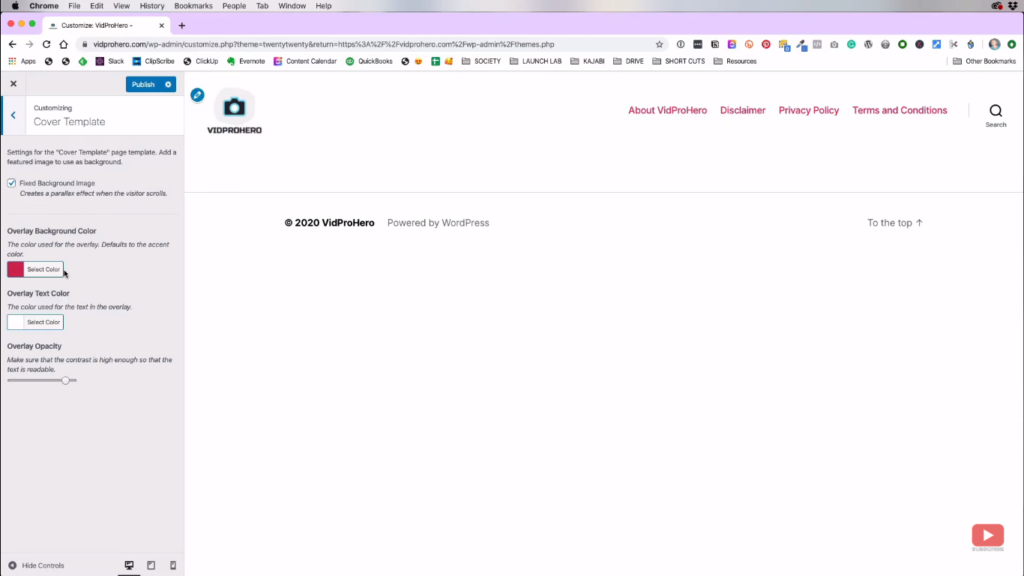
Now, remember that you can always customize your WordPress 2020 theme anytime you want and re-tweak things. You can set it all to default and just change it later when you're ready.
In this case, I don't have any background image yet, so I'll just leave it to default and skip the customizing the Cover Template and the Background Image.
Menus
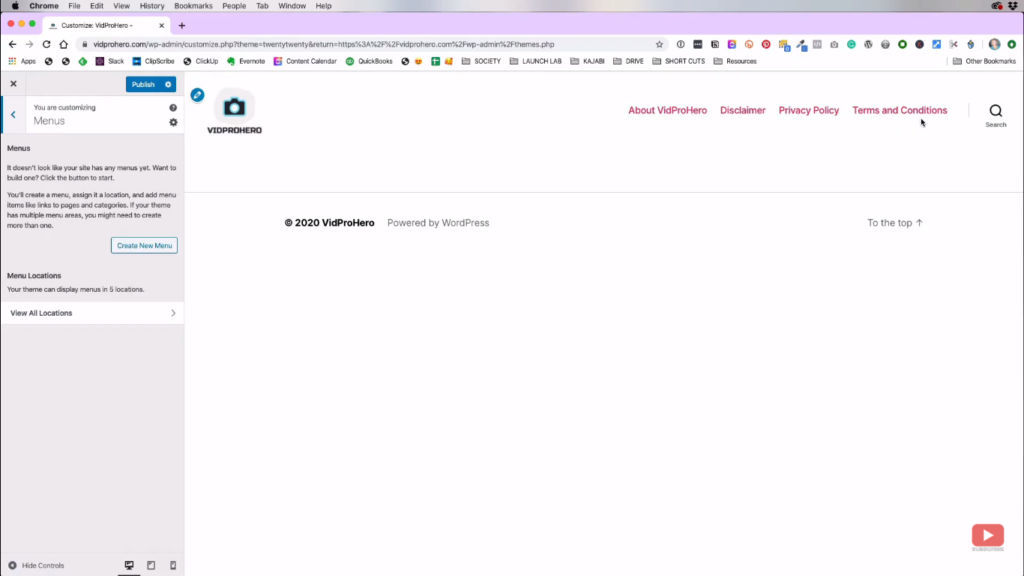
Menus are the ones that are on your header. For some popular pages, they have categories or pages that you don't normally have. But, what we don't have yet is a created custom menu, so we'll create one by hitting the “Create New Menu” on the sidebar.
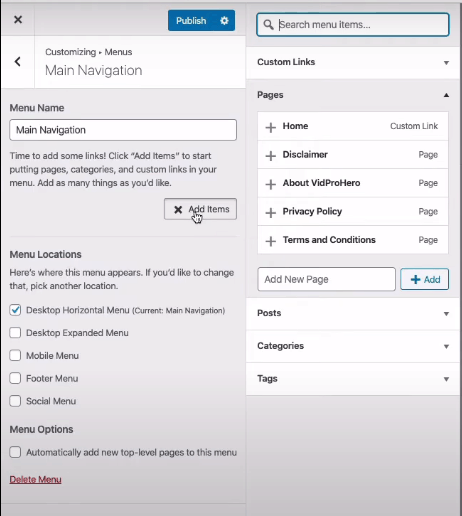
You just have to put a name for that menu. Then, choose which location will you place that menu. After that, you can start adding items to that menu and select the items that you want to add like About page, Privacy Policy, Disclaimer, Categories, and so on.
Also, keep in mind that you can create multiple customized menus on the different locations in your website which is very handy.
Widgets
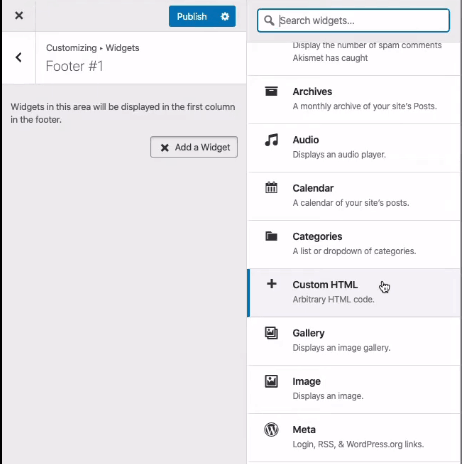
The next thing would be the widgets. These are the things that you can add to your footer. In fact, this twenty-twenty theme lets you have 2 different parts of footer where you can add some widgets.
Homepage Settings
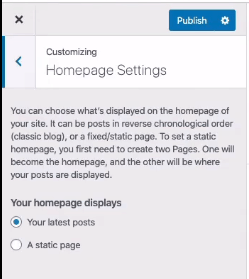
For this, we don't really need to customize it for now because we don't have any blog post yet. But, this is just the settings where you can choose what to appear in your homepage.
Additional CSS
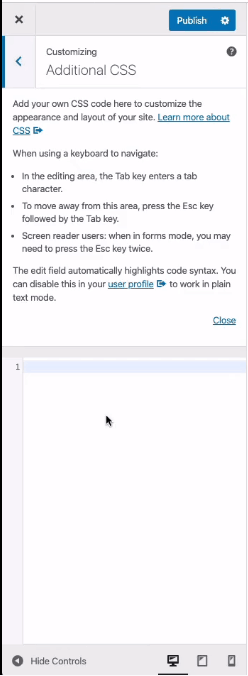
Lastly, we have Additional CSS. CSS stands for Cascading Style Sheets. Basically, it is where you put the code that alters the appearance of your website such as colors and fonts.
This feature is actually kind of advanced for our tutorial right now, but I told you that just in case you're wondering.
Now that we're done with customizing our theme, make sure to hit that publish button on top of the sidebar to save and apply the changes you have made. But, there are actually some final touches that I want to show you.
Publishing a post

I just want to show you what it looks like on the front-end if we start to publish a post. As you can see, I have a draft article there. It's not yet done and published but we'll use it as an example. Before hitting publish, I want to make sure that I put it on the correct categories, add featured image, and so on.
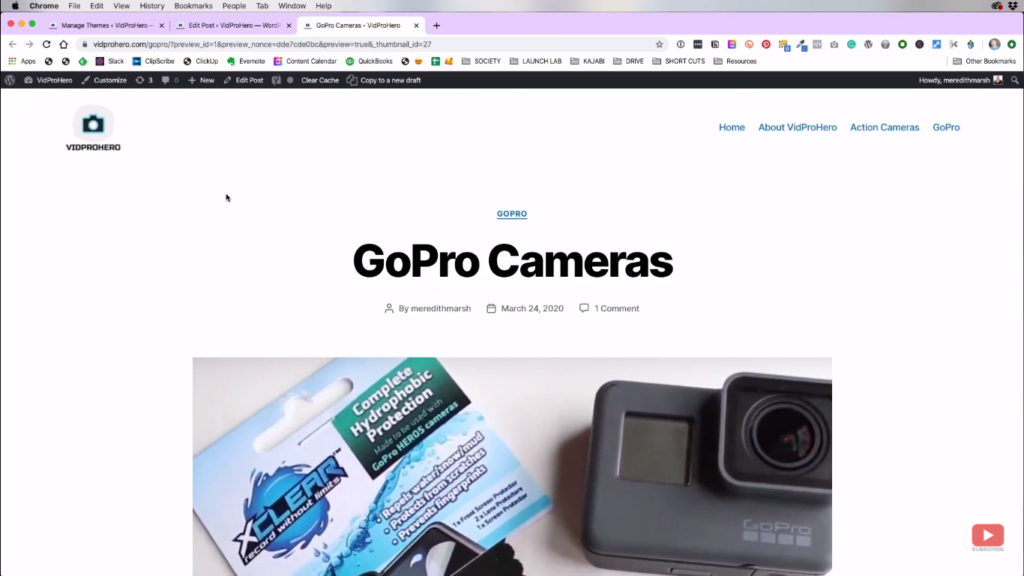
Then, you can hit preview after you publish it. It will take you to the page of that post and you will see there what it really looks like in the front-end. It will show you the category, author, comments and everything.
Also, if you click a certain category from your menu, it will show you all the posts that are under that category.
Great Job!
Congratulations! You have now a complete and customized blog setup. People can now see it, and it is now surely more appealing after you've customized your WordPress 2020 theme. If you want to check more of my tutorials, feel free to visit my YouTube channel here and make sure to hit that subscribe button!
Related: How to Turn Videos into Blog Posts FAST
Be sure to subscribe to the VidProMom YouTube Channel so you don't miss fresh new videos from Meredith! Click here to subscribe now.