My DSLR Video Settings – Canon 70D Manual Mode
Are you confused about how to use your DSLR video settings? A Few videos ago I walked you through my “YouTube Studio Setup – at Home” and today I'm going to show you the DSLR Video Settings that I use on my Canon camera. I use a Canon 70D, it's a few years old but it's a great camera, and this should apply to the updated versions too, the Canon 80D and 90D.
Some product links in this post are affiliate links, and I will be compensated when you purchase by clicking our links. Read my disclosure policy here.
DSLR Video Settings, Simplified
Click here to subscribe to Meredith Marsh on YouTube.
I got a question from Lindsay Hazel over on Instagram where she mentioned that she has Canon 70D but the manual settings are confusing, so she usually just uses her phone or webcam.
And I was like GIRL! You've got a really great camera, and you can up-level your YouTube videos by using your camera and DSLR video settings!
The secret is to use the DLSR in manual mode, and it's really easy to become overwhelmed with manual mode DSLR video settings but I'm going to make it really simple for you so that 1: once you really nail it in your space with your lighting, you don't really have to change those settings a whole lot 2 if your shooting environment changes and you do need to change your settings, you'll know the exact setting to tweak.
Camera Settings for Videos
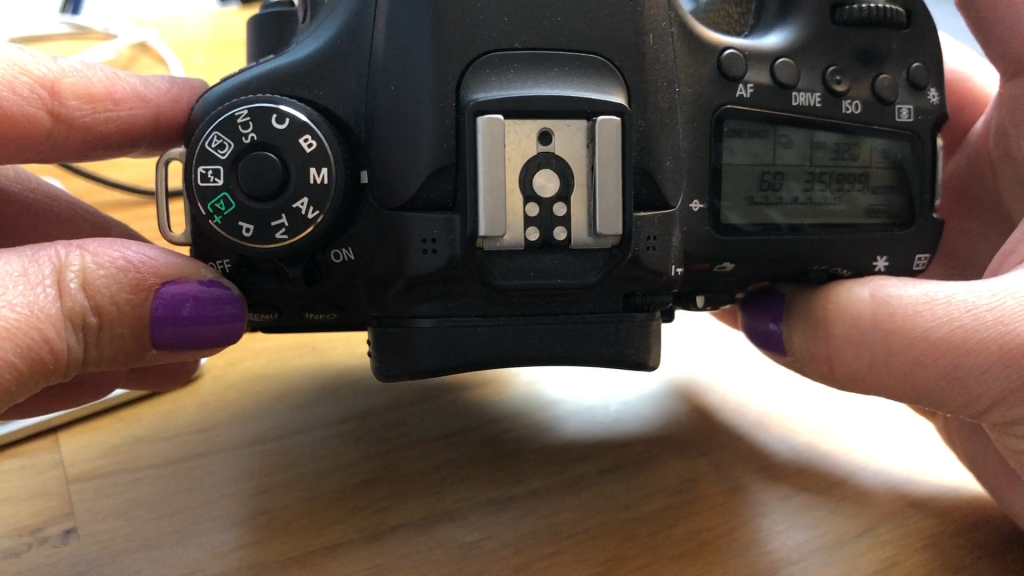
The first thing you will do is turn your camera on and put it into manual mode. Using the mode dial, press the lock release button in the middle and turn this dial so that the “M” is selected.
Now, there are two ways we can look at and adjust your camera's settings when shooting video, one–on the camera itself, which I'm going to show you in this video, and two–using Canon's EOS utility app on your computer.
Related: YouTube Studio Setup at Home
I'm going to show you that process in a different video because hooking my camera up to my computer has been a total game-changer. Once I started shooting my YouTube videos that way, creating videos became a much quicker process.
But we're going to dive into the DSLR video settings I use, why I use them, and what they mean for your Canon DSLR in Manual mode, AND I have an excellent hack to prevent your camera's battery from draining while you're shooting videos too, so let's dive in.
DSLC Video Resolution
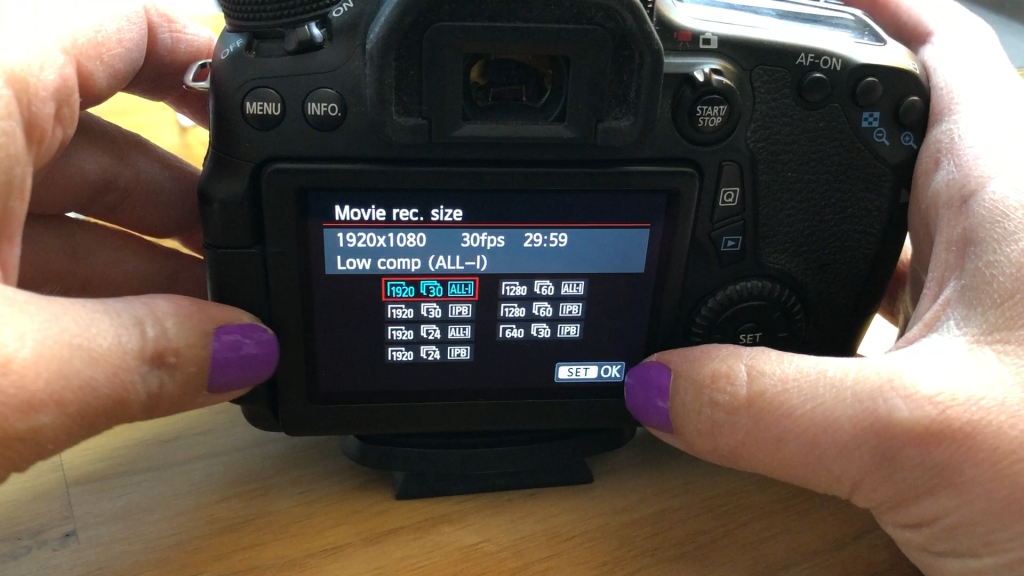
Before we get into the settings on the monitor, let's go into the menu and go to the second video settings tab, and tap Movie Rec. Size. I keep mine in 1920, 30 All-I. Which means, I'm shooting 1080, so it's 1920×1080 resolution, my frame rate is 30, and the All-I refers to the compression. I find these settings to be just fine.
Now we change the shooting settings. You can use the LCD Screen and buttons here on top, or use the LCD monitor on the back which is a touch screen. For shooting videos, I tend to use the touch screen monitor to change my settings because my camera is usually facing me with the screen also facing me.
Auto Focus
So looking at the monitor we can see a few different settings and numbers here. If you don't see any settings on your monitor, or if yours looks different, hit the info button above the monitor and press it a few times to filter through the different options until you see what I'm seeing. I like to use the LCD monitor to see and adjust my DSLR video settings.
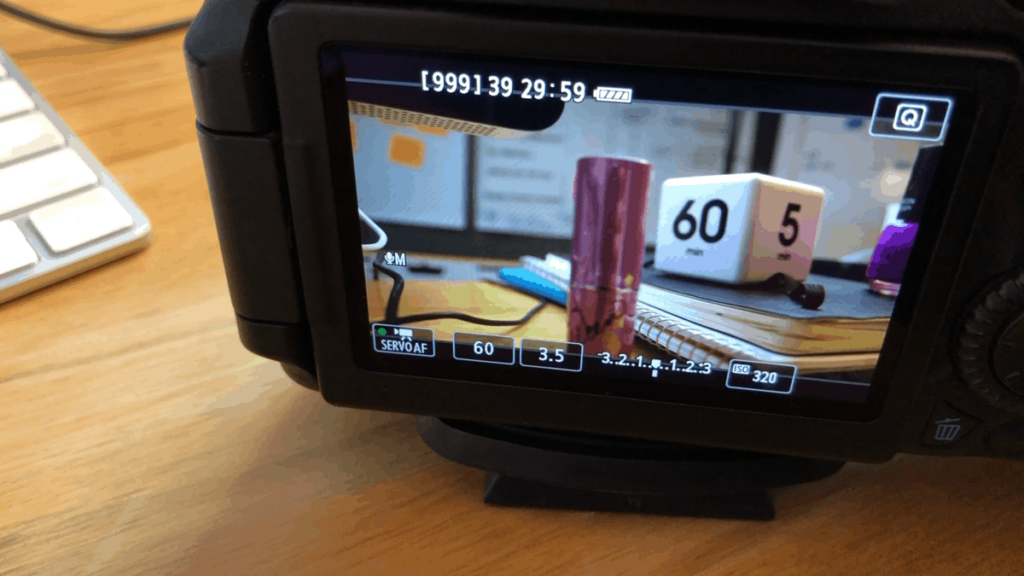
On the bottom left, you will see Servo AF, which means that when shooting a video, the autofocus will continue to focus on the subject as they move around in the frame. The little green light is on so that means it's enabled. To disable it, just tap it.
Now, I like to keep autofocus enabled, however, because the lens is continuously focusing and re-focusing, that sound is sometimes picked up by the microphone. The noise depends on the lens itself, I'm using a regular kit lens – the 18-55mm lens, nothing fancy. And I situate my microphone so that even though it's close in proximity to the lens, it's a shotgun mic so it's really not designed to pick up sound coming from that direction. I don't move around a whole lot so it's not a big problem for me. You may decide differently, that's up to you.
Set Video Shutter Speed
The next setting over is the camera's shutter speed. Now, remember we're in manual mode, so we have to tell the camera what we want our shutter speed to be, what we want the aperture to be, and what we want the ISO to be. These are the main components
And the shutter speed is an easy one when you're shooting video… it should be set at double the frame rate. I'm shooting 30 frames per second, so my shutter speed is set to 60. And as long as I'm shooting videos, not photos, then I can leave it there and never touch it again.
The next setting over is the aperture, and the aperture refers to how big or small of an opening the lens has so it controls the amount of light coming in, and it also is the setting the creates that blurred background or bokeh effect. But before we play around with the aperture, we really need to talk about the ISO first.
How to Set ISO on Canon
ISO refers to how sensitive your camera is to the light that is coming in. So this is where your lighting situation where you are filming comes into play, and I can tell you what my settings are, but yours will very likely need to be different because you're not shooting videos in my studio with my lights and my window.
Related: For a complete list of my YouTube gear, see everything here.
Generally speaking, you want your ISO to be as low as you can go, to create the best possible image quality. This is one of the reasons why having decent lighting is so important. The more light you have available, the less your camera has to work to bring an image forth.
In the video here in this post, let me show you what I mean. If I didn't have my box lights on, and I relied on my window, my lamp, and my overhead lights, I'd need the ISO to be way up here to look like it was light enough or exposed enough. But if you look closely you can see a lot of noise and fuzziness. But if I turn my lights on – and I'll put a link in the description below to the exact lights and gear I'm using – so with my lights on I can lower my ISO and not only do I look a whole lot better with less shadows, but the image quality is better as well.
My ISO is usually set to 200-400, depending on what's happening with the light coming in my window. I never want to be in direct sunlight, but depending on the weather, I may have more or less ambient light coming in, but I always have these lights on.
Exposure Meter on the Canon 70D
It's a good idea to get to know the exposure meter if you're new to using your Canon in manual mode. If you hold the shutter button down halfway, the camera will take a reading and give you a little mark on the scale. You want it to be in the middle generally, so if you're new to this and you don't really know what you looking for (like is this exposed well or not) use that as a guide.
But to keep it simple, ask yourself are the whites white without being washed out? And are the blacks black without disappearing completely? If yes, then that's a good indication that you're in the right zone.
Set the Aperture
Now let's go back to the aperture (also referred to as the f-stop) and this is what determines your depth of field. Your lens is really what's at play here.
Generally with my kit lens here I keep at pretty low at 3.5 or 4. With my lighting and the small size of my office, this gives me enough of a background blur that I'm happy with that.
So my camera is focused on my face, my hair is also in focus, my shoulders are in focus. But stuff behind me is not, it's blurry. And if I move my hand back here, the camera is going to say focused on my face, so my hand is out of focus.

So depending on your shooting setup, and your own personal preferences, like how blurry you want your background to be, you'll want to play with the aperture. If you don't want a blurry background, raise it up and as you do that, you're allowing for less light into the camera, which means you're image will get darker and you'll also need to bring up your ISO a little bit. Don't be afraid to play around and get the combination that works best for you here.
So, to review, in my studio, with my two lights and my window, my settings are Servo Auto Focus ON, a shutter speed of 60 (double the frame rate), an aperture of 3.5 or 4, and ISO between 200 and 400.
Just remember to check your meter by pressing the shutter halfway, and you can make adjustments and actually see that meter move which helps you to learn what these settings are actually doing.
Related: Best Computers for Video Editing
Now I promised you a battery hack, but before I do that I want to talk about white balance.
Set White Balance
For a really long time, I kept this camera on auto white balance, so I let the camera decide. White balance is where the camera adjusts for the color of light that's coming in.
But shout out to Michael Kinney on Instagram who reached out to let me know about a better way to adjust for white balance, which is set the white balance to the actual temperature of your bulbs.
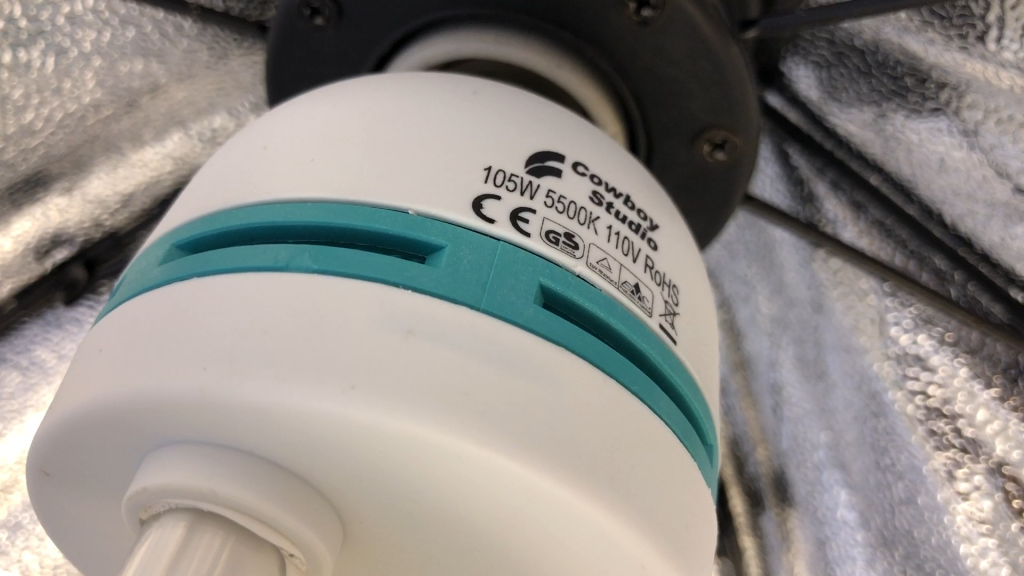
So I found those on the bulbs themselves in my box lights. So if you feel like the color is a bit off with your videos, I'd recommend looking at the temperature of your blubs and actually setting your white balance to that.
Related: YouTube Studio Setup at Home
Plug your Canon Camera into an Outlet
You may have noticed that I have a cord coming out of my Canon 70D here, and this is so that I can just plug the camera into an outlet and not even use a battery. The batteries don't last extremely long when you're shooting a video, and I found that often I'd forget to charge my battery, SO I bought this thing that goes in just like a battery, and you can close the battery door and everything, and you'll never have a battery die on you again.
Related: Video Editing for Beginners
Be sure to subscribe to the VidProMom YouTube Channel so you don't miss fresh new videos from Meredith! Click here to subscribe now.