iMovie for YouTube Videos – 2022
iMovie is a simple yet robust free video editor, and honestly, if you're using iMovie for YouTube videos, you're in luck! iMovie is the perfect place to start editing videos for YouTube if you’re a beginner. So in this blog, let’s get you set up with your video edit in iMovie 2022.
Some product links in this post are affiliate links, and I will be compensated when you purchase by clicking our links. Read my disclosure policy here.
Thanks to Epidemic Sound for partnering with me to bring you this iMovie Tutorial! Try Epidemic Sound free using this link: vidpromom.com/epidemicsound
iMovie for YouTube Videos
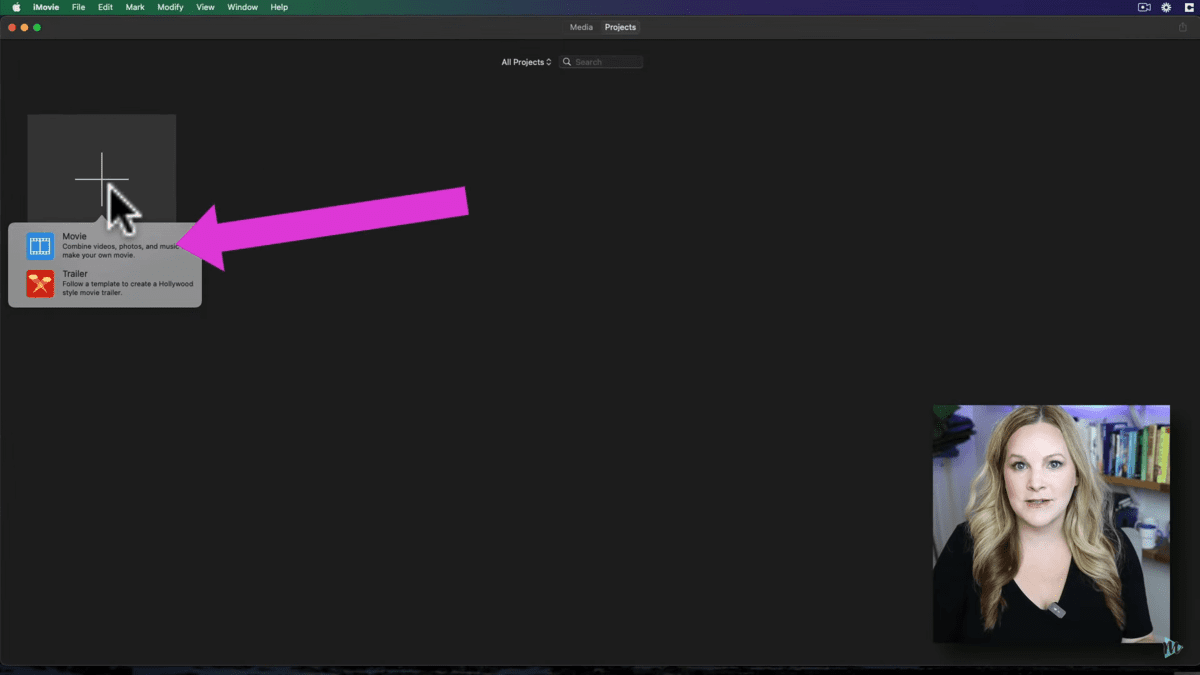
So if you're just learning iMovie for the first time, let's start with the basics. When you open iMovie for the very first time, you're faced with this big blank project window. Just hit the big “+” button to create a new project, then it's going to give you the option to either choose “movie” or “trailer.” Today, we're going to choose “movie.” That will give us a nice blank canvas to start with. Now, I'm using iMovie version 10.3.3. That is the newest version of iMovie as of the time of this blog post.
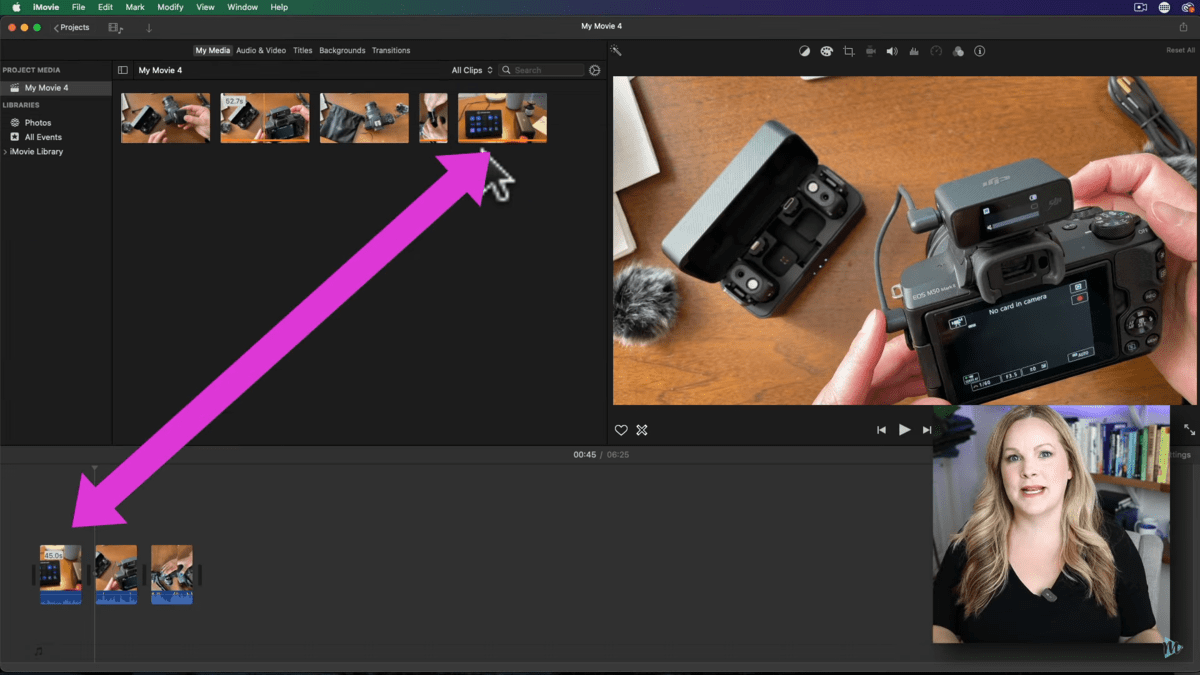
Many people make the mistake of jumping off the deep end, going after all the bells and whistles. That makes it really complicated and it can be hard to know what to do when you just have this big black screen in front of you. First, we're going to bring in one video clip, and there are a couple of different ways to do that. What I like to do is find my video files that are on my computer or my external hard drive. Then, I’ll drag those clips into my project.
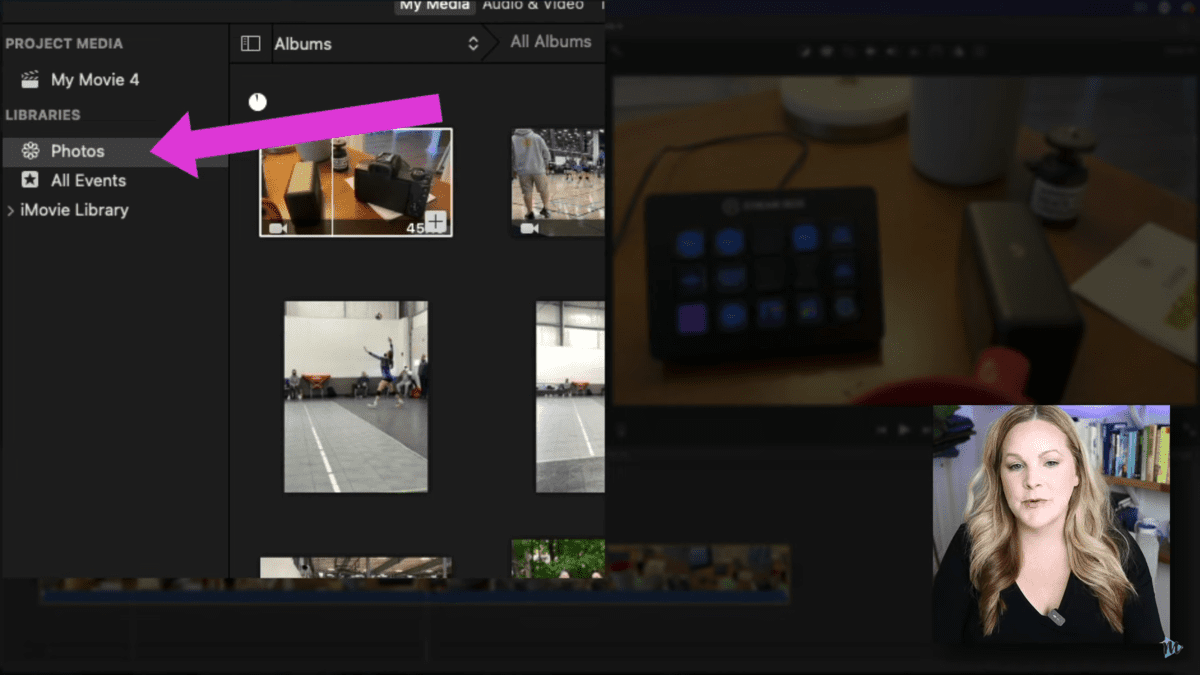
Keep in mind that you can drag multiple video files to the timeline area of your iMovie project. Moreover, if you have video files that you shot on your iPhone or iPad and it’s synced with your Photos app through iCloud, you can pull in those clips directly from the “Photos” option over in the library on the left-hand side.
BFF Editing Method

Importing our clips is the first step of the “B” in my BFF editing process (Basic, Fancy, and Fine-tune). This is the editing process that works no matter what video editor you're using, whether it's on your desktop, your phone, or your iPad. I have a whole cheat sheet you can download for free here. There are a few more steps in the basic edit of my BFF method, so let’s get going.
Related: How to Make a Professional Video with iMovie
iMovie Project Settings
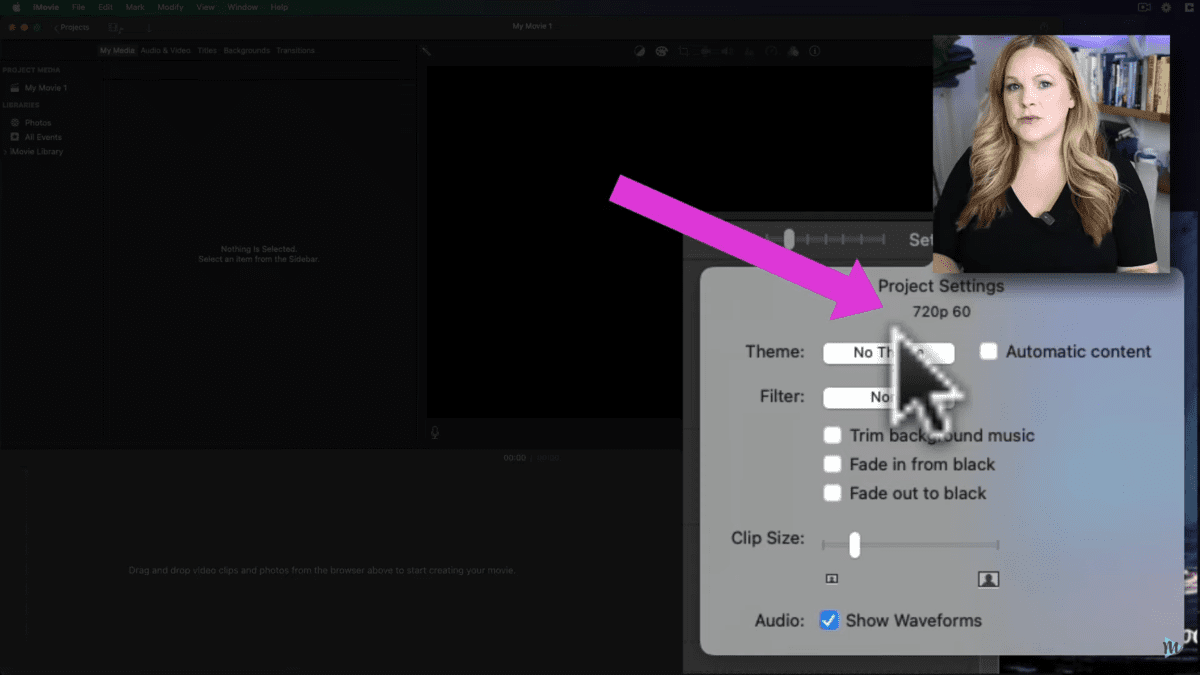
Now, one thing I want you to notice is that you have a settings menu on the right-hand side. Take a look at whether it is set to 1080P or 720P. The resolution of your iMovie project is going to be determined by the footage that you first import into your iMovie project. So if you want to create a video that's going to play horizontally on a screen like a typical YouTube video, you want to make sure that you import a clip with that exact resolution.
Usually, YouTube videos that I create for myself, they're always 1080P and 30 frames per second. We haven't really done much in the way of editing this project yet, right? All we've done is imported our footage and moved things around a little bit. Let’s go to the next step!
Trim Clips in iMovie
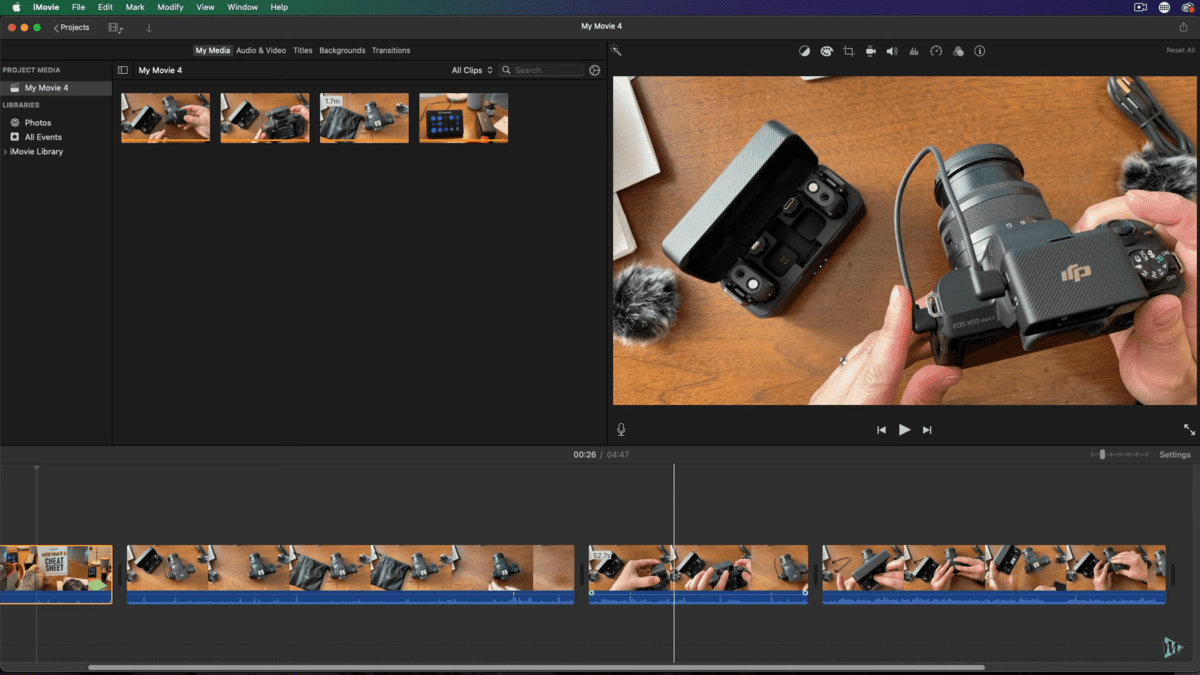
First things first. You probably have one or several clips where you want to keep parts of that clip in your video, but you need to get rid of all the other stuff. If you're talking to a camera, maybe it's where you say, “Um, you know” 17 times. Maybe you mess up your words and you need to get rid of them. In this example here, I am putting together a few clips that I took for a review for an Amazon Video. I'm not talking to the camera as a talking head in the video, but I am doing a voiceover as I'm going through some of the items there with the new microphone that I got.
There are a couple of different ways to get rid of the sections that you want to remove. First is if you have one clip, but you just need to get rid of the few seconds at the beginning and a few seconds in the end. You can just trim it. All you have to do is drag the ends. Like you're dragging the handles. If you think about video editing, your clips on the timeline are just like a piece of tape. You can rip that tape at the beginning and the end to get a nice clean line. Also, you can rip it into a bunch of different pieces and rearrange them. That's exactly what we're gonna do here inside of iMovie.
Split Clips in iMovie
What if you need to get rid of the pieces and parts in the middle of your clip? You can see my cursor is creating a vertical white line. That is referred to as a “scrubber bar”. If you just line this up to the part where you want to split your clip, just click right there, then the clip will be selected. You’re going to right-click on your mouse and choose “Split Clip” or “Command+B” on your keyboard. When you do that, your clip is now split into two pieces and each of them is now a separate clip. You could move it around or you could delete it.
Rearrange Clips in iMovie

So back to the BFF editing guide. We added our footage to the timeline, we trimmed it, and we split it. Now, we can rearrange it by just simply clicking and dragging. You can see that when you are moving the clip, it's giving you a blue space or a blue line. You can just drop it right in there. So you can rearrange your clips, or your pieces of tape, in whatever order you want them to go.
So in the “Project Media” area, that's the square at the top left-hand side of your screen, you're going to see all of the clips that you have imported. Also, whether they're down in your timeline or not, they're all going to be right there for you. In fact, if you add stuff to your timeline, and then you decide that you don't really want that clip there, or you’re not ready for that yet, you can delete it from your timeline. Just select it, and hit delete on your keyboard. It will still be there in your project, so you don't have to go hunting for it on your hard drive or in your photo library.
What are the Orange Bars in iMovie Clips?
Now, you might notice an orange line at the bottom of some of these clips in the media area. That orange line is there to let you know that that certain clip is in the timeline already. If we have trimmed or split our clips and remove some sections from the timeline, you'll also be able to see that the orange line indicates where and how much of that clip is down on your project.
Add Titles and Text in iMovie
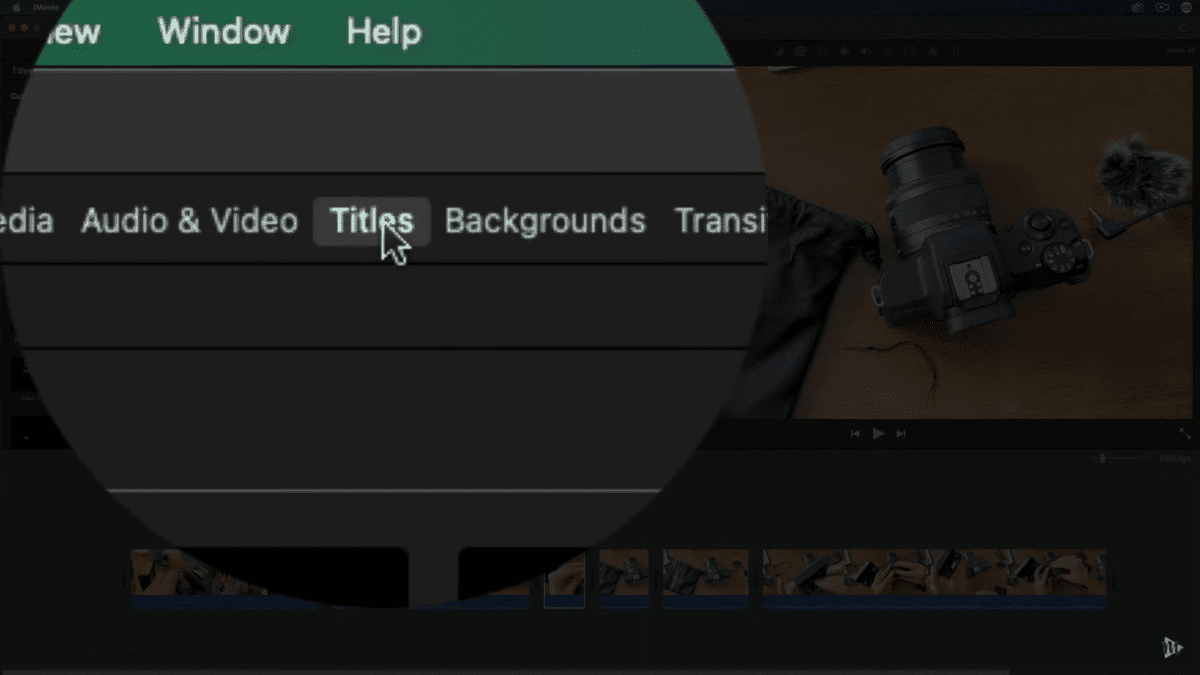
The last thing under my basic editing in the BFF process is the titles and text. Now, I think titles and text is a little bit more of an advanced thing. However, they seem to be something that most people are interested in, even for a basic edit. There are a few different ways that you can add titles and text. So right there at the top of the media section, you have “my media,” “audio & video,” and then you have “titles.”
When you click titles, it's going to give you a whole bunch of pre-designed and pre-animated title options. Some of these, you can think of as a title screen, some of them are considered like a lower third. Some of them have animations, and some of them don't. Also, some of them are a little wild or a little bit extravagant.
So once you’re done choosing, you're just going to select it. Drag it down to your timeline, and on your keyboard, you can just hit “command” and “+” to zoom in a little bit on the timeline. You can also zoom in on your timeline on the right-hand side.
Edit Titles and Text
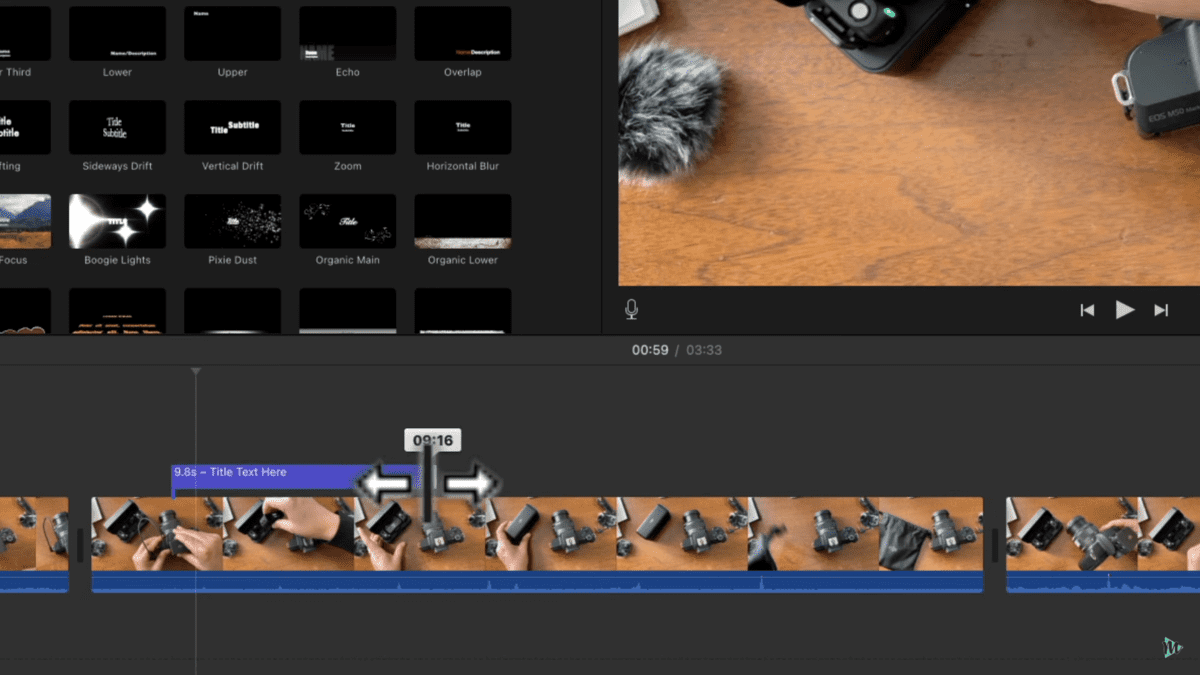
From my sample, you can see that I have that purplish or bluish title clip there. This acts a lot like a regular video clip. You can actually expand and make it even longer, you can make it shorter, and it's going to be pre-animated for you.
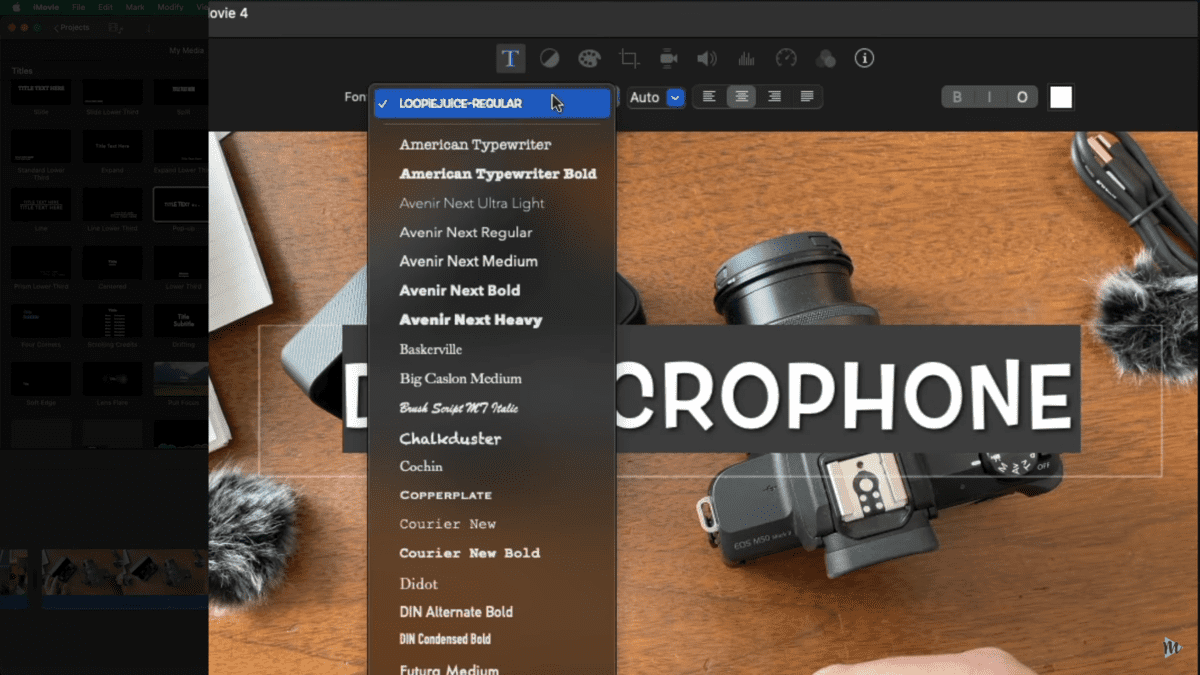
If I double-click on that title clip, it's going to select the text up there in the video area, and I can edit the text. So there's our title, we also have a couple of other options like changing out the font. With that, you're not stuck with the exact font that the pre-designed title gives you.
Moreover, you can go left, center, right, or justified alignments. Some fonts will give you the option to make it bold, italic, or outlined. You can also move the title clip by selecting it and dragging it just like you do with a regular video clip.
Export iMovie Videos

So from here, you have a nice simple basic edit. You imported your footage, edited out the stuff you wanted to get rid of, trim your clips, split your clips, and maybe you rearranged a little bit. Then, perhaps you even added a title to your video. If you're happy with that, you can export this as it is. That means you take this iMovie project, and you let iMovie package it up into an actual video file that you can put on YouTube or social media. The way that you do that is a little bit hidden up there in the way top-right of the screen. There is a share icon right here. If we hit that, it gives us a couple of different options.
Now, these Share options have changed a lot over time. So if what you're seeing here on my image doesn't look like what you are seeing on your screen, it might just mean that we're using two different versions. So what you can do there is choose “export file.” This is what I recommend, don't choose YouTube, Facebook, or email. Choose the export file option. That is going to create a video file, and it will save right on your hard drive, then you can send it to your social media.
iMovie Export Settings
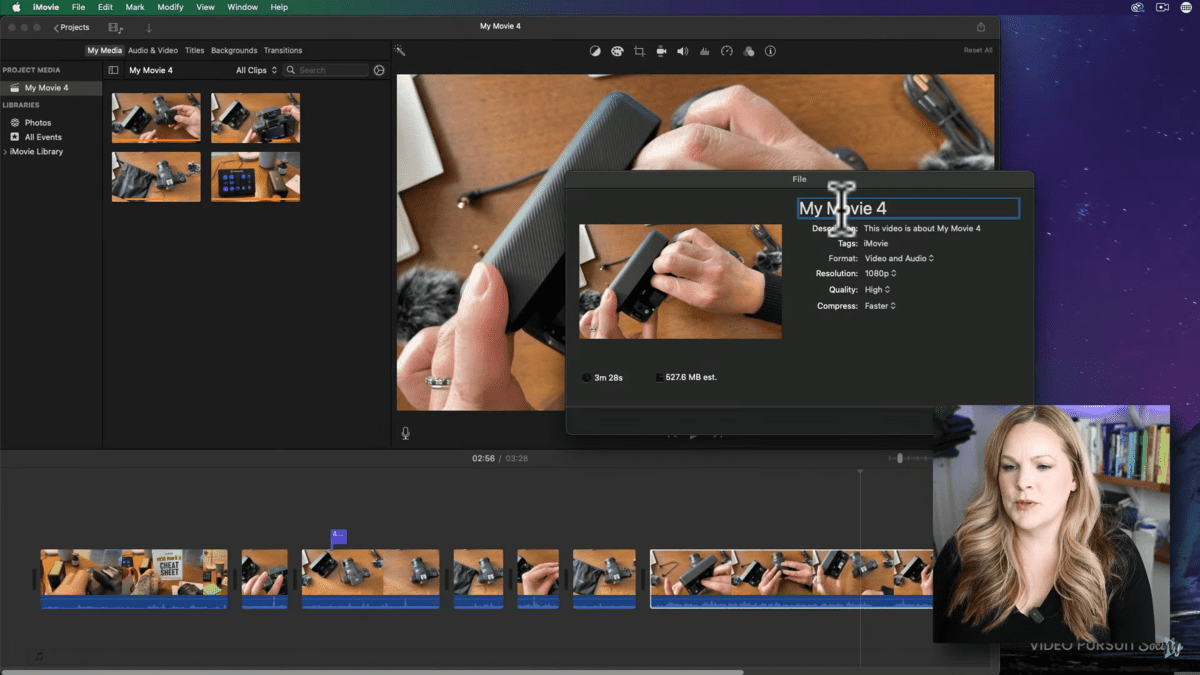
So right there at the top, you can give the project a title and you can also give it a description if you want to. It doesn't really matter that much. Under format, you want to make sure you have selected “video and audio.” For the resolution, of course, you want to choose the resolution that you want the video to be exported at. Then, under quality, this is really, really important. Choose “High,” don't choose “Best (ProRes).” That is going to give you an enormous file size. It's not needed unless you are planning to play this video on like a giant movie screen. For compression, it really depends on what you're doing with this project, and where you're going to be uploading or sending this project. You can choose either of the two choices. For me, I'm going to go for “better quality.”
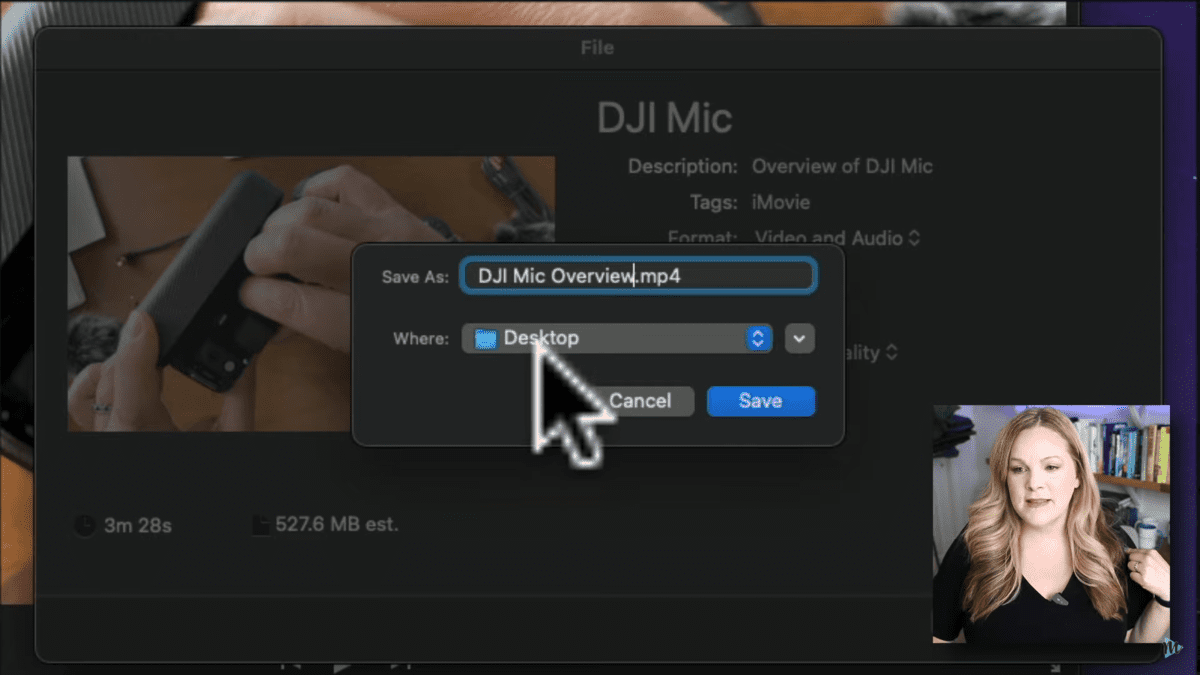
Once you’re done, just press the Next button there on the bottom right. Then, it asks for the actual file name that you want the video to be called. Also, where you want it to be saved on your computer. I like to put everything that I do right on my desktop, so I don't have to go find it later. I don't have to figure out what folder was that in. So I just choose Desktop, make it easy for myself, and choose the save option.
Now, this is going to export the project. Again, it hides what is happening. Up there in the top-right, you have a little pie timeline there and it's going to go around. But when it's done, you should get a notification on your actual computer. Plus, that video is going to show up on your desktop or wherever you saved it.
Fine-Tuning your iMovie Project
So moving on from that basic edit, let's talk about fine-tuning. I edited a few clips from a previous YouTube video because I want to show you some examples if you're talking directly to the camera. When you're doing your fine-tuning, what I like to do first is called “cleaning up the jump cuts.”
What does this mean? It means that I go and zoom right in anywhere that I have a cut. I make a lot of mistakes in my videos, so I have a lot of jump cuts where I'm talking. And maybe mid-sentence, I might cut to a completely different clip because I messed up a sentence here and there. I put them together and create a relatively cohesive sentence, right?
Cleaning Up the Jump Cuts
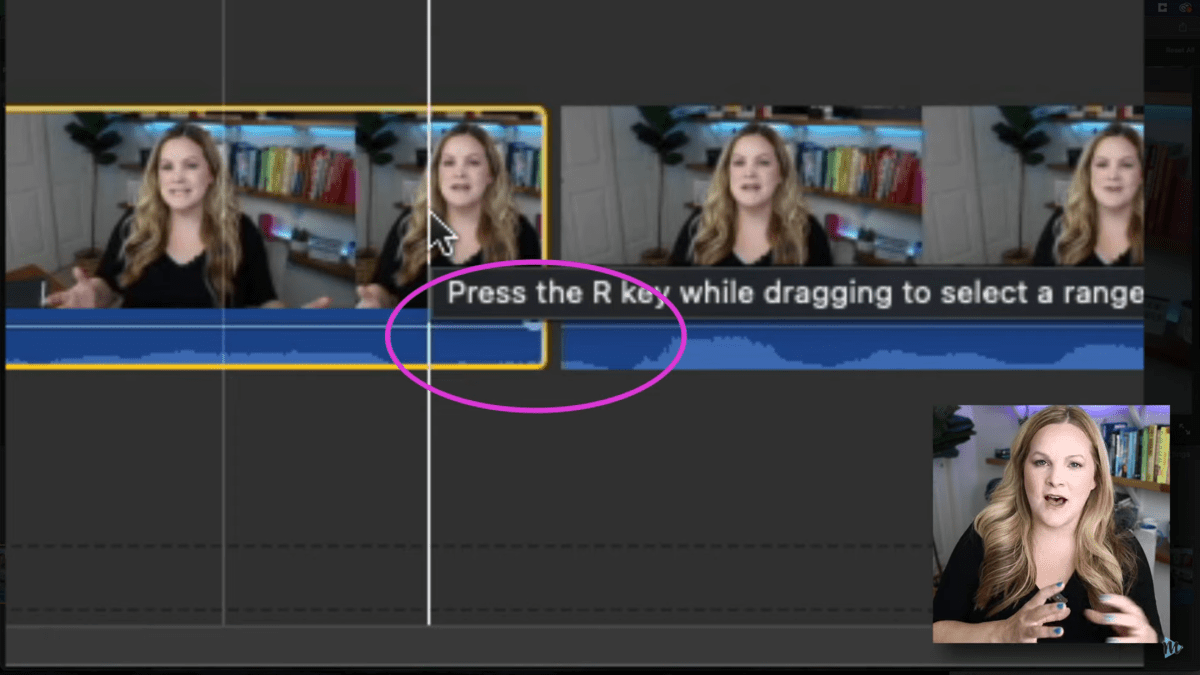
So one of the things I like to do, especially if I'm doing a “talking head” or “talking to the camera,” there often seems to be a few frames at the beginning and the end of your cuts or clips that create a little bit of awkward silence or an awkward breath. We can just get rid of that and take them out. What I do is zoom in as far as I can, then watch every cut and every transition. I'm going to remove the parts where I obviously messed up.
I don't want to cut those waveforms. I don't want to cut where I'm actually talking. It might still be a little bit awkward, but it's better. I would go in and do this with all of the jump cuts. I would just go in and make sure that the spaces between are just as smooth as I can get them.
Adding B-Roll in iMovie
Now let's talk about adding a B-roll. So what you have on your timeline already is called A-roll. This is my main footage, it's where I'm talking to the camera. In this case, B-roll would be any other footage that you might use. It is sort of like over-top of your main footage.
So for example, I have a screencast screen recording that I'm using as B-roll. So maybe as I'm talking about something, I can pull up a B-roll. I will literally just take my B-roll clip and drag it down in the timeline. Then, I put it over top and is layered just like a cake. The track that's on top is going to be the one that you see on the screen, and then you can edit these just like you would your clips. You can make a cut, you can delete what you don't need.
Editing Audio in iMovie
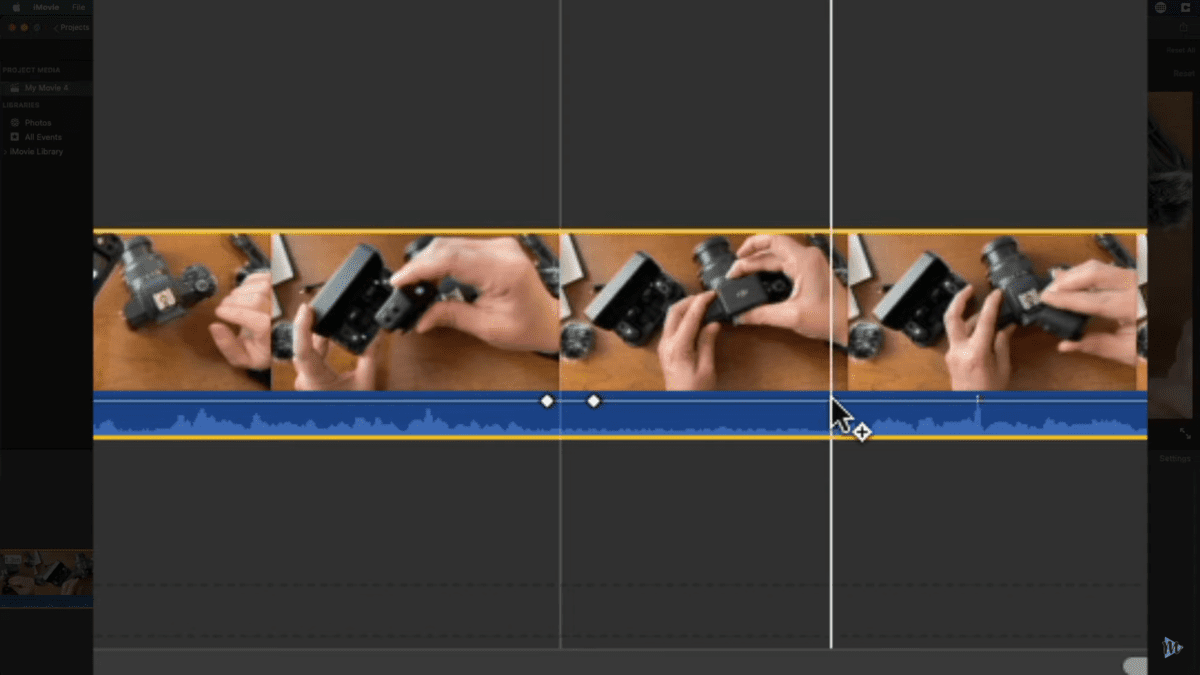
When we're fine-tuning, we want to look at the audio levels of this video to make sure it's going to be fine when the viewer is watching the video. So what I like to do usually is I will have my headphones or earbuds in, so that I can get a good sense of the actual audio levels. I like to put the volume of my computer about halfway or a little higher than halfway. That gives me a good sense of what the end result volume is going to be. So it's not too quiet for viewers and it's not too loud for viewers.
In this example, I have pulled up here, I'm doing a voiceover. So I'm talking while I'm holding my phone in my hand and recording this clip. So what you want to look for here is that your audio levels aren't so high. If you bring the audio bar up, you don't want them to be so high that they're in the yellow, or even up to the red. If you see red peaks, you don't want that peaking to happen. So if you have yellow spikes, you want to bring your level down. I'm just grabbing this bar and bringing it down until there are no yellow or red spikes. If your audio is really low, and it's hard to hear, but you want the viewer to be able to hear, just grab that bar and bring it up.
Another thing you might find useful is that you can fade in or fade out your audio. So we have our audio level bar right there. Way on the end, you can see this little tiny button. So this is where we can trim our clips, right? But if you hover over the button, you have a different arrow. If you pull this over to the right, you're going to see how it has this gradual fade. So this is going to let your audio fade in. Then if you do it at the end of a clip, it'll do the opposite it will fade out for you. So if you want to have your audio fade out very gradually, then you're going to want to drag it way over. If you want it to be a subtle and quick fade-out, then you can just make it a short one.
Audio Keyframes in iMovie
If you have a section of your clip, where you just want this one section to have a lower volume or a higher volume without having to make cuts to your clip, you can add keyframes to your audio. Let me show you what I mean.
So I have my clip selected, and my cursor is right there. I'm going to hold the “Option” key on my keyboard, this is going to give me a little plus sign. Then, just keep clicking on the parts of your timeline where you want to add a keyframe while holding the “Option” key on your keyboard.
Now I have those keyframes. You can take one of those and you can move it up or down. But you can also hold your shift key to select two of them, you can select the two middle ones, and bring those up or down.
Fancy Editing with iMovie
Okay, we have the basic, we have the fine tune, and we need that final “F” in the BFF editing method. Let's talk about the fancy stuff that you can do with iMovie. Let's talk about adding background music and sound effects to your videos.
Now, I have a whole collection of background tracks that I like to use in my YouTube videos along with some sound effects. I get them all from Epidemic Sound, they have partnered with me to bring you this blog post. Epidemic Sound has by far the best selection of background music in all different kinds of genres. And I don't run into any copyright issues because my Epidemic Sound license works on YouTube, TikTok, Instagram, and also Facebook.
Add Background Music in iMovie
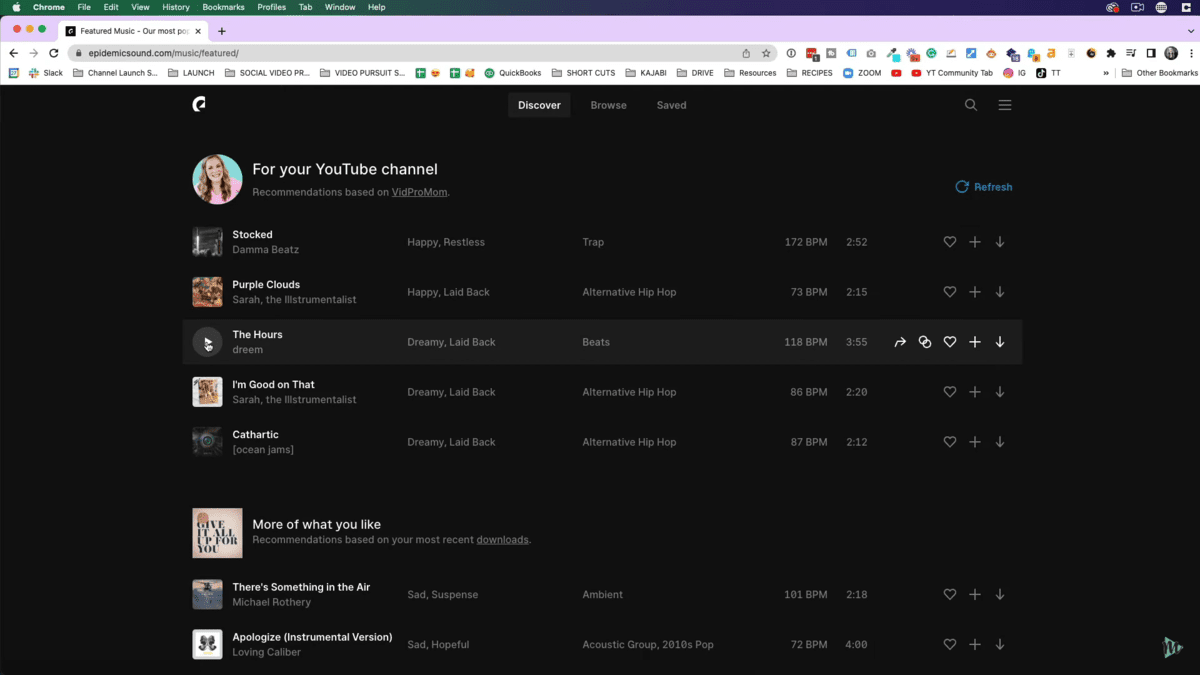
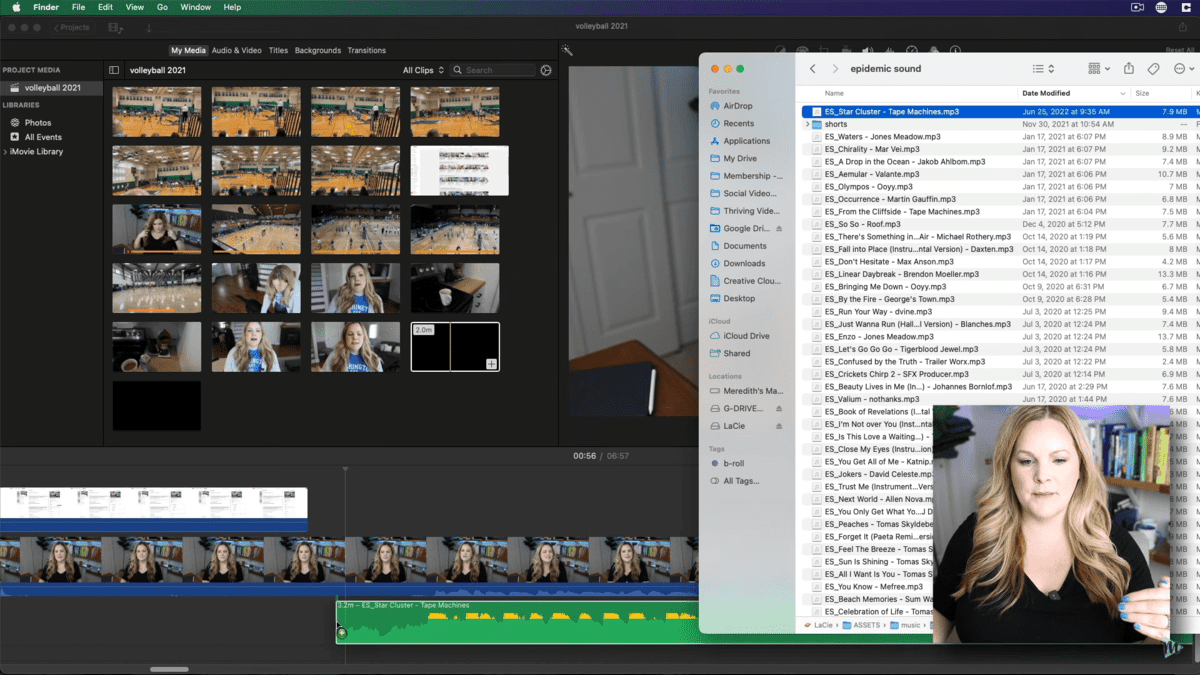
I have my go-to collection of background tracks from Epidemic Sound. But every once in a while I go take a peek at the site and see if there's anything new because they're always releasing new songs. When I find something I like, I just hit that heart icon. It will save this to a list of tracks that I have marked as favorites.
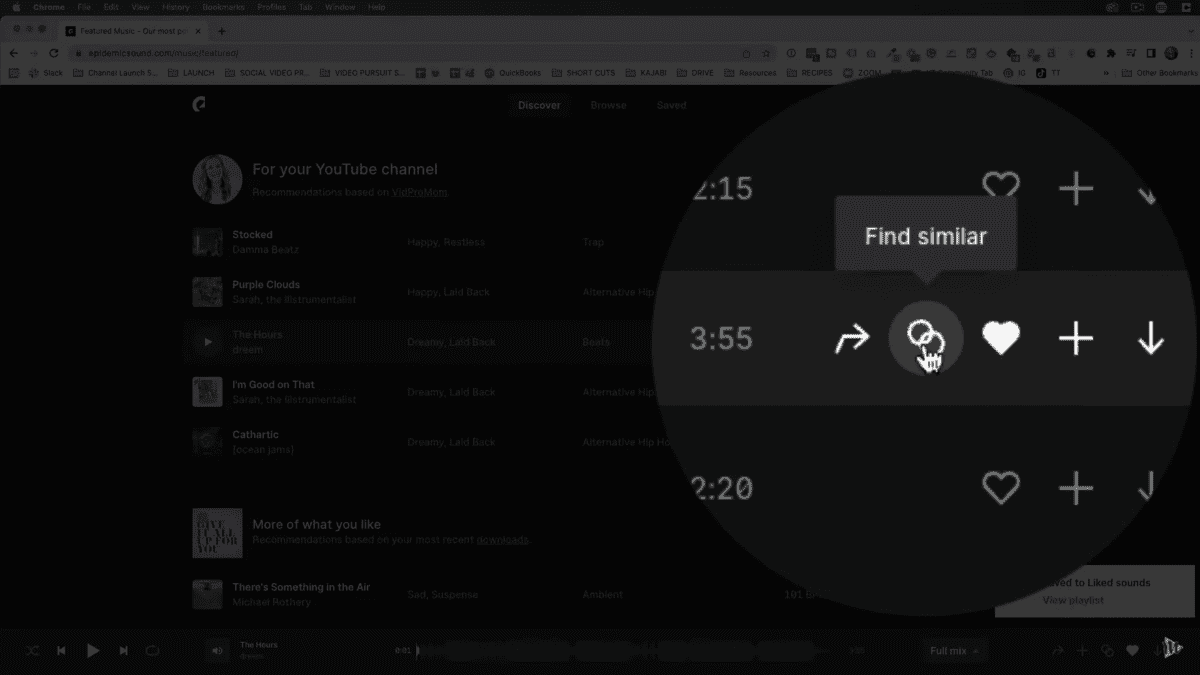
Then, what's really, really cool is if you find something you like and you want to hear more just like that sound, you can hit this button here. It will take you to all of the background tracks that sound similar or are within the same genre or even from the same artist.
All I have to do is click and drag my background music track down here. It creates its own track right here inside of iMovie. Now, if you want to use Epidemic Sound, I have a link down in the description on the video at the end of this post. It's a special link it will get you a 30-day free trial. So make sure to use that link so you can find all of the songs that you could ever imagine using as background tracks.
Sound Effects in iMovie
Every once in a while, I throw sound effects in. Especially if I show something on the screen. For example, I have a video on the DOs and DON’Ts of using background music. And I'll usually do like a little pop sound to make that show up there. I get those pops from Epidemic Sound as well. What you have to do if you want to pop is to just search for a mouth pop sound effect.
Related: How to Add Background Music in ScreenFlow
Lower Music Volume in iMovie
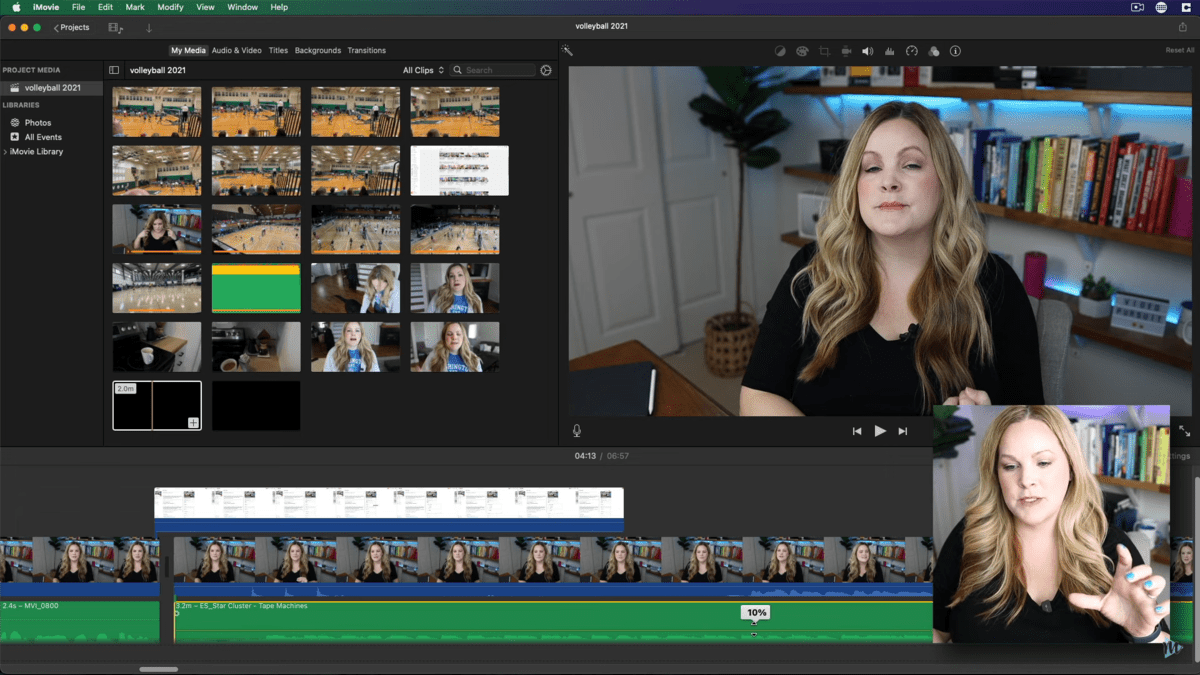
Next, I brought this background track to my timeline. If I zoom out a little bit, I can see that the volume is peaking out. It's giving those yellow peaks. We don't really want that in our video, it's, it's gonna make it impossible to hear what's being said in the clip. So I’m going to bring it way down. I usually like to say between like 8-10% or less, sometimes they go as low as six for background music.
If the background music is playing while you're talking in your video, you don't want your viewer to strain just to hear what you're trying to say. You don't want it to be distracting. The background music is there to enhance the video, enhance the content, and enhance whatever it is that's on the screen. Not to distract from it. So always make sure you lower that background music down. Then, you can edit your background music just like you would your regular clips.
Fade Out Music / Fade in Music
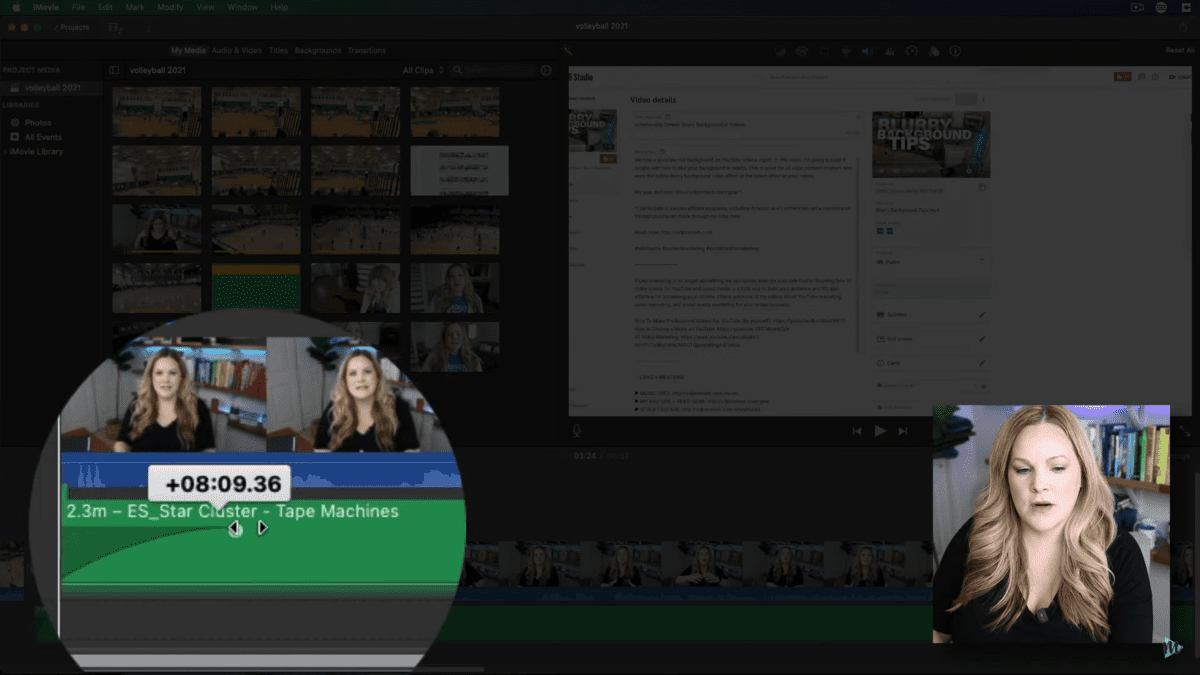
You can also fade out or fade in your background music track as well, which I highly recommend! At least do a fade-in and fade-out. Same thing with a sound effect. The sound effects are really short. Usually, they're like a short video file. So you can hardly see it on the timeline. The volume of that sound effect is going to be high. So you always want to make sure you lower that too.
Another fancy thing that you can do with your edits is to add lower thirds to your videos. Now, this could mean adding in titles, a lower third title like this down here, this is in the lower third of the video, right? But the other thing you can do is if you have some graphics that are with your like logo, your name, your website, those kinds of things, you can just add those in as regular video clips.
Let me show you what I mean. I have this Meredith Marsh lower third. If I drag it to my timeline. It is an animation, a video file, it's over the top of me talking and is automatically set at 10 seconds. It fades in, it fades out right around in there. So if you have branded lower thirds, you can just pull them right into iMovie and edit them just like you would any video clip.
Color Balance

Now, what about all the other editing features and functions that iMovie has? Because there are quite a lot hidden under this menu bar at the top of the preview window. Some of them are going to prove to be very useful for you. So let's take a look!

So the first one at the top is the color balance. Now, if you just choose “Auto”, it's going to automatically balance your color. If it feels like it's off, then just choose that option to let iMovie fix it for you. For the color correction, that is where you can change the color correction of your videos.
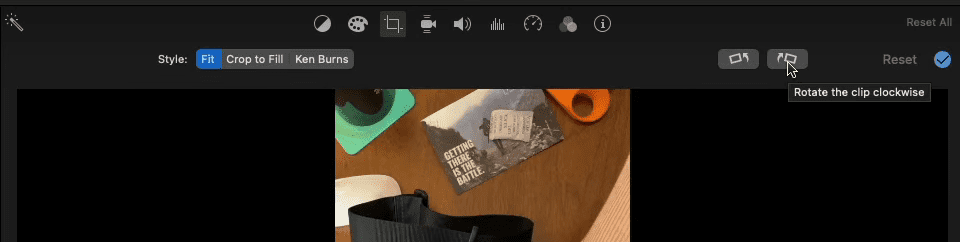
Next, the crop feature is actually one that you're probably going to want to use. Especially if you accidentally shoot something with your phone, vertically when you really intended for it to be horizontal. So if you come under the crop function, you can hit the little “Rotate” button there and it will rotate the video clockwise.
You also might have a situation where you want to crop or reframe your video. Here's a shot that was taken by me on my phone, I'm at my desk. All those ugly boxes over there in the background, I don't want those to be in my shot. So I'm going to hit the crop tool. We're going to choose “Crop to Fill” and then we get to adjust where the video gets cropped. I'm going to hit the little blue checkmark over there on the right once I’m done cropping. So this is kind of like zooming in on something. If I was really trying to zoom in on something, in particular, you would also use that same function.
Stabilization
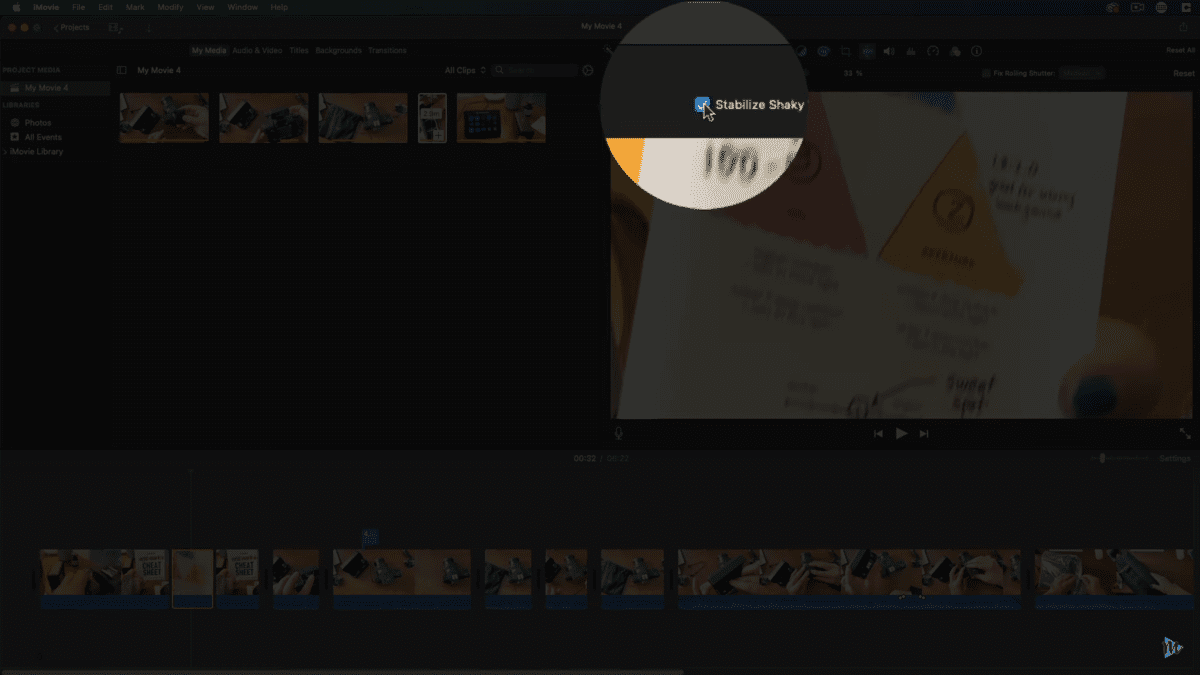
The next one over is this stabilization. So if you have some shaky footage and iMovie will automatically analyze this clip and smoothen it out for us, you can play around with it if you need to. But this is going to add a bunch of time to your video editing process. So unless you really need it, you can just skip that.
Speed in iMovie – Slow Motion or Fast Forward
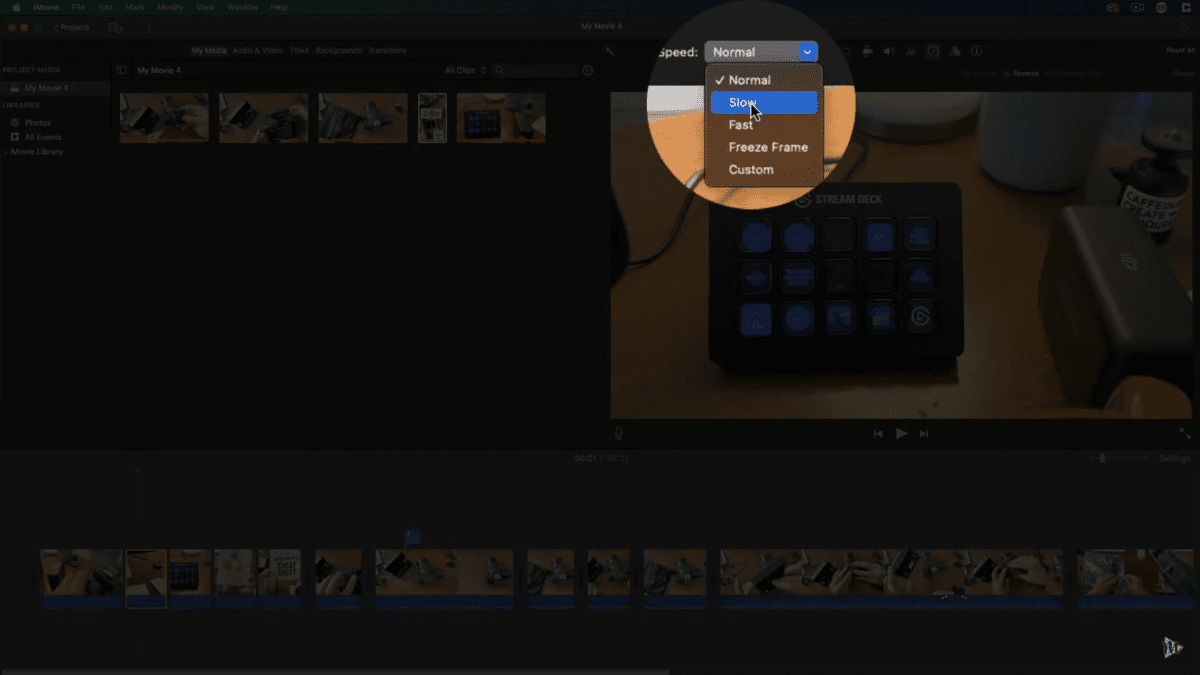
iMovie also has the speed function. This is where you can speed up or slow down your clip. So let's choose slow speed. There will also be a little turtle icon down in the video timeline that still lets us know that this clip has been slowed down.
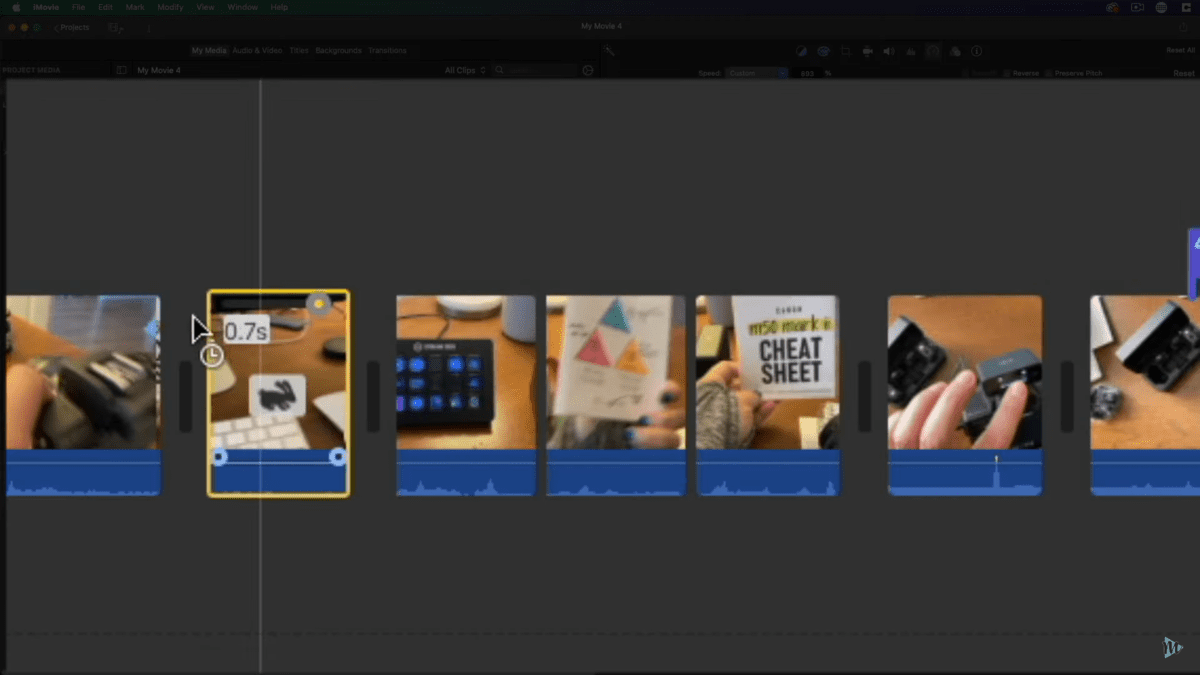
There is also a button where you can actually adjust just how slow or fast the clip is going to be. If we choose fast, then it's going to make the clip go in fast motion. Then again, you can use the button to adjust just how fast or slow this clip should be.
Clip Filter and Audio Filter in iMovie
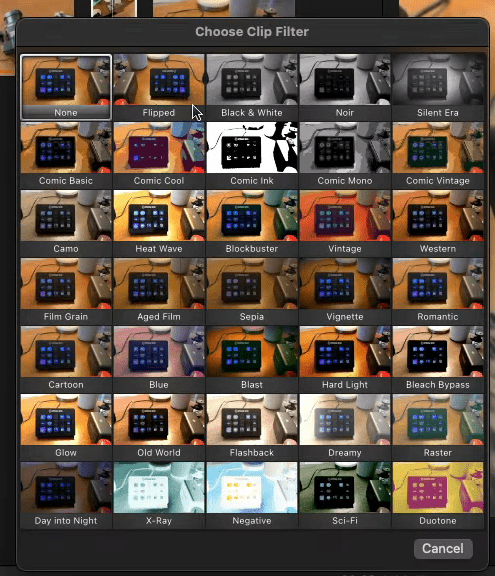
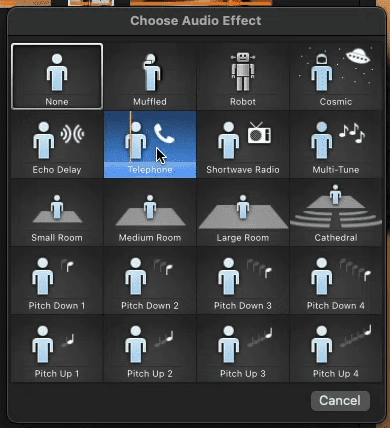
Moving over to the filter function. If you wanted to add a particular look to your clip, you could do that here with the filter. there's an audio effect as well. So if you want it to sound like you're a robot, or you're on the telephone, you have those fun features as well.
Saving iMovie Video
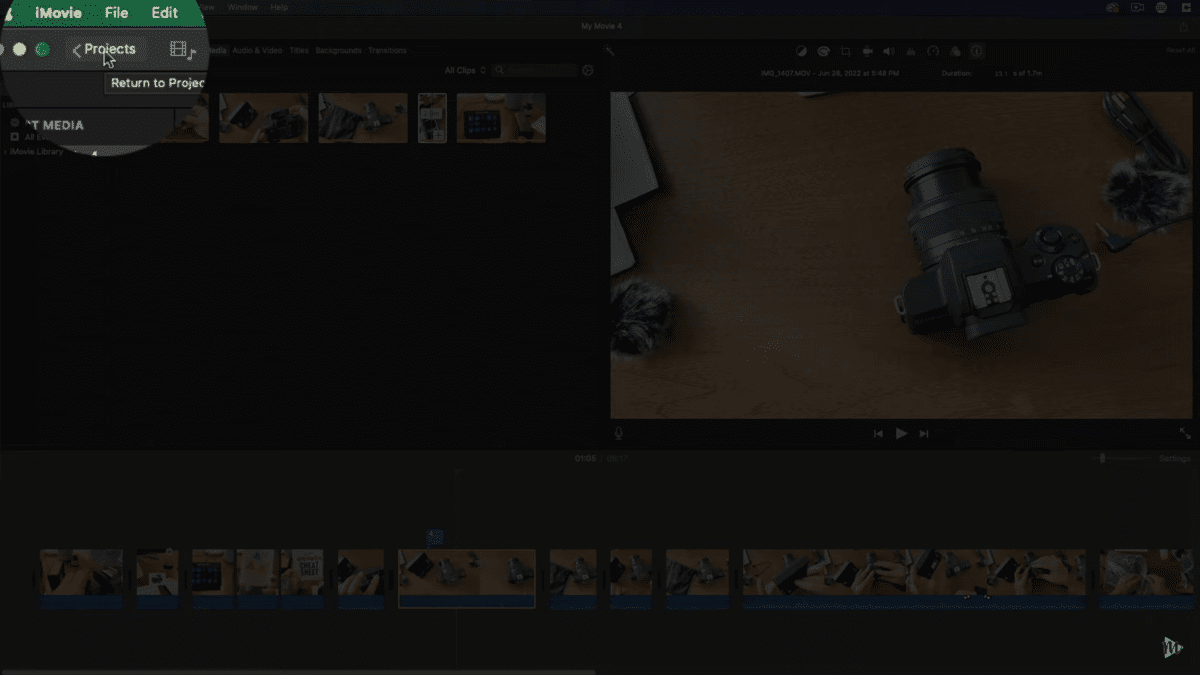
Now, one thing that's kind of funny about iMovie is that there's no way to save your project, it does it automatically. So if you want to take a break, you want to start a new project, or work on something else, just come up here to the top left under projects. You're going to want to name your movie, hit OK. It will take you back to your projects window so all of your iMovie Projects will be right there for you. You can open them up again and start editing where you left off.
Share and Export iMovie Video Recap
When you're done with your edit and you want to share it, maybe upload it to YouTube or social media, you're going to have to export it. I covered the export settings in detail earlier in the video below.
However, just as a reminder, you're going to come to the top-right “Share” button. You're going to choose “Export File”, give it a name, and give it a description if you want to. Then, just make sure your format resolution, quality, and compression are set. Choose “Next”, and you're going to give it a file name. Save it on your desktop to make it easy for yourself and hit “Save”.
Don't forget to check out Epidemic Sound for your free trial using the link here and download the Video Editing BFF Method. This is a cheat sheet that I created just for you so that you can learn how to create your YouTube videos without spending forever at your computer screen editing them.
Related: How to Export Videos in iMovie for Mac, iPhone, and iPad
VIDEO: iMovie for YouTube Videos – 2022
Click here to subscribe to Meredith Marsh on YouTube.