YouTube Publishing Workflow
To finish up my YouTube workflow series, here's my YouTube publishing workflow! In the past couple of months, I've walked you through some of my different workflows — planning workflow, editing workflow, and I even showed you how to turn your YouTube videos into blog posts really fast and easy!
Click here to subscribe to Meredith Marsh on YouTube.
Some product links in this post are affiliate links, and I will be compensated when you purchase by clicking our links. Read my disclosure policy here.
YouTube Publishing Workflow
Step-By-Step YouTube Workflow
For the past couple of months, I have been walking you through my different workflows such as editing workflow, planning workflow, and even turning your YouTube videos into blog posts easily.
Then, I got this question from one of my audiences:
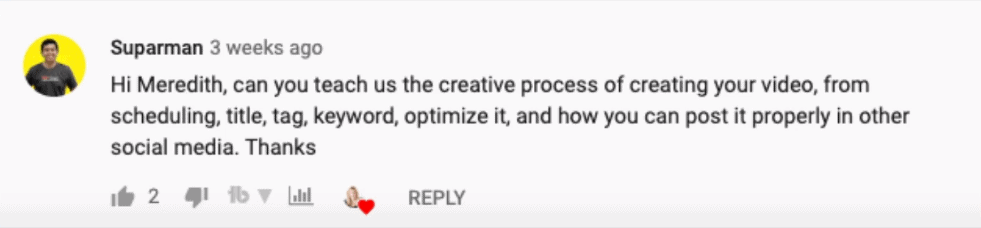
To be honest, that's a lot of stuff. But, I also believe that I have already covered some of those topics in my previous videos and blog posts. Now, I'm going to walk you through my workflow after I create a video, how I upload it, and all the next steps moving forward.
Related: Planning out YouTube Videos
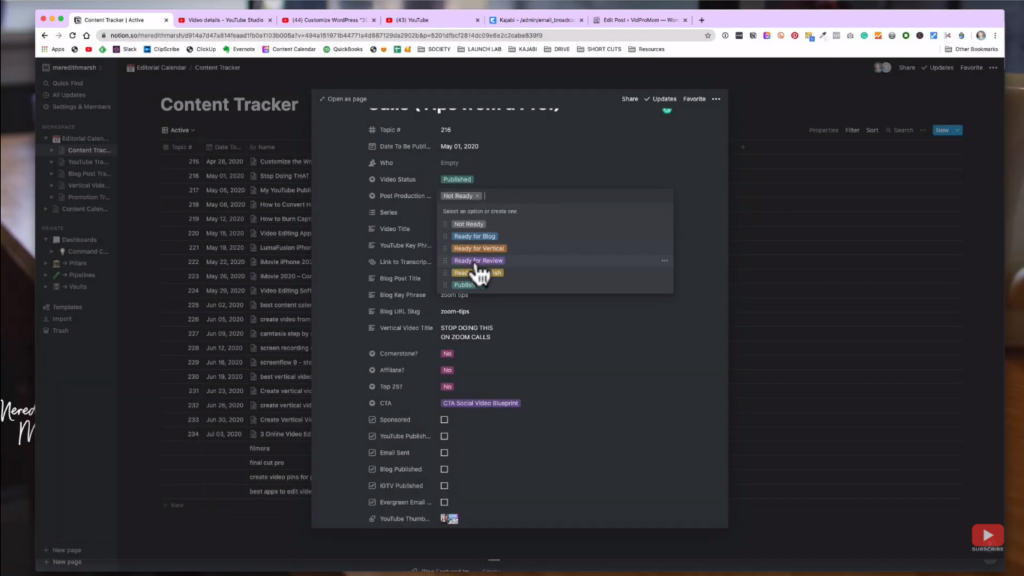
My Content Tracker
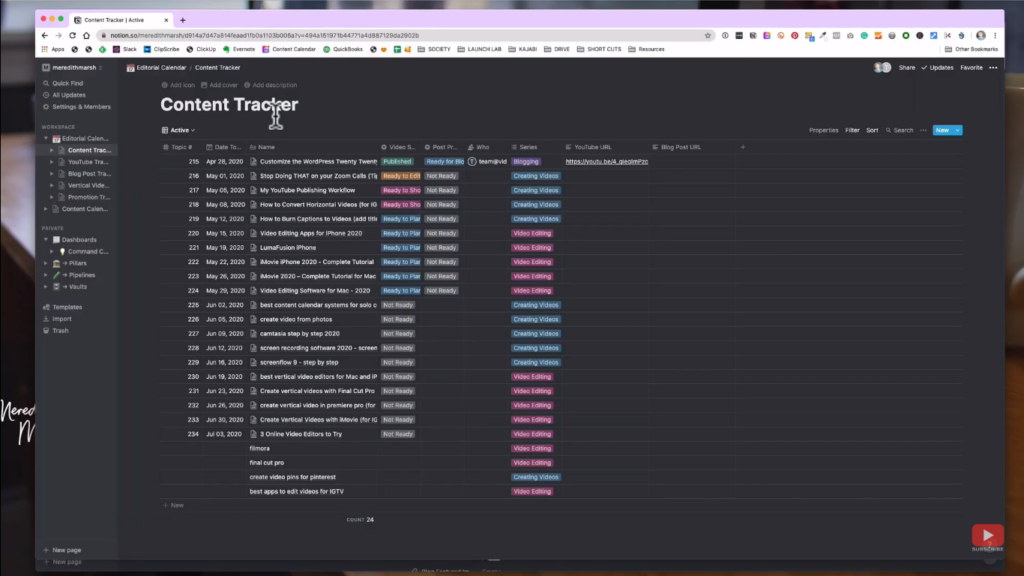
Going a couple of blog posts back, I've shown you my content calendar inside an app called ClickUp. It's a great project management software and it's very easy to use, but it just wasn't cutting things for me because I have to manage multiple media platforms.
So, I've been using Notion now, and as you can see, I have different lines for each individual content.
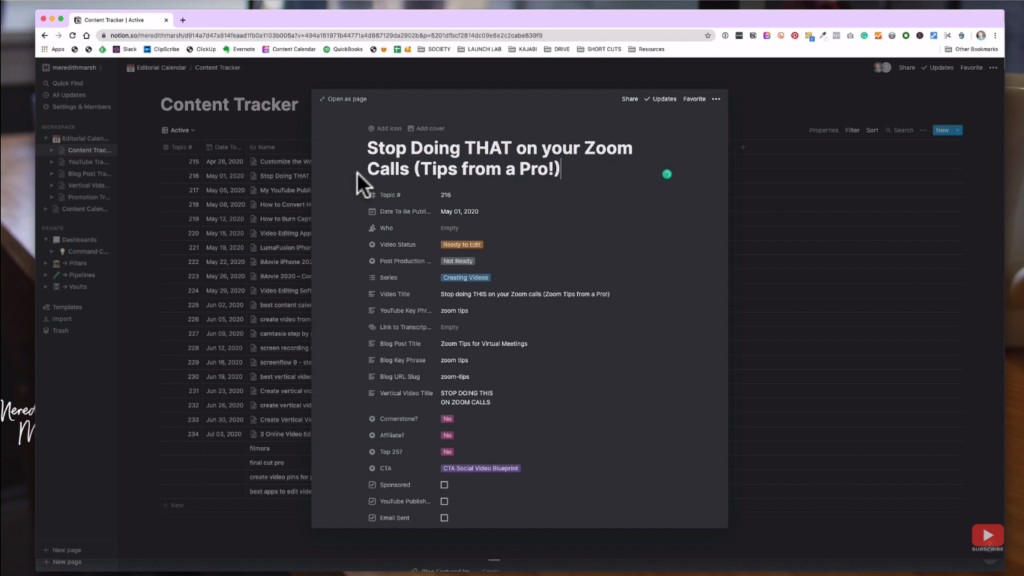
Here is how each single content topic looks. This is a video topic and you can see that attached to it is a complete process along with checklists for creating it.
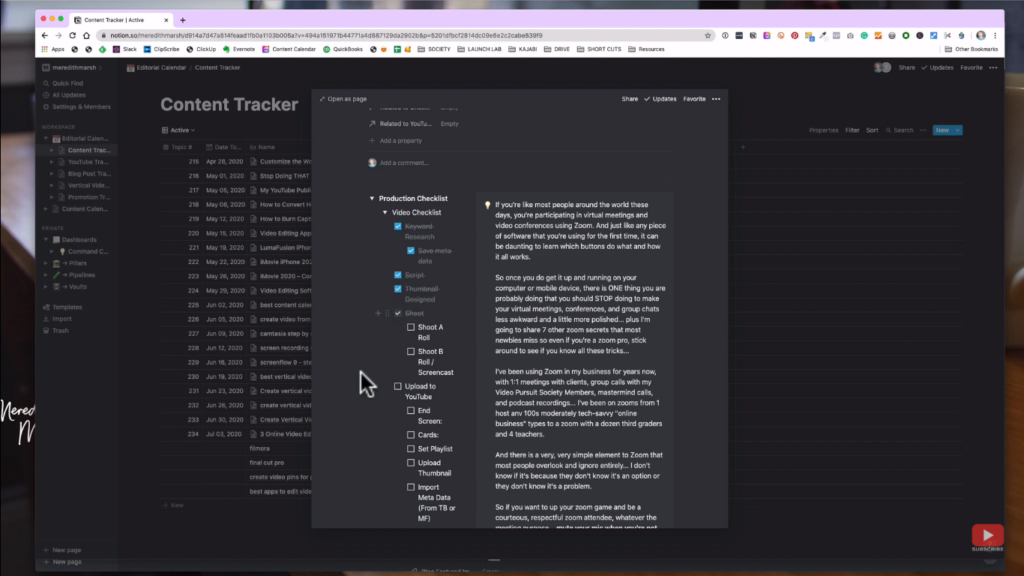
Below that, you will see a production tracker checklist to keep track of my progress. Once done, I'll go now to the editing and exporting of the video. Then, I'll upload it to 2 different places: First, my YouTube channel, of course, then to Clipscribe. That is where I turn it to a vertical video, which I will cover in a future video.
Related: Easily Edit Videos with the YouTube Video Editor
TubeBuddy SEO Optimization
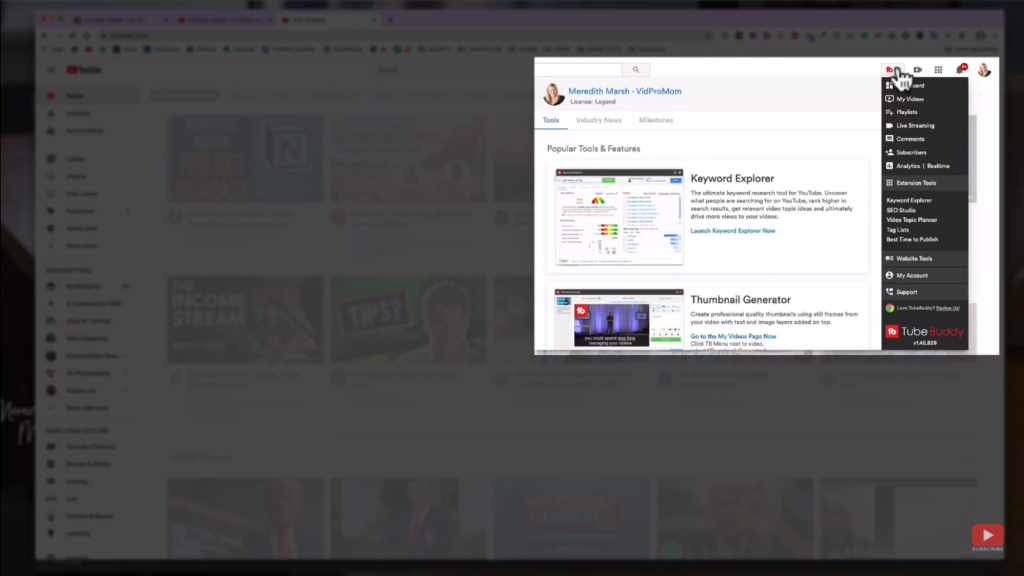
Going back to YouTube, we're now going to upload our video. As most of you might know, I use TubeBuddy Keyword Explorer to figure out the title of my video and other SEO stuff.
Search for Topic Keyword
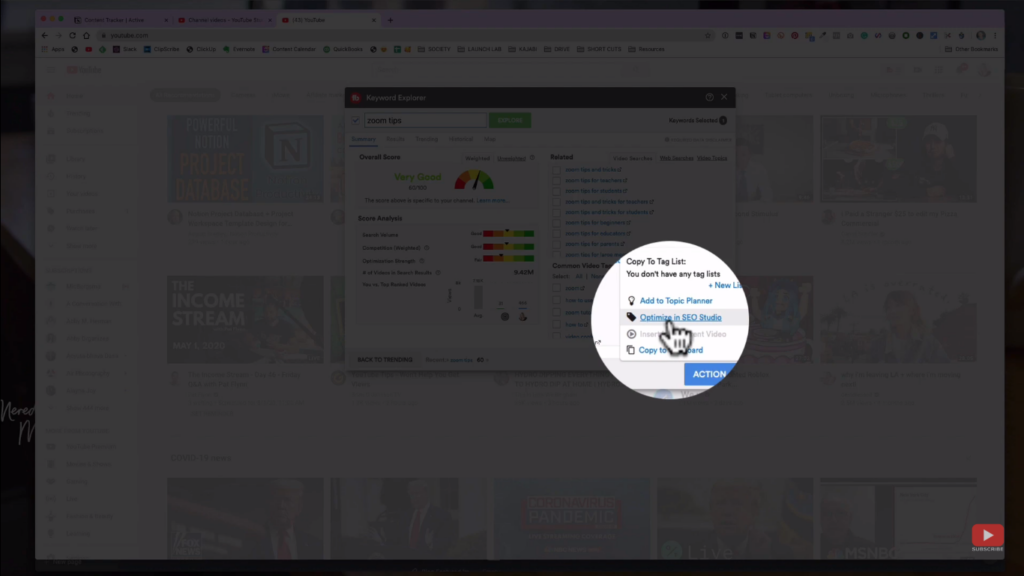
What happens is that I search for a certain topic in the keyword explorer. Then, once I've already chosen the title for my video, I'll just hit “Action” then “Optimize in SEO studio.”
Title and Description
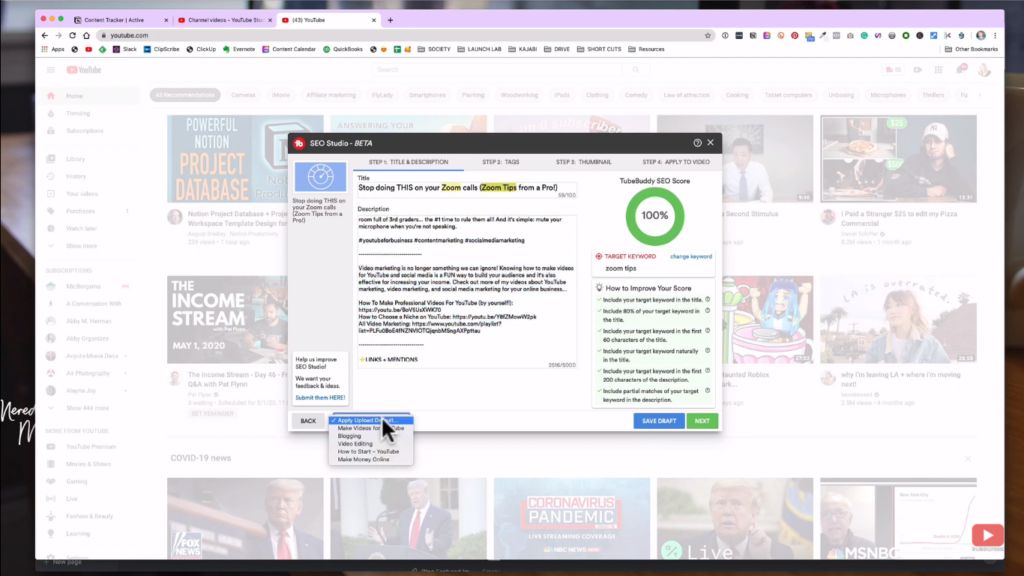
Since I already have my title and description, I'm just going to figure out what I would want to write in the first paragraph of my description. The rest of it was just imported through TubeBuddy's “Apply Upload Default” so I won't have to type it every single time.
Add Tags
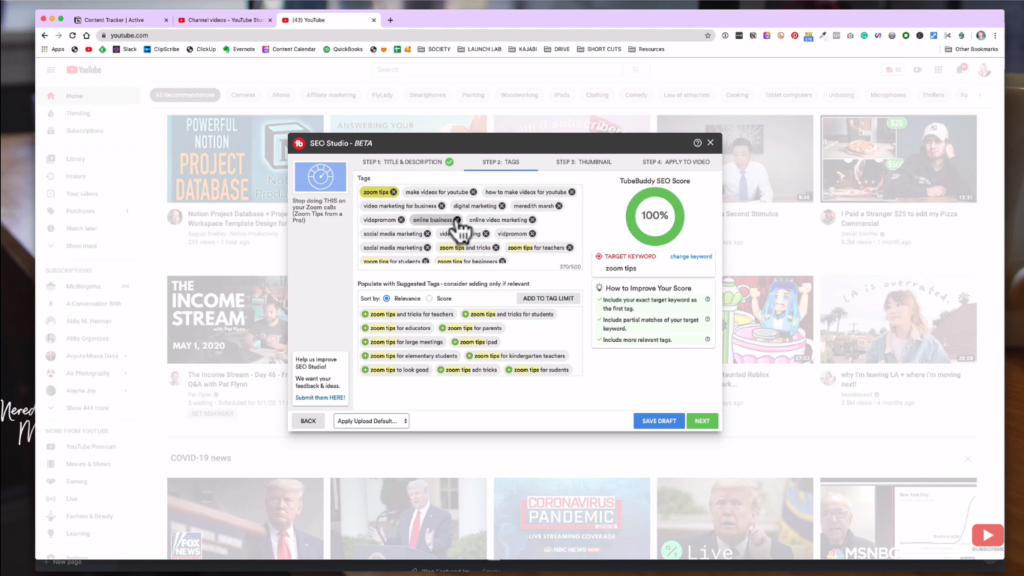
Once you're done, just click “Next”. As you go on, you'll see that TubeBuddy is giving you a score to guide you with how well you are optimizing your keyword.
The next one would be the tags. This is just an easy step and you don't really need to put so much time into it; just put whatever makes sense.
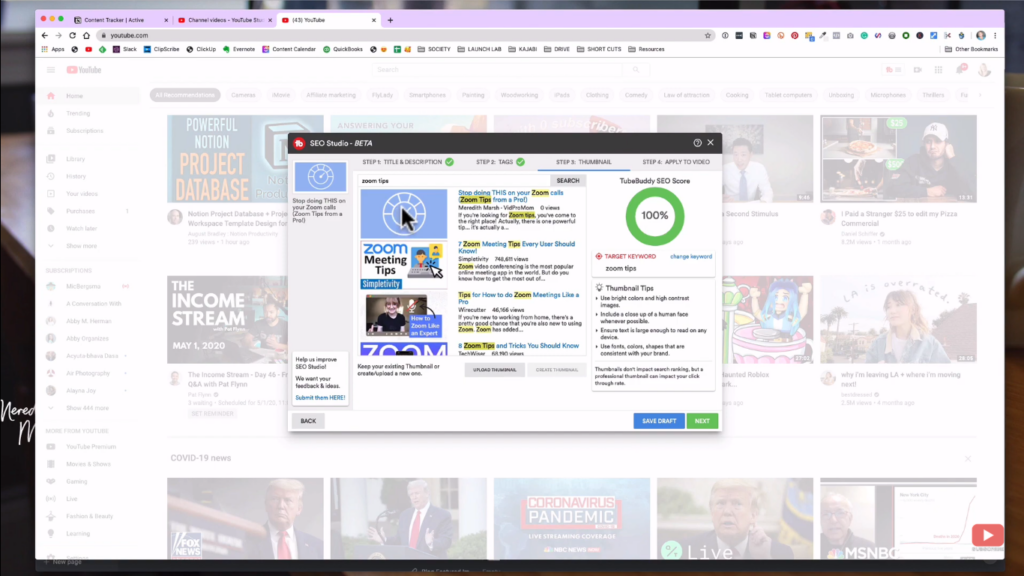
Next would be the video thumbnail. Personally, I usually don't upload my thumbnail inside SEO studio, but you can if you want to see how it looks compared to its related videos.
Since my video is still uploading, I'll skip step 4 and just hit “Save Draft”. Then, I'll go back to the video that I am uploading.
Import Optimizations to YouTube Video
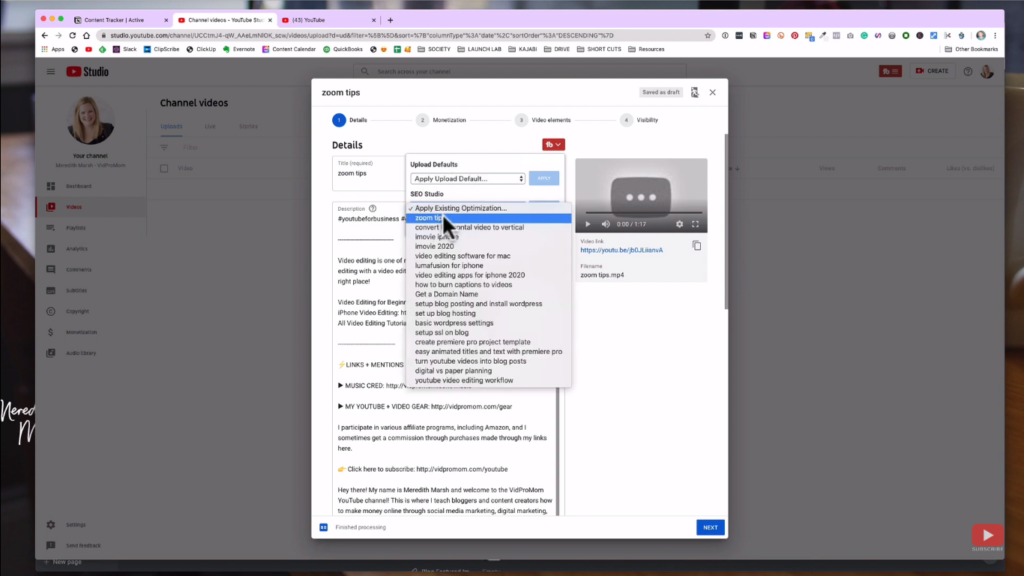
Then, you just need to click that TubeBuddy drop-down menu, hit the “SEO Studio” menu, and select the topic you created in SEO Studio, then hit “Apply”.
That will let TubeBuddy apply all the optimizations that you have made earlier inside of the SEO Studio to your actual video while it's uploading.
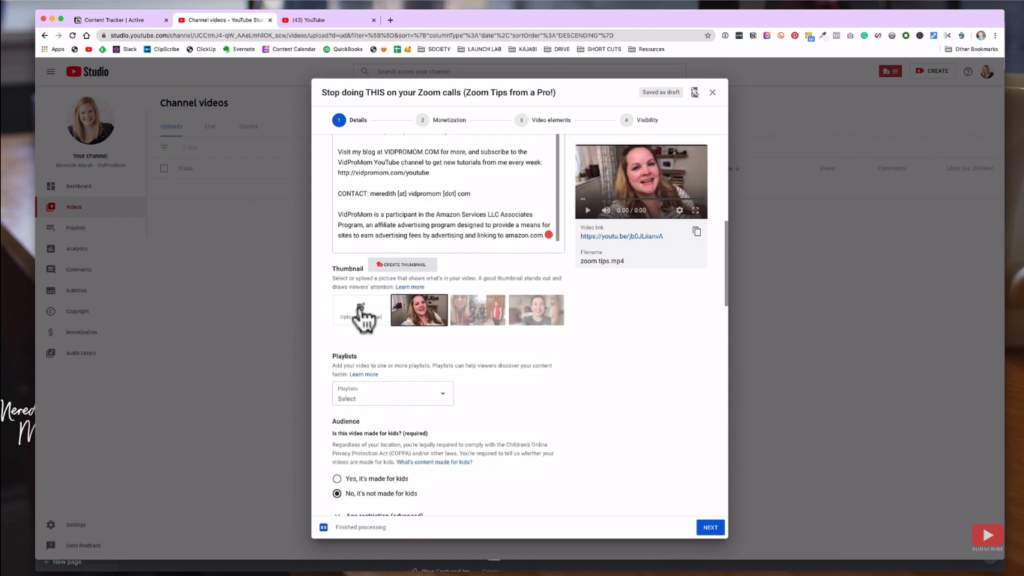
Once it's done, you'll see that it already has the title, description, and tags imported from TubeBuddy. Then, I'll just need to upload my thumbnail. If I don't have one yet, I'll just go to Adobe Illustrator and design it. If applicable, I'll also select and upload it to one of my playlists.
Moreover, I'll go on with the settings for my video audience, paid promotion, and so on. After that, just hit “Next”.
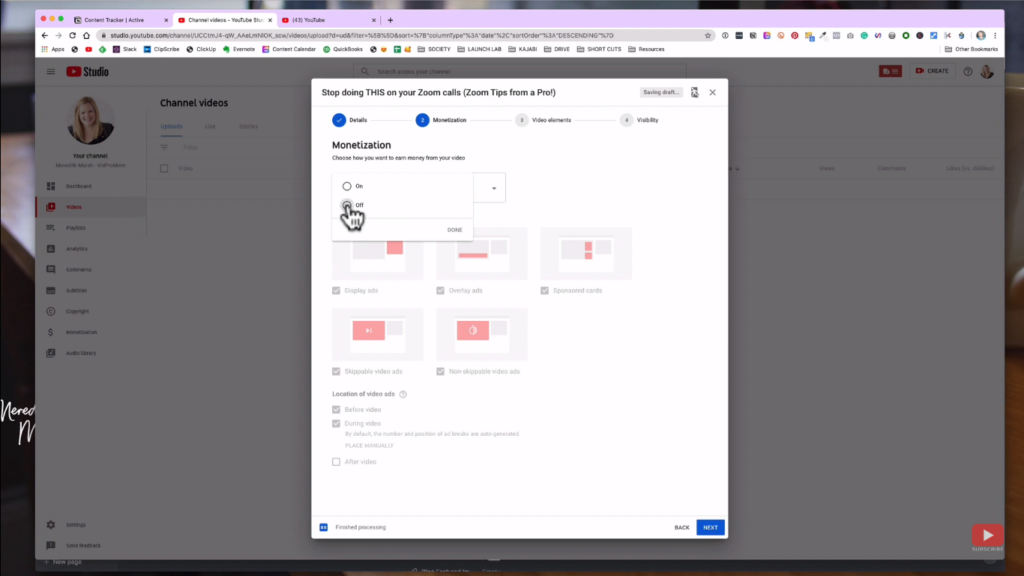
My monetization for this content will be turned off, but I usually set it to “On”.

Now, end screens and cards. Cards are those little things that come up on the corner top-right of the screen. It is where you can link to other videos or channels.
You might already be well-familiar with end screens. It is always at the end of my video where I say that I queued up another video or playlist for you to watch next.
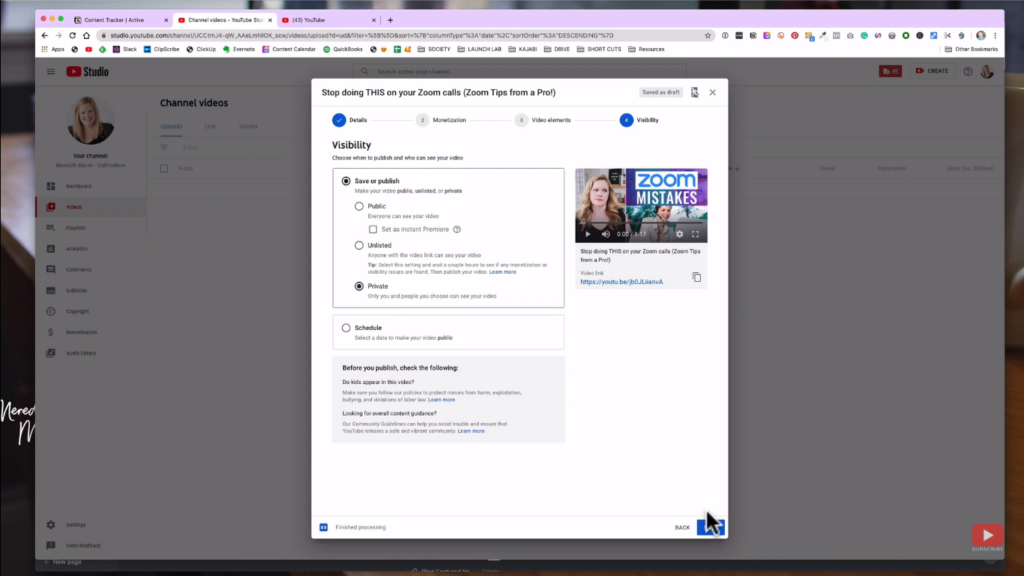
The next thing in this YouTube publishing workflow would be “visibility”. If I'm ready to publish it, I'll just hit “Public” then “Publish”. If not yet, I'll just keep it as private and hit save. Also, you can schedule to publish it for a later time.
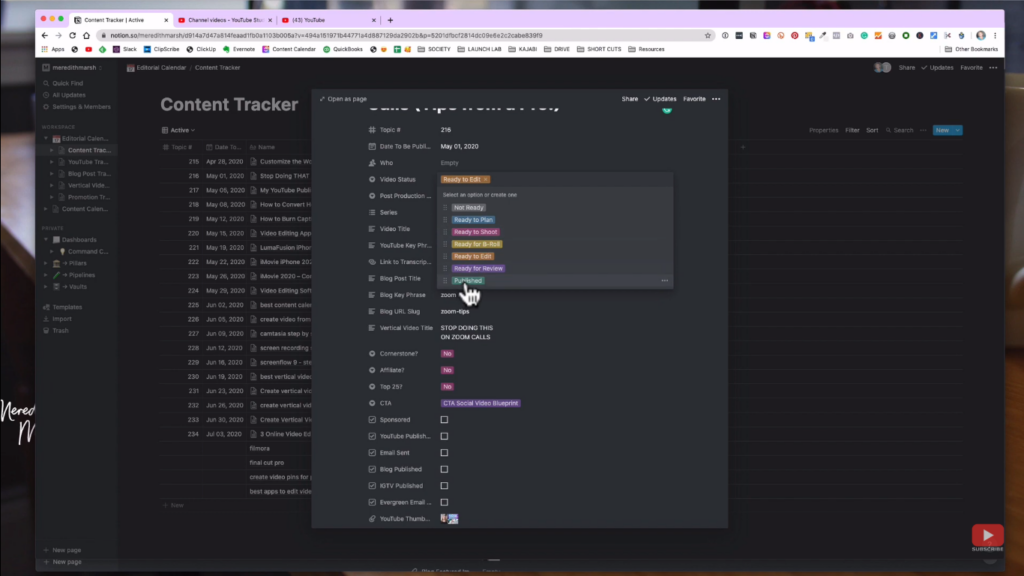
Once I'm done, I can go back to Notion and update my checklist. If that's already finished, I'll change its status to “Published”. After that, there are actually still some things that need to happen.
Check Published YouTube Video
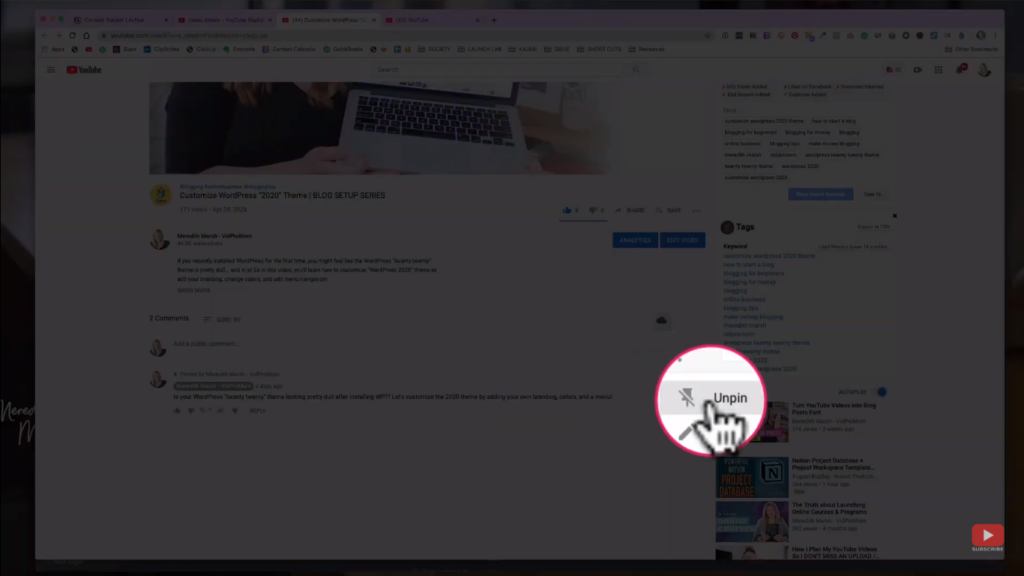
I would now go back and check the video I've just uploaded to see if everything is correct. I always give myself a thumbs up for my videos. Also, I put a comment that would reiterate the title of my video and the purpose of it and a link for the subscribe button. Then, pin that comment so it's always at the top.
Share to Twitter and Send out E-mails
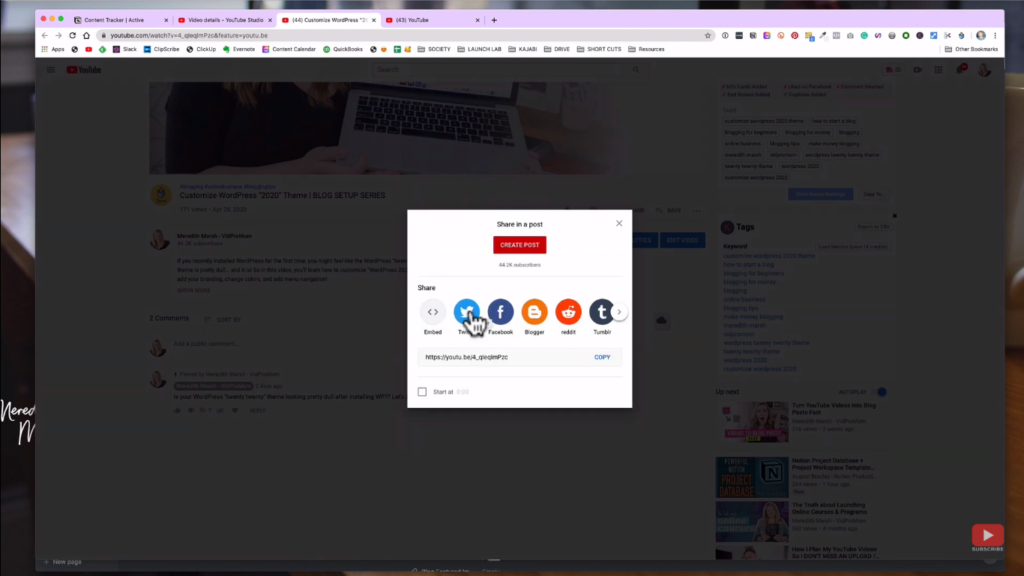
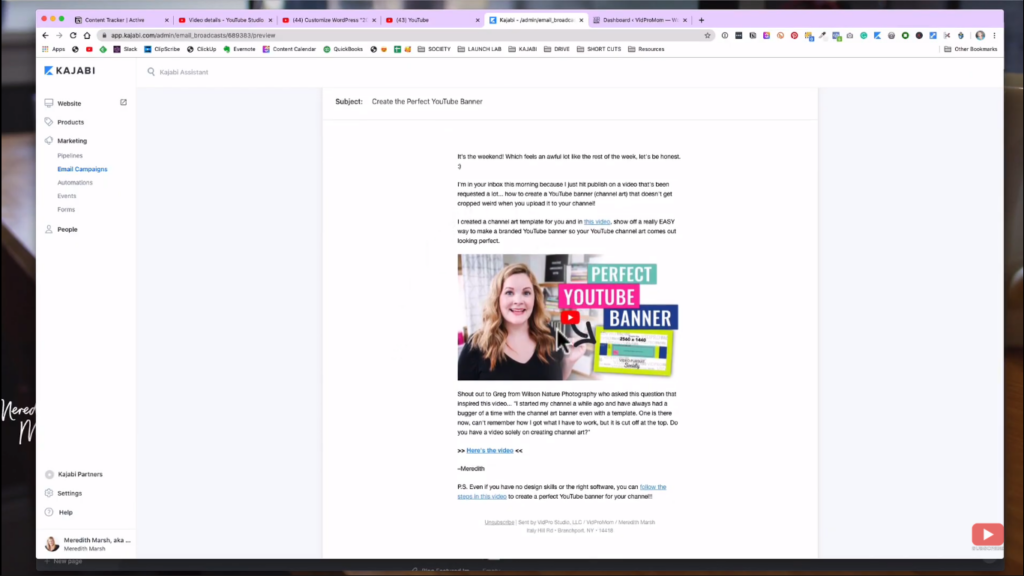
I also sometimes try to hit the share button, at least to my Twitter, but I don't always remember to do that. Another thing that most YouTubers skip, for some reason, is to send emails to their email list.
I try to do this constantly every time I upload a video, and I've been doing pretty good lately. I mean, why not? You want to get as many views as possible within the first 24 hours after upload.
Create Blog Post

Now, this is another thing that most YouTube creators skip very often: creating blog posts. However, I find it very important for me. My website gets traffic. Also, it earns ad revenue by itself in addition to my YouTube videos.
What I do here is take the script of my video. Then, turn it into an actual readable blog post with subheadings, checklists, and so on. I also embed my YouTube video into the blog post, put affiliate links, images, etc.
Just so you know, this is one of the first things that I outsourced by hiring a virtual assistant to turn my videos into blog posts. Before, I was doing it by myself but it's too time-consuming in order to do it really well to make it easier for the readers.
Once done with the blog post, my VA would go to the post-production inside Notion. Then, he can mark it as “Ready for Vertical” and turn it to a vertical video using Clipscribe so I can upload it to my IG TV. If you're not yet following me on Instagram, here is my profile.
Related: Step-by-Step WordPress Blog Setup
Be sure to subscribe to the VidProMom YouTube Channel so you don't miss fresh new videos from Meredith! Click here to subscribe now.